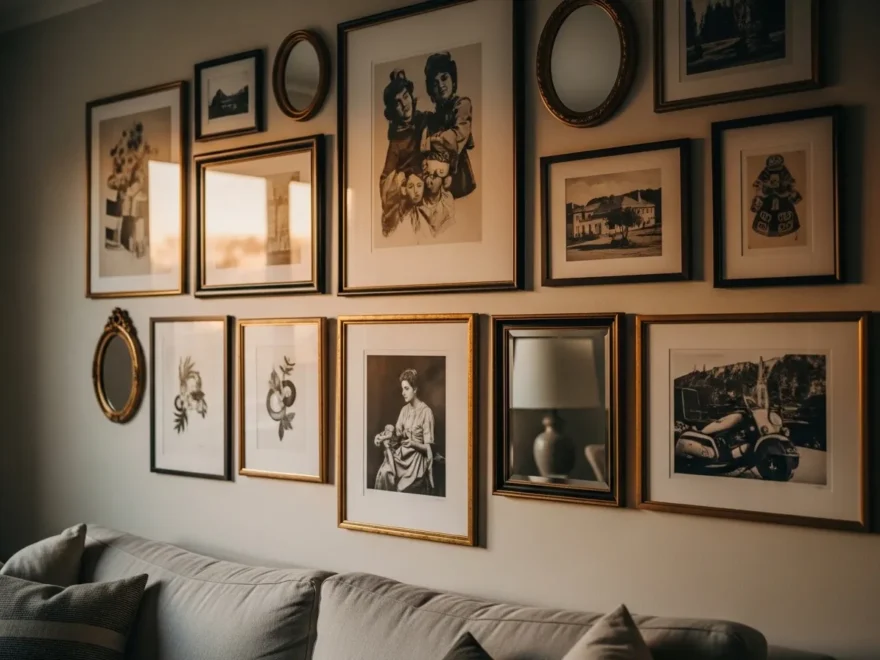
1. The Classic Black-and-White Grid
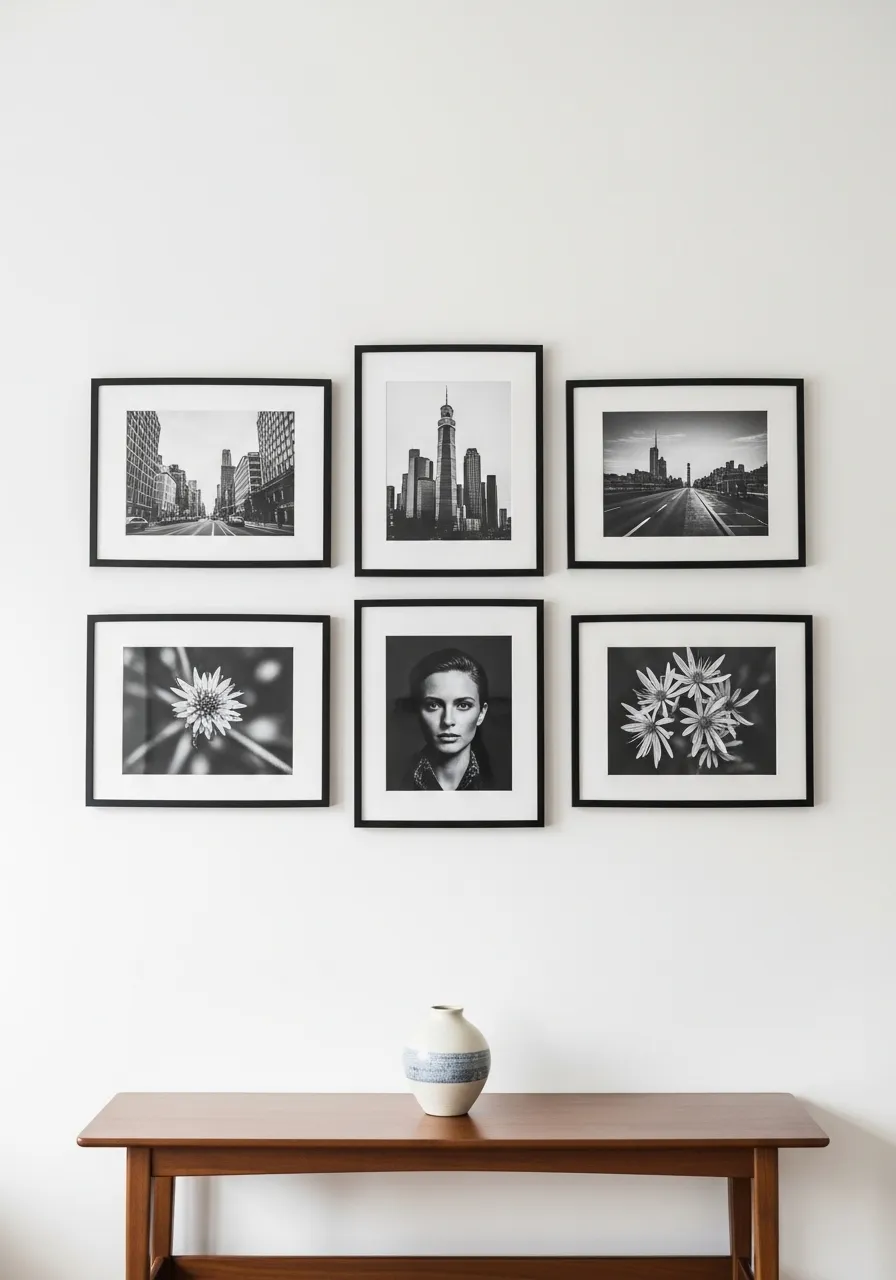
A grid layout is the most approachable gallery wall you can create.
Everything lines up. Everything matches. It feels intentional even when you throw it together on a weekend.
How to do it: Pick one frame size — say, 5×7 or 8×10. Buy identical black frames from IKEA or a dollar store. Print black-and-white photos at home or through a cheap printing app.
Lay the frames on the floor first. Arrange them in equal rows and columns. Measure the gaps between frames — 2 to 3 inches is the sweet spot.
Use painter’s tape on the wall to map out the grid before hammering a single nail. This saves a lot of patching later.
Budget tip: IKEA’s RIBBA frames run about $4–$6 each. A 12-frame grid can cost under $60 total including printing.
The black-and-white theme keeps the wall calm and cohesive even if your photos cover wildly different subjects. Landscapes next to portraits next to architecture — it all works when the color palette is unified.
This style suits hallways, home offices, and dining rooms especially well. It reads as polished without trying too hard.
2. The Salon-Style Stacked Wall
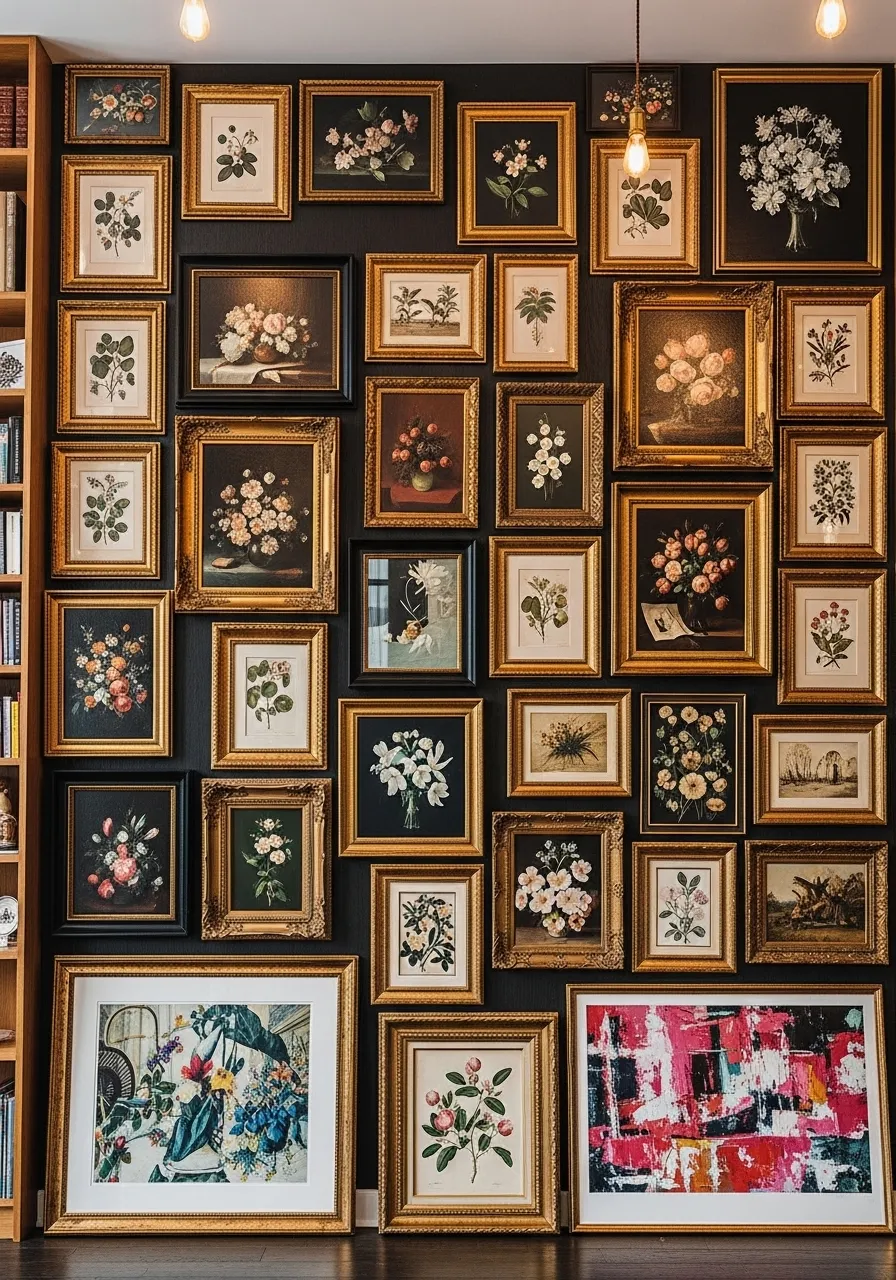
Salon-style means more is more.
Frames are packed tightly, almost touching. Sizes vary wildly. The effect feels like a European art collector lives here — and it costs almost nothing to pull off.
Start with your largest piece. Place it slightly off-center. Then build outward, filling gaps with smaller frames. The goal is controlled chaos.
Mix painting reproductions, vintage posters, family photos, and even decorative plates. There are no rules about what counts as “art” on your wall.
DIY tip: Thrift stores are goldmines for this style. Mismatched frames for $1–$3 each. Spray-paint them in one color if you want a more cohesive look, or keep the mix for a true antique-market vibe.
Cut paper templates the exact size of each frame. Tape them to the wall before committing to any nails. Rearrange until you love it.
This style works especially well in living rooms with high ceilings and in dining rooms where you want drama. It fills space fast and makes a bold visual statement without expensive furniture.
Give yourself an afternoon and about $40–$80 in thrift finds.
3. The Floating Shelves Display
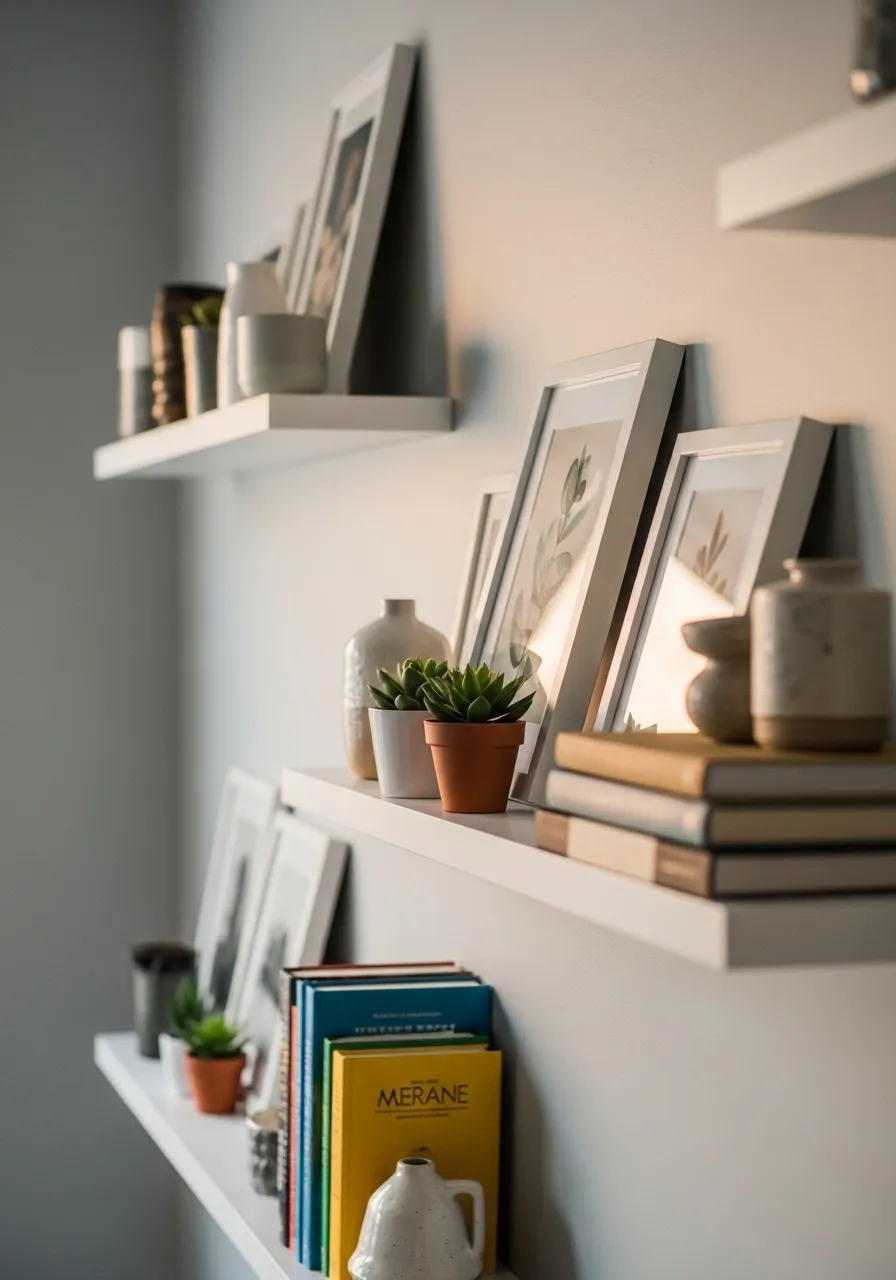
Floating shelves give you a gallery wall you can rearrange without touching a single nail.
That’s the real advantage here. Swap frames, add a plant, move a candle — the display evolves with you.
Use 2–3 shelves at varying heights. Don’t align them perfectly — a slight stagger makes the arrangement feel intentional and designed rather than random.
Lean frames instead of hanging them. This adds depth and a relaxed, lived-in quality. Mix frame sizes freely.
Add non-frame objects between prints: a small ceramic dish, a trailing pothos in a tiny pot, a single pillar candle. These breaks in the frame-only pattern make the display feel like a curated collection rather than a photo dump.
Budget tip: IKEA LACK shelves cost about $8 each. Combined with $2–$5 thrift frames, this whole setup can cost under $50.
This approach is perfect for renters. You put in minimal holes and get maximum impact. It also works beautifully in bedrooms, nurseries, and kitchens where you want warmth without overwhelming the room.
Rotate your art seasonally. Swap in holiday cards in December, floral prints in spring. The shelves make it effortless.
4. The Nature-Themed Botanical Wall
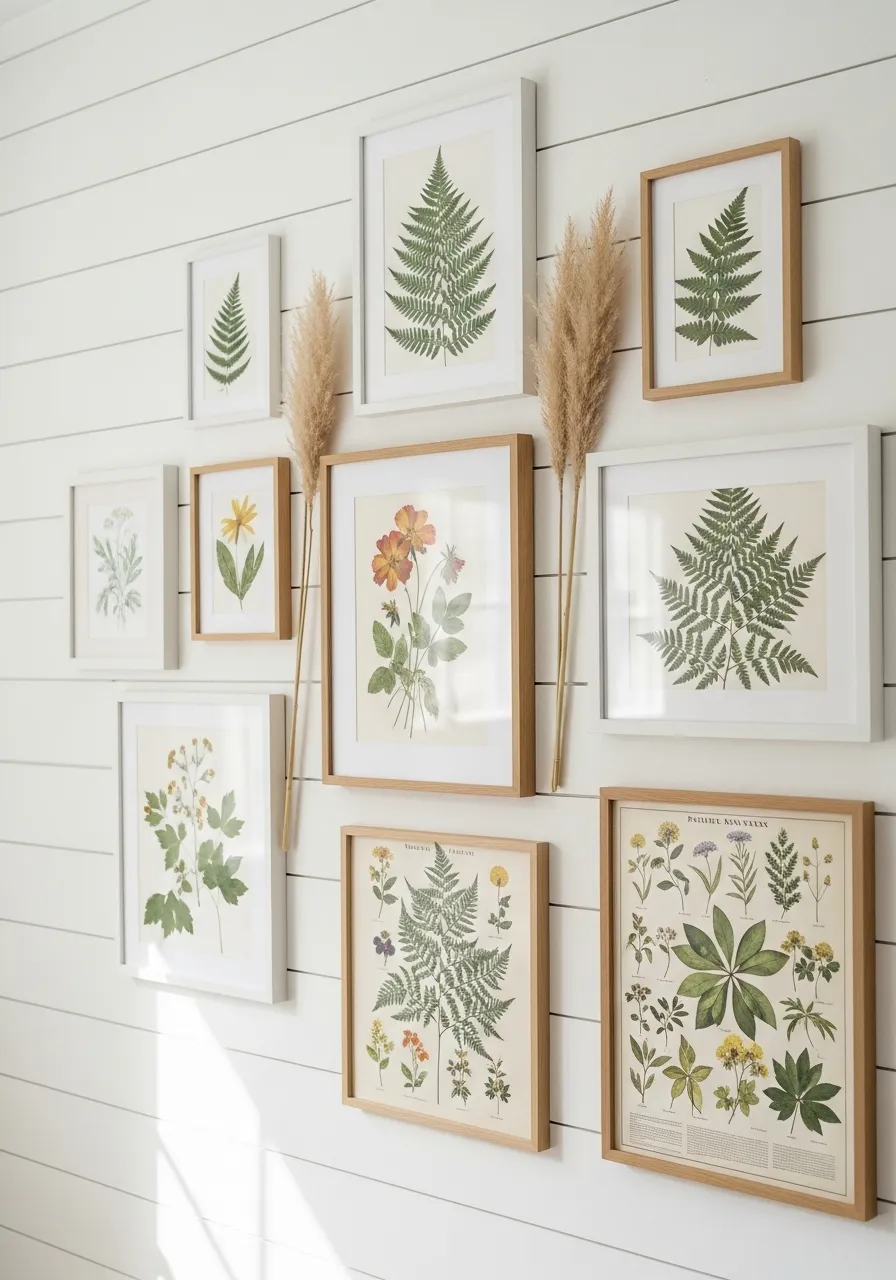
Botanical gallery walls feel calming and organic — like bringing the outdoors in without the upkeep.
They work in almost any room: kitchen, bathroom, bedroom, or living space.
What to print: Search free sites like Unsplash, RawPixel, or the Biodiversity Heritage Library for vintage botanical illustrations. These are high-resolution and completely free to print.
Mix pressed real plants with printed art. A dried fern taped behind glass in a simple frame costs essentially nothing and adds incredible texture.
Frame tip: Thin natural wood frames or white frames keep the botanical theme light and airy. Avoid heavy black or ornate gold here — it competes with the delicate plant imagery.
Arrange frames in a loose, organic cluster rather than a rigid grid. Odd numbers (3, 5, 7 frames) tend to look more natural.
Budget tip: Print 8×10 images at home for under $1 each. Buy white frames from the dollar store or Amazon basic packs. A 9-piece botanical wall can cost $15–$25 all in.
This style suits anyone who loves plants but struggles to keep them alive. It’s also an easy way to add green to a room without committing to maintenance.
5. The Monochrome Color-Story Wall
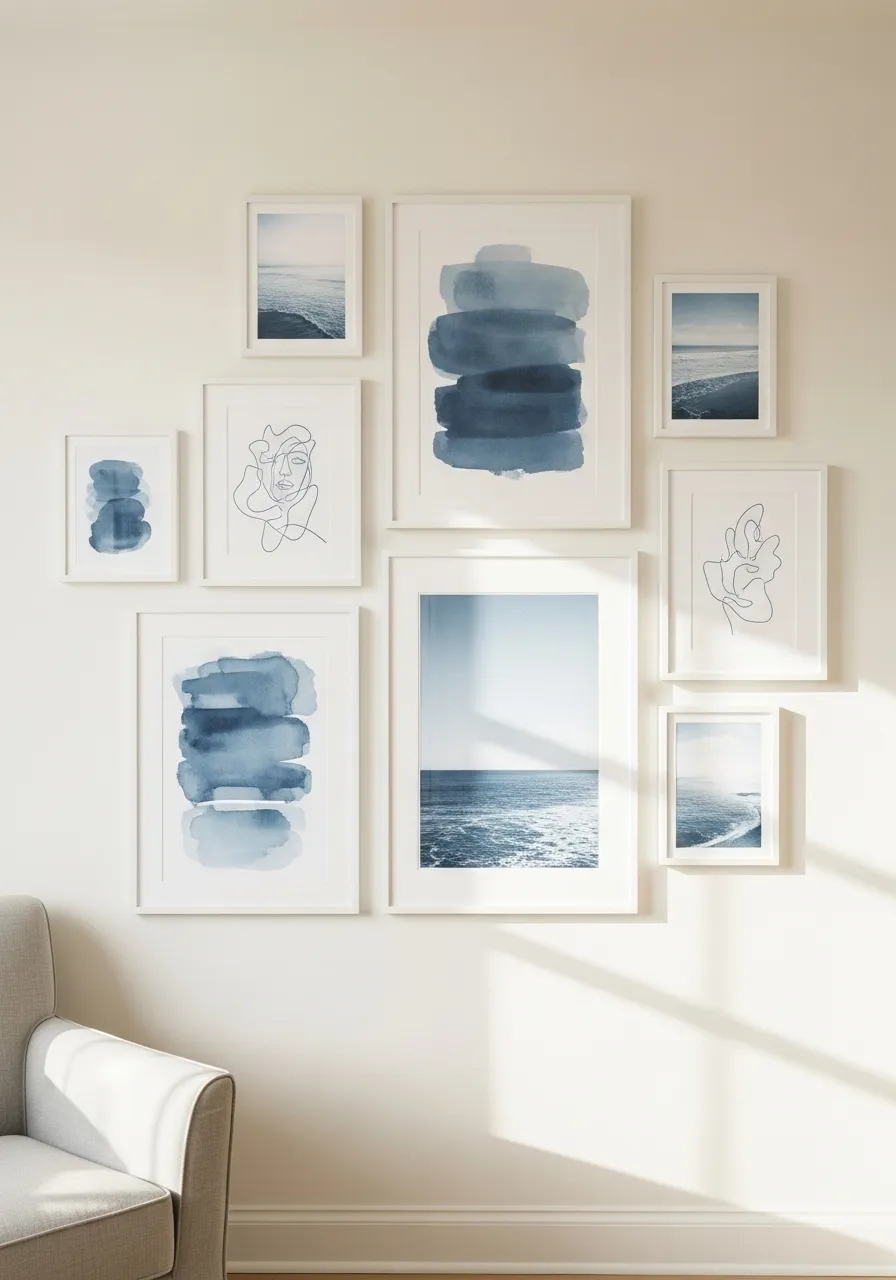
A monochrome gallery wall picks one color family and sticks to it.
Every piece of art shares the same hue — different shades, different mediums, but the same base color. The result is a wall that feels deliberate and sophisticated without requiring expensive art.
Pick your color. Deep terracotta, dusty blue, sage green, and warm ochre all work beautifully. Choose one that already appears somewhere in your room — a pillow, a rug, a throw blanket.
Where to find affordable monochrome art: Etsy printables run $2–$6 per download. Print at home or through a local print shop. Abstract pieces, minimalist line drawings, and landscape photography all come in every color imaginable.
Vary the frame sizes and keep the frames white or natural wood so the art color stays the hero.
Arrangement tip: Start with the largest piece slightly off-center. Place medium pieces flanking it, then fill in with small frames. Step back often.
This style is particularly powerful in bedrooms where a calm, unified color story helps the room feel restful. It also photographs beautifully if you care about that.
Budget for this wall: $20–$50 for printables and basic frames.
6. The Mixed Media Eclectic Wall
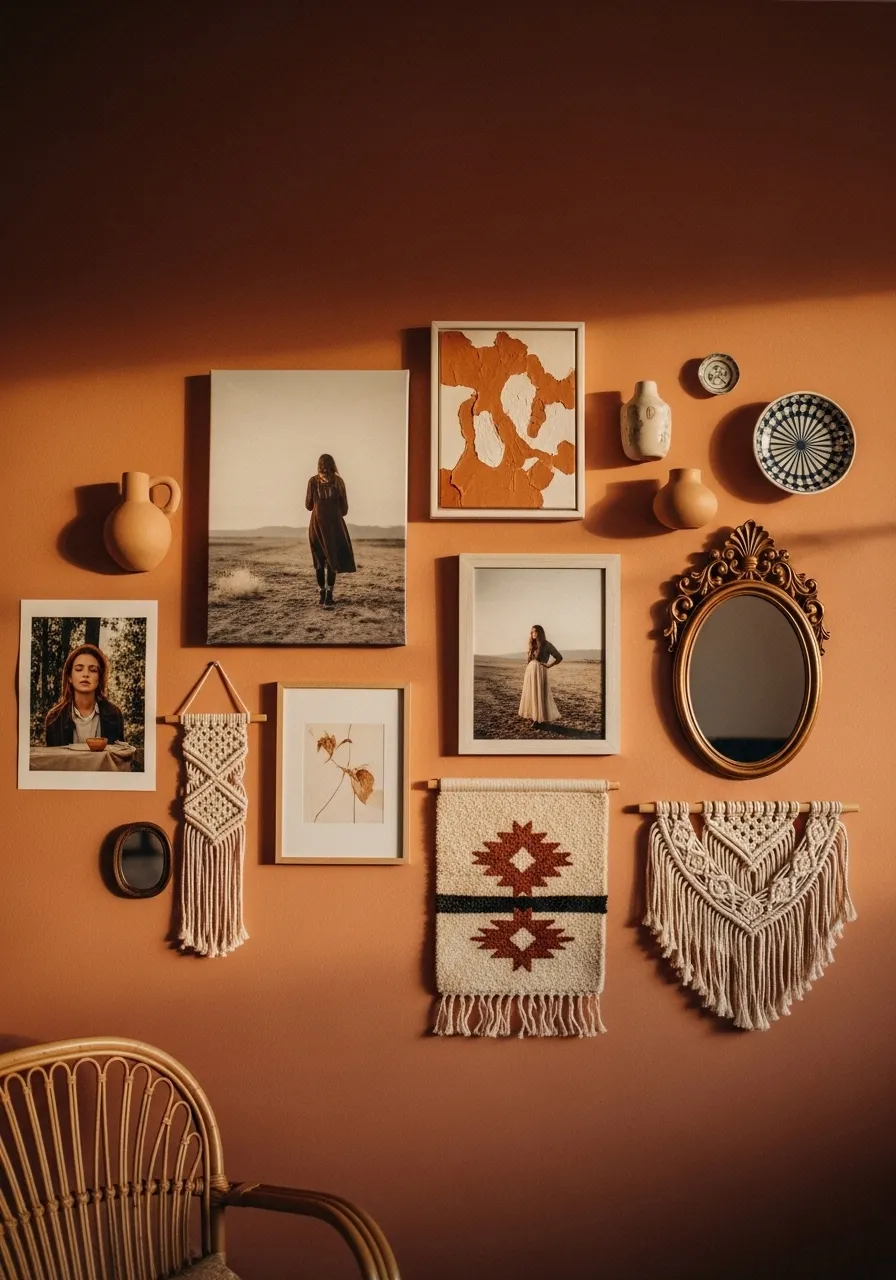
Not every gallery wall needs frames.
A mixed media wall breaks the mold by combining framed art with unframed objects — macramé, mirrors, baskets, ceramic wall hangings, even a small shelf or two.
Think of your wall as a 3D collage. Depth and texture matter as much as the images themselves.
Items that work well unframed: Woven baskets hung flat, a small tapestry, a round mirror, air plants in mounted holders, decorative plates, or sculptural metal art.
How to plan it: Lay everything on the floor first. Mix the framed and unframed items until the balance feels right. Take a photo with your phone. Then recreate it on the wall.
Budget tip: Round mirrors at HomeGoods or TJ Maxx run $15–$30. Woven baskets at thrift stores cost $1–$5. A few Etsy printables fill the frame portions for under $10.
This style suits bohemian, global, and maximalist interiors especially well. It also works in rooms that need warmth fast — the mix of textures and materials makes a space feel layered and lived-in without years of collecting.
Give yourself a Saturday afternoon and keep a level handy.
7. The Oversized Statement Piece Center
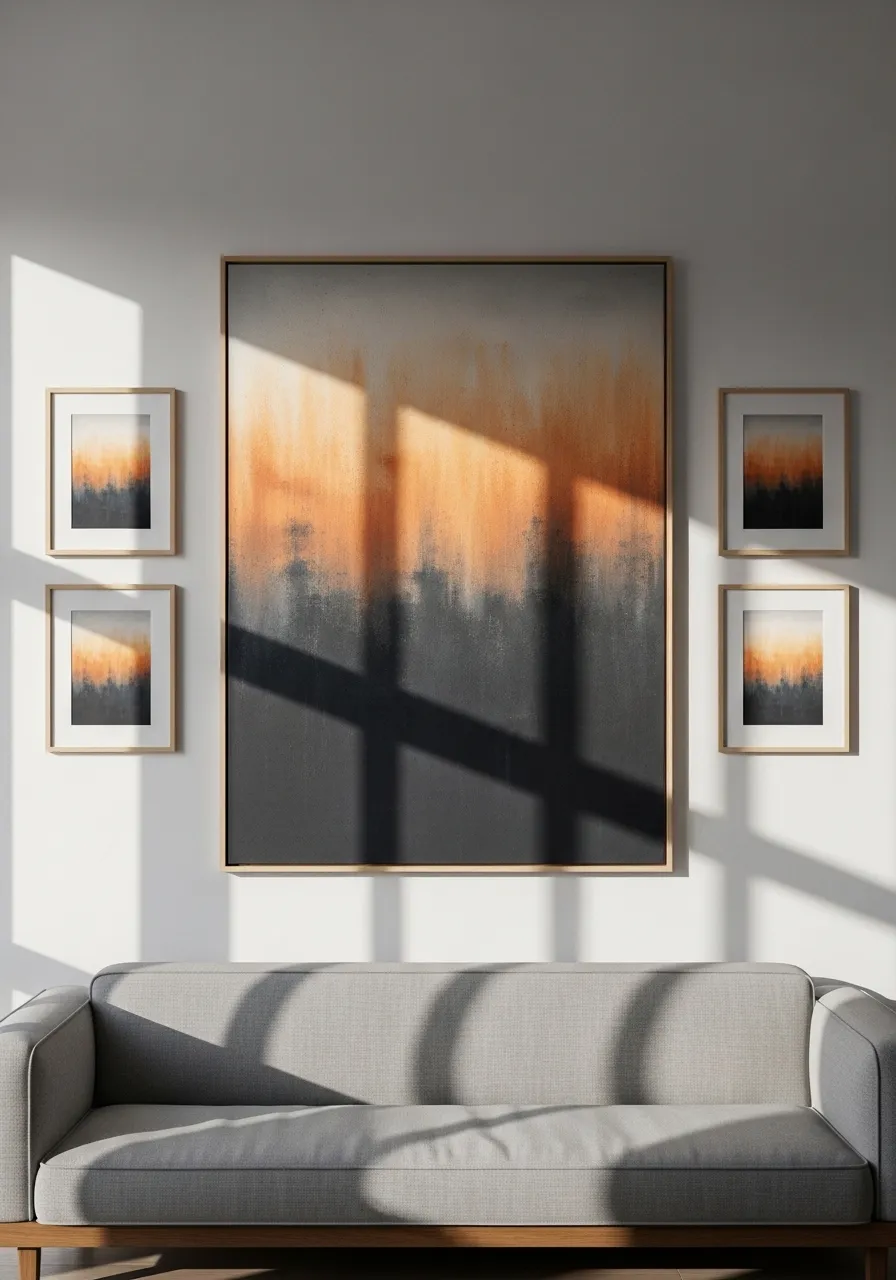
Sometimes one large piece does more work than twenty small ones.
The anchor-and-surround approach builds a gallery wall around a single statement piece. Everything else plays a supporting role.
The anchor: Choose something at least 24×30 inches. It doesn’t have to be expensive — oversized canvas prints from Society6, Redbubble, or even Walmart’s art section can cost $30–$80 and look genuinely impressive.
The surround: Add 2–6 smaller frames flanking the large piece symmetrically or loosely. Keep colors coordinated with the hero piece.
Spacing matters here. Give the large piece room to breathe. Don’t crowd it with small frames. A gap of 4–6 inches between the anchor and surrounding pieces keeps the composition clean.
DIY tip: Print a large-format photo at a local print shop (Walgreens, Costco, Office Depot). A 20×30 print costs $8–$15 before framing. Use a simple floating frame from Amazon.
This layout works especially well above a sofa, bed, or fireplace where there’s a natural center point. It gives the room a focal wall without requiring an entire afternoon of arrangement.
8. The Travel Memory Wall
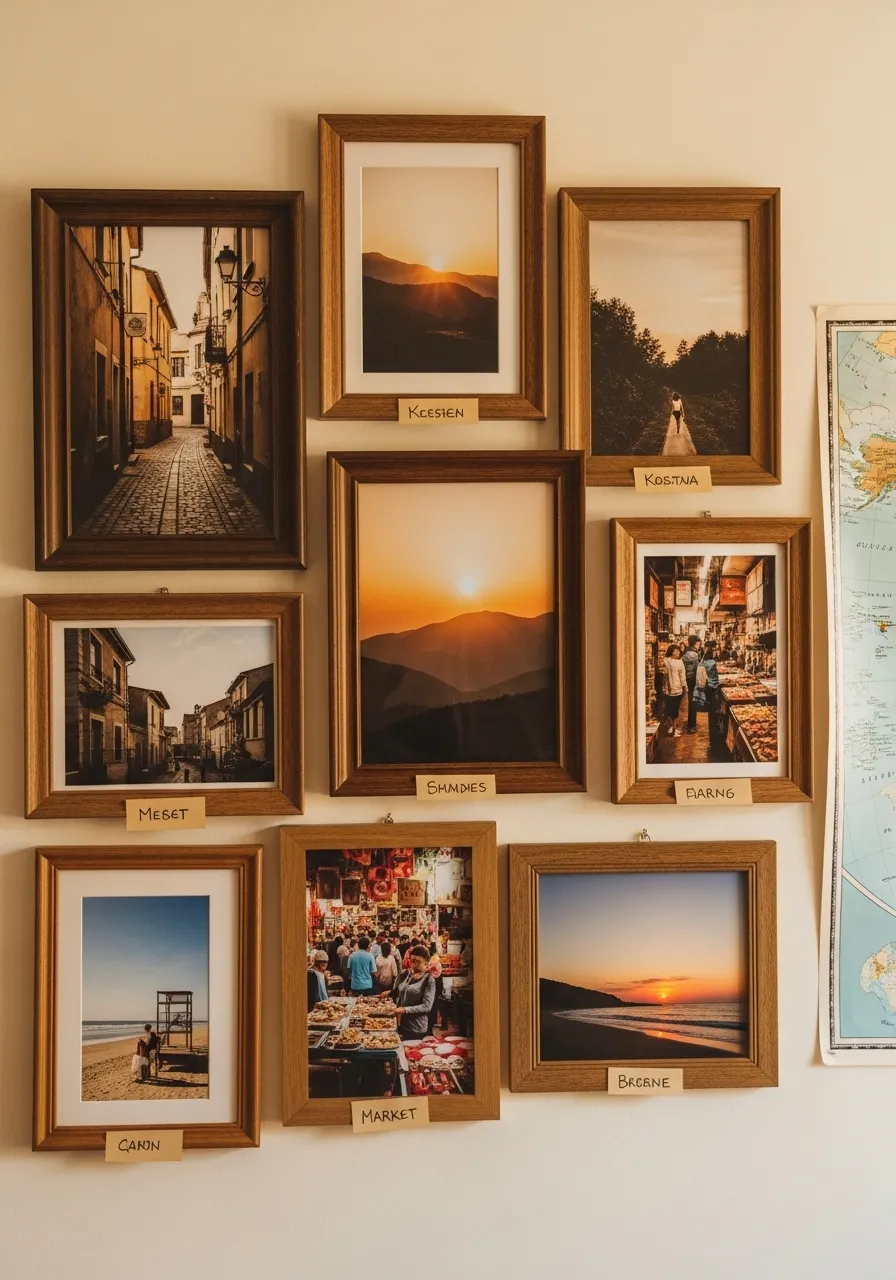
A travel gallery wall turns your best adventures into daily decor.
It’s deeply personal, completely free to source (you already have the photos), and constantly evolving as you add new trips.
How to curate it: Pull your 10–20 favorite travel photos. Choose images that vary — wide landscape shots, close-up details, people, architecture. Variety in subject matter makes the wall more interesting than a series of similar sunset shots.
Editing tip before printing: Run your photos through a free app like Lightroom Mobile or VSCO. Apply one consistent preset to all images for a unified look. This is especially helpful if photos were taken in different lighting conditions.
Print at home for pennies per photo, or use a cheap printing service. A 5×7 print at Walmart costs about $0.50.
Mix frame finishes — light wood, dark wood, thin black — for a collected-over-time feel. This style is actually better when the frames don’t all match.
Add a small vintage map as one of the “pieces” for extra context and visual interest.
Budget: $20–$40 total for printing and thrift frames.
This wall works beautifully in a home office, bedroom, or living room. It sparks conversations and reminds you daily of experiences worth having again.
9. The Kids’ Artwork Rotating Gallery
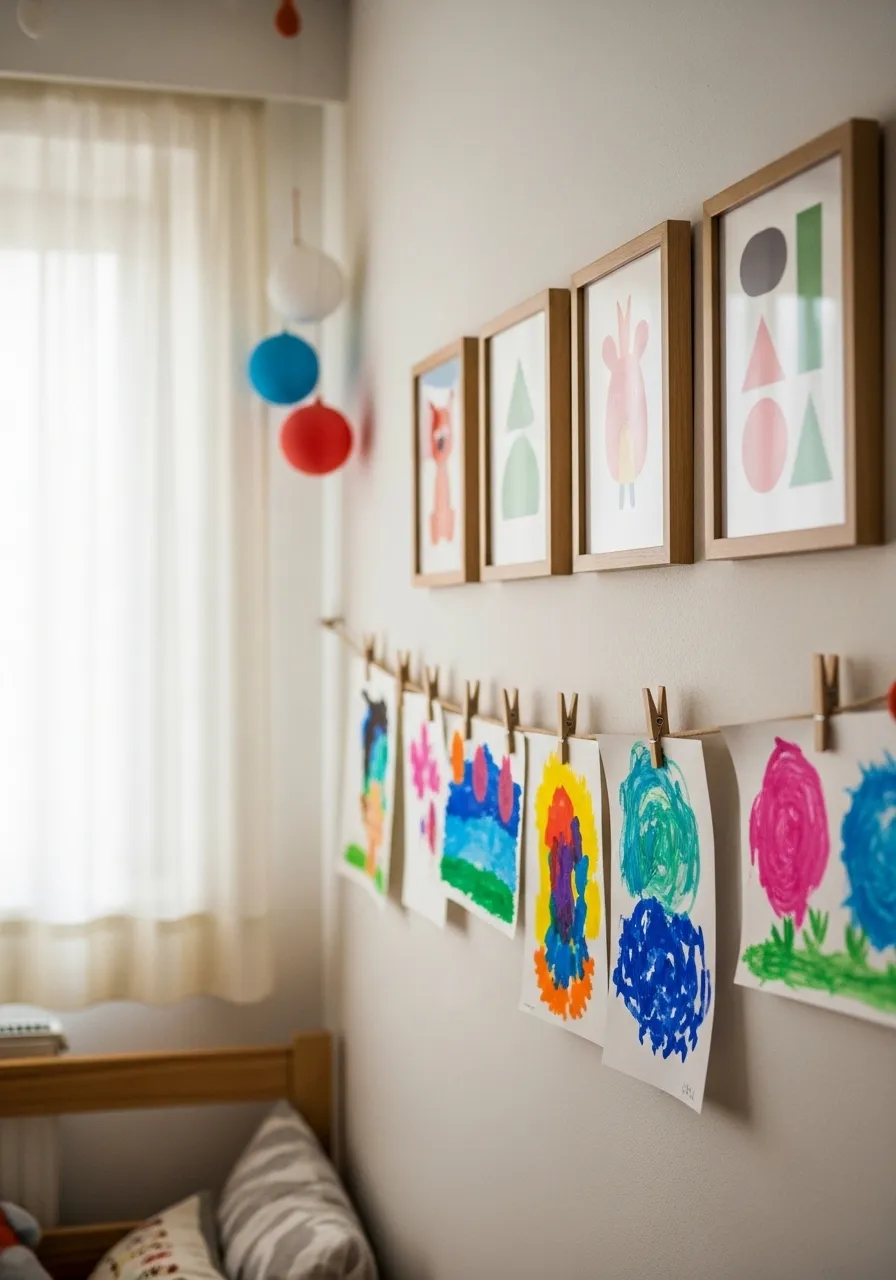
Kids make incredible art. It deserves to be displayed properly — not stuffed in a drawer.
The gallery rail system is the most practical solution for constantly changing kid art. Mount a wooden rail or picture ledge low on the wall. Use small binder clips or wooden clips to hang drawings. Swap them out whenever a new masterpiece arrives.
Why rails over frames: Framing changes every week is time-consuming and expensive. Rails let you swap pieces in seconds.
Mix in a few permanent framed pieces — a simple animal print, an alphabet poster, their name in block letters — to anchor the display around the rotating art.
Keep the display at child eye-level, not adult eye-level. This makes it feel like their wall, their space.
Budget tip: IKEA MOSSLANDA picture ledges cost about $10 each and are specifically designed for this. Two ledges plus a pack of binder clips runs about $25 total.
Add one special piece each year — maybe a framed piece from each birthday or school year — so the wall grows with them.
This idea works in any kid’s room or playroom and genuinely encourages more creative output because kids love seeing their work on display.
10. The Vintage Poster Collection
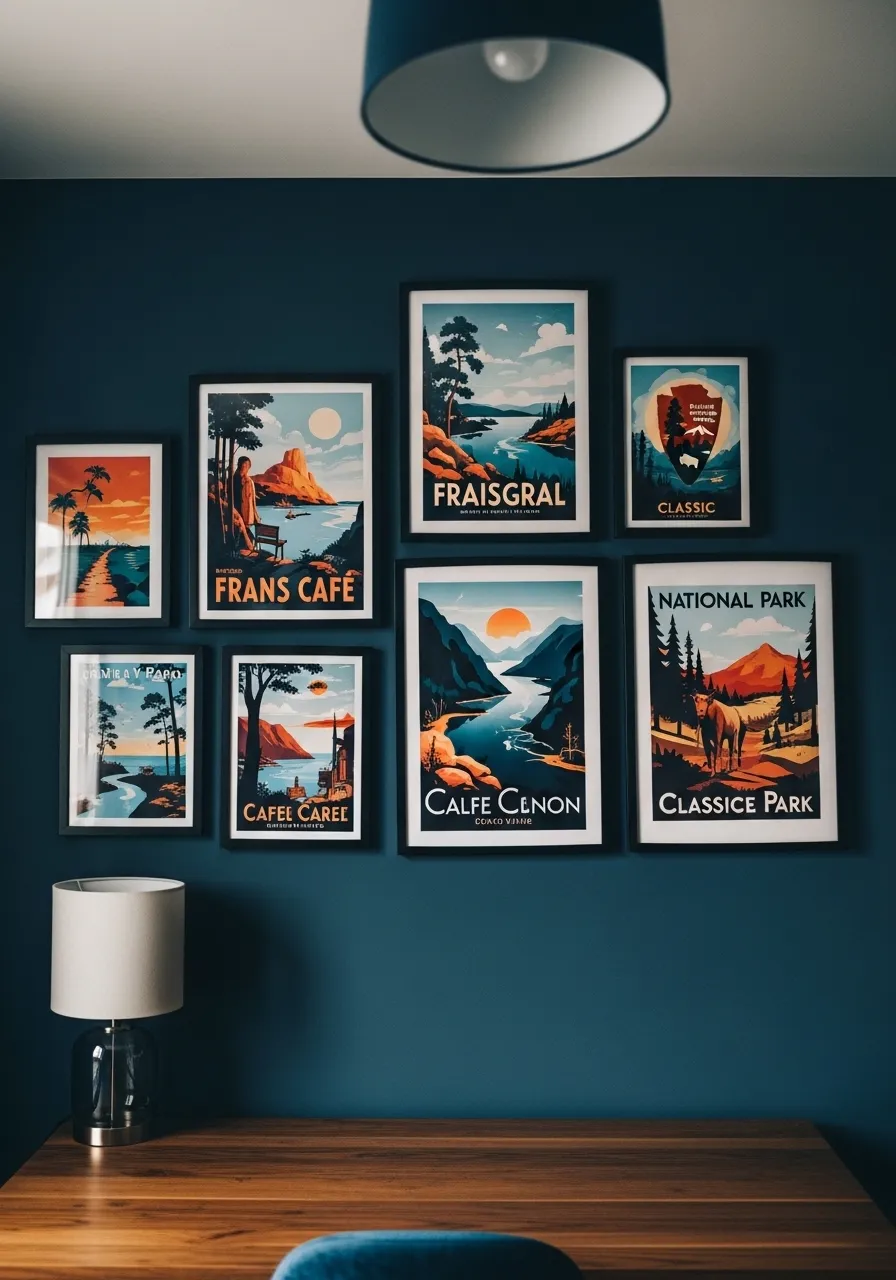
Vintage posters have a timeless, graphic quality that looks intentional and collected — even when sourced on a tight budget.
Where to find them for free or nearly free:
- Library of Congress digital archive (free, public domain)
- Retro Futurism subreddit collections
- National Park Service’s free poster downloads
- Vintage travel poster sites with free low-cost printables
Print them large — 11×17 or even 18×24. Large prints in simple frames are more impactful than small prints in elaborate frames.
Frame in matching black for a clean, editorial look. Or use mismatched vintage frames from a thrift store for an authentic antique feel.
Wall color matters here. Vintage posters pop against a deep color — navy, forest green, burgundy — more than against plain white. If you can’t paint, position the cluster against your darkest existing wall.
Budget: $0 for free printables, $5–$10 per print for larger local printing, plus $4–$8 per frame from IKEA. A 6-poster wall can cost under $60.
This style suits home offices, libraries, living rooms, and basement bars especially well.
11. The Mirror Mosaic Wall
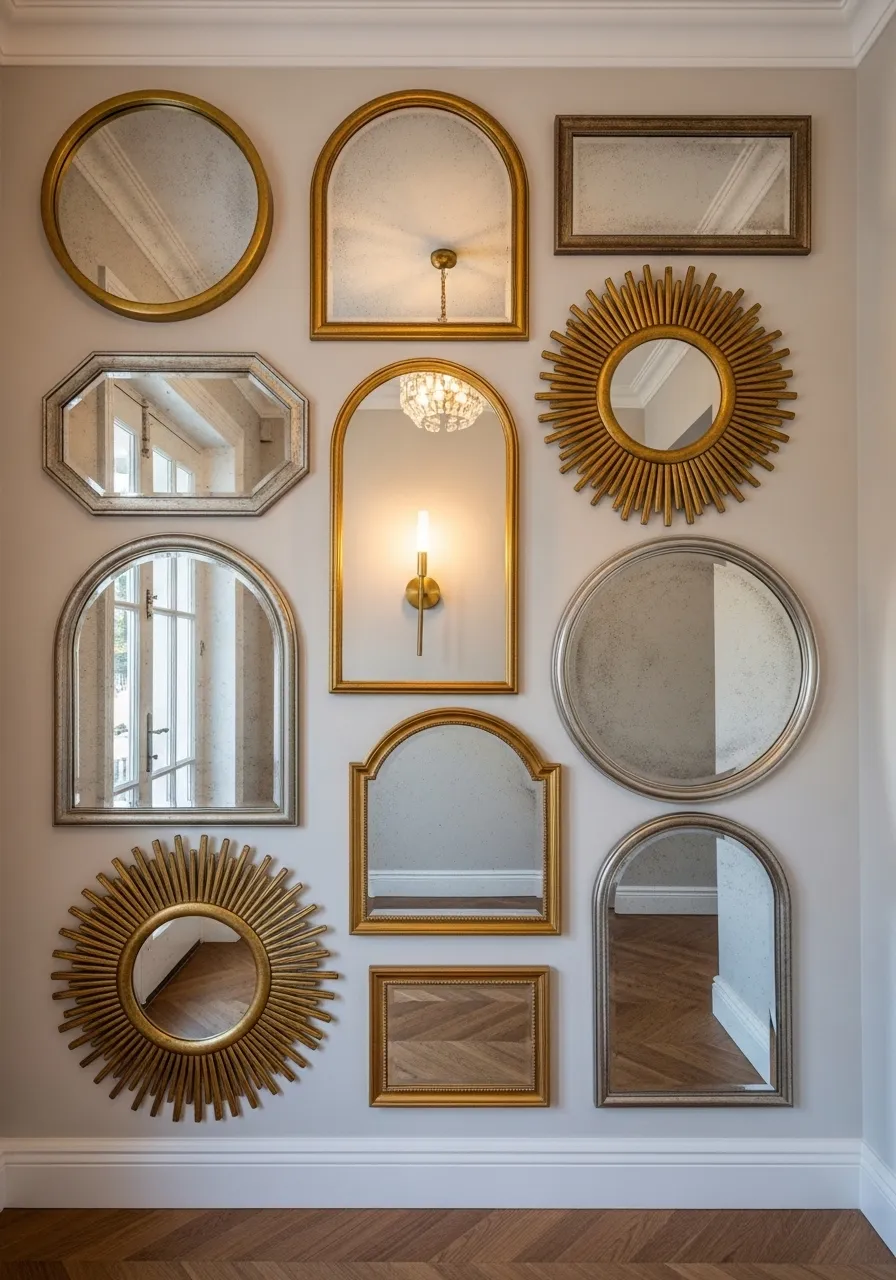
Mirrors do double work on a gallery wall: they function as art and they make the room feel larger and brighter.
A mirror mosaic replaces traditional framed art entirely — or mixes mirrors in among framed pieces for added dimension.
Best shapes to combine: Round, arched, starburst, rectangular, and irregular organic shapes. The variety in silhouette is what makes this work.
Mixing finishes: Brass, antique gold, black, and chrome can coexist on one wall when the shapes are varied enough to hold the eye’s attention.
Where to source affordable mirrors: TJ Maxx, HomeGoods, and Target’s home section regularly stock decorative mirrors for $10–$30 each. Amazon has basic round mirrors for $8–$15. Thrift stores occasionally yield ornate vintage frames for $5.
Placement tip: Hang one large mirror as the anchor piece and arrange smaller mirrors around it. Keep an irregular, organic cluster shape rather than a grid.
Budget: A 6–8 mirror wall can cost $60–$120 depending on sources. Split the purchase over a few weeks of thrift shopping if needed.
This approach is particularly effective in entryways, hallways, and small living rooms where light and the illusion of space matter most.
12. The Washi Tape Art Grid
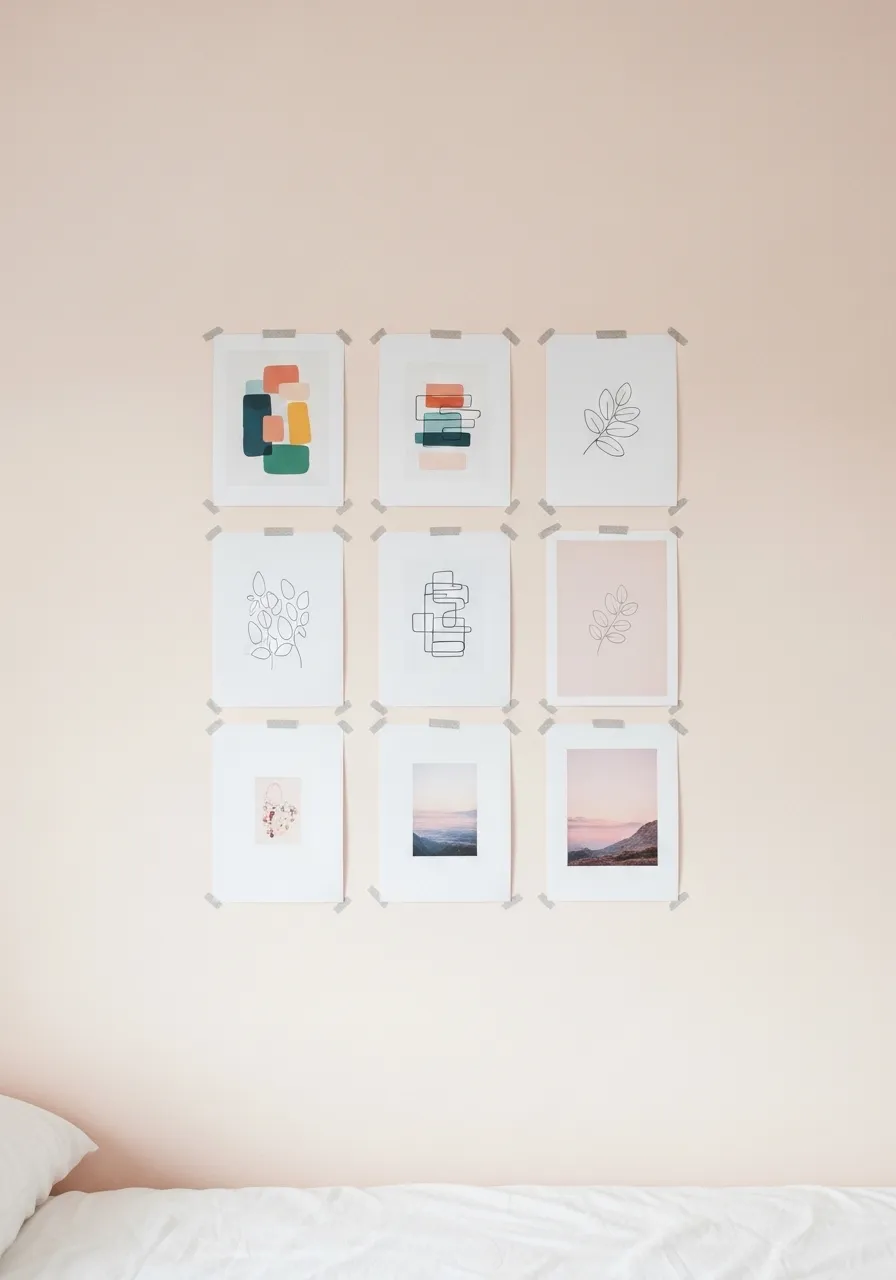
No nails. No frames. No damage to the walls.
Washi tape gallery walls are the perfect renter’s solution — and they look genuinely stylish when done with intention.
How it works: Apply washi tape directly to the wall in rectangle or square outlines — these become your “frames.” Place printed photos or art inside each tape outline using a small loop of tape on the back.
Choose tape wisely. Black, gold, or white washi tape reads as sophisticated. Pastel or patterned tape reads as playful. Match the tape to your room’s vibe.
Size your tape frames. A 5×7 or 8×10 tape outline holds standard print sizes perfectly. Measure before taping so your grid is even.
Where to source art: Print smartphone photos at home. Download free art from Unsplash. Print simple line art from Pinterest (for personal use).
Budget: A roll of quality washi tape costs $3–$6. Printing 12 photos at home costs about $2 in ink and paper. Total wall cost: under $10.
This works especially well in kids’ rooms, dorm rooms, and rentals. Change the whole display in an afternoon with zero wall damage. Perfect for seasonal updates too.
13. The Black Frame Maximalist Wall
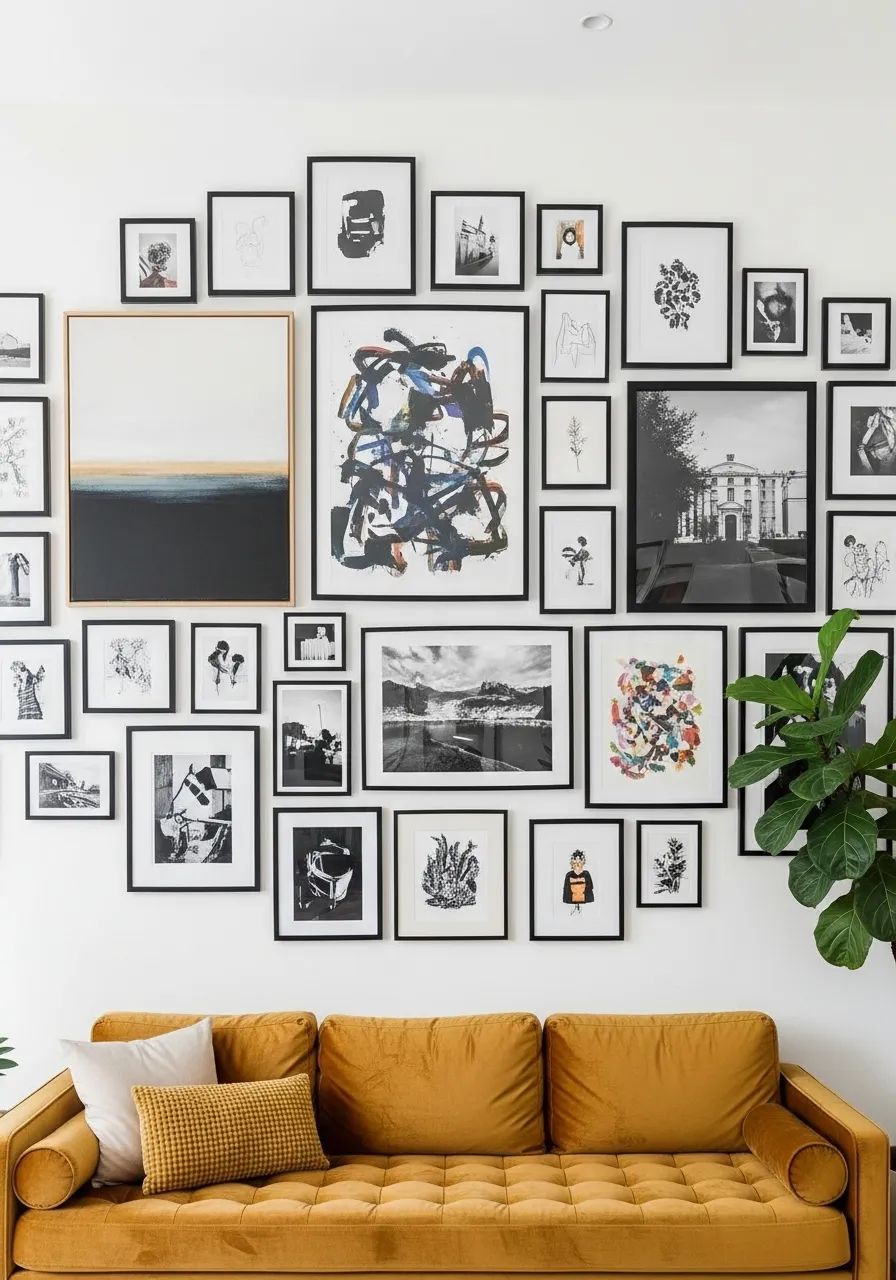
All-black frames create a unified, graphic look — even when the art inside is wildly varied.
This is the easiest way to do salon-style without it feeling messy. The matching frames do the cohesion work for you, so the art can be as eclectic as you want.
Collect frames over time. You don’t need them all at once. Start with 5, add 3 more next month, keep going. The wall grows organically.
What to put inside: Anything. Family photos, vintage magazine pages, abstract prints, pressed flowers, your own sketches, screenshots of art you love printed on cardstock.
Free art sources: The Metropolitan Museum of Art, Rijksmuseum, and Art Institute of Chicago all have free high-resolution downloads of public domain artwork. Print them at home or at Costco.
Frame sources: IKEA RIBBA in black runs $4–$8 depending on size. Amazon basics packs of small black frames run about $2–$3 each.
Arrangement tip: Lay all frames on the floor before hanging. Take a photo. That’s your hanging guide.
Budget for a 15-frame maximalist wall: $60–$100 total. The impact-to-cost ratio here is outstanding.
14. The Architectural Line Drawing Wall
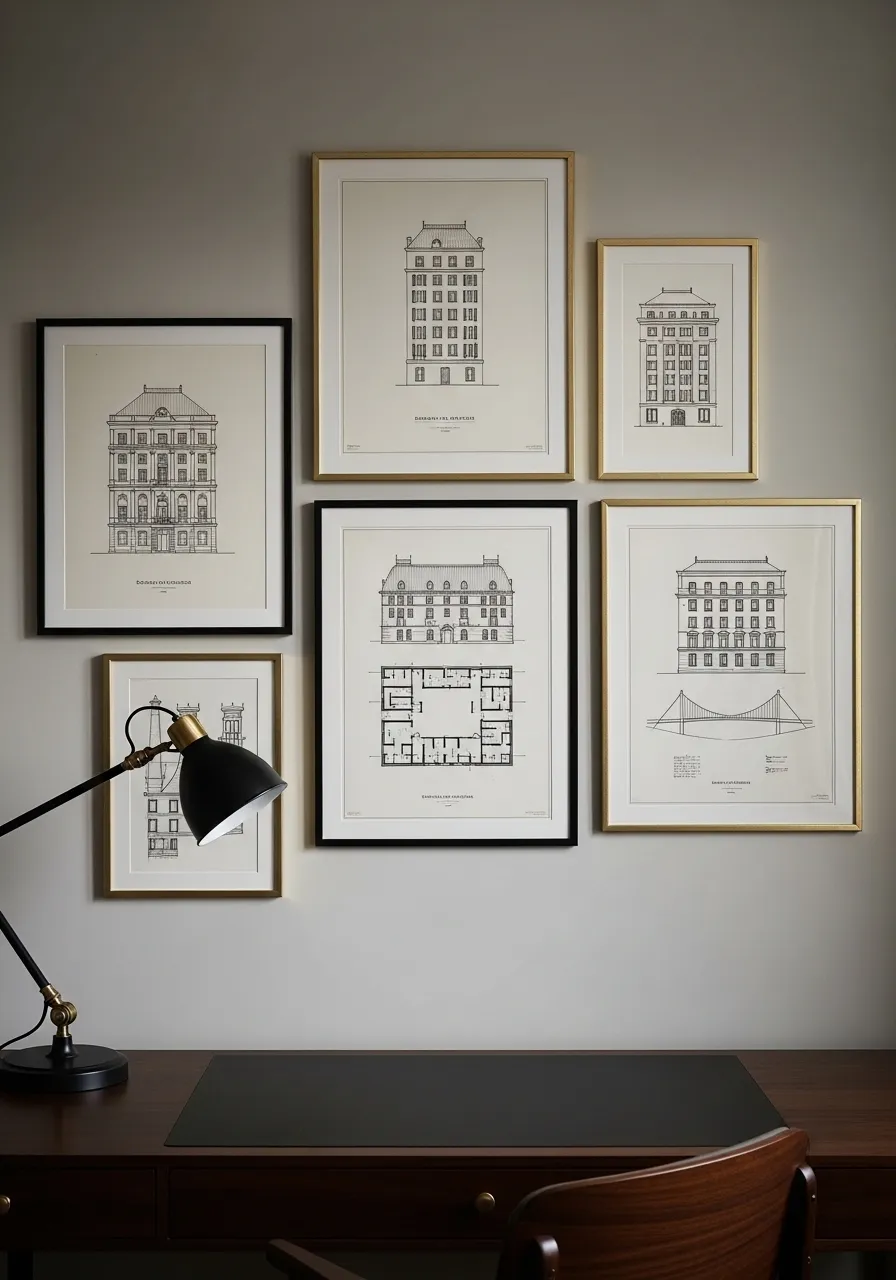
Architectural drawings — floor plans, building facades, bridge schematics, city maps — make surprisingly beautiful wall art.
They’re graphic, geometric, and interesting to look at up close. And most of them are completely free to download.
Where to find them:
- Library of Congress Historic American Buildings Survey
- David Rumsey Map Collection (free downloads)
- Wikimedia Commons architectural drawings
Print in sepia tone on cream paper for a vintage feel. Print in crisp black on white for a modern, graphic feel.
Frame in thin brass or matte black metal for the most polished result. These frame styles suit the linear quality of architectural drawings perfectly.
Sizes: Mix large (16×20) and small (5×7) for visual rhythm. A floor plan printed large becomes a genuine conversation piece.
Display tip: Group drawings by theme — all bridges, all famous buildings, all local landmarks — for a more intentional curatorial feel.
Budget: Free prints, $8–$15 each for larger printing at a copy shop, plus basic frames. A 6-piece architectural wall costs about $40–$70.
This style suits home offices, libraries, and dining rooms where intellectual, mature decor feels right. It reads as thoughtful and personal without being overly decorative.
15. The Family Photo Black-and-White Story Wall
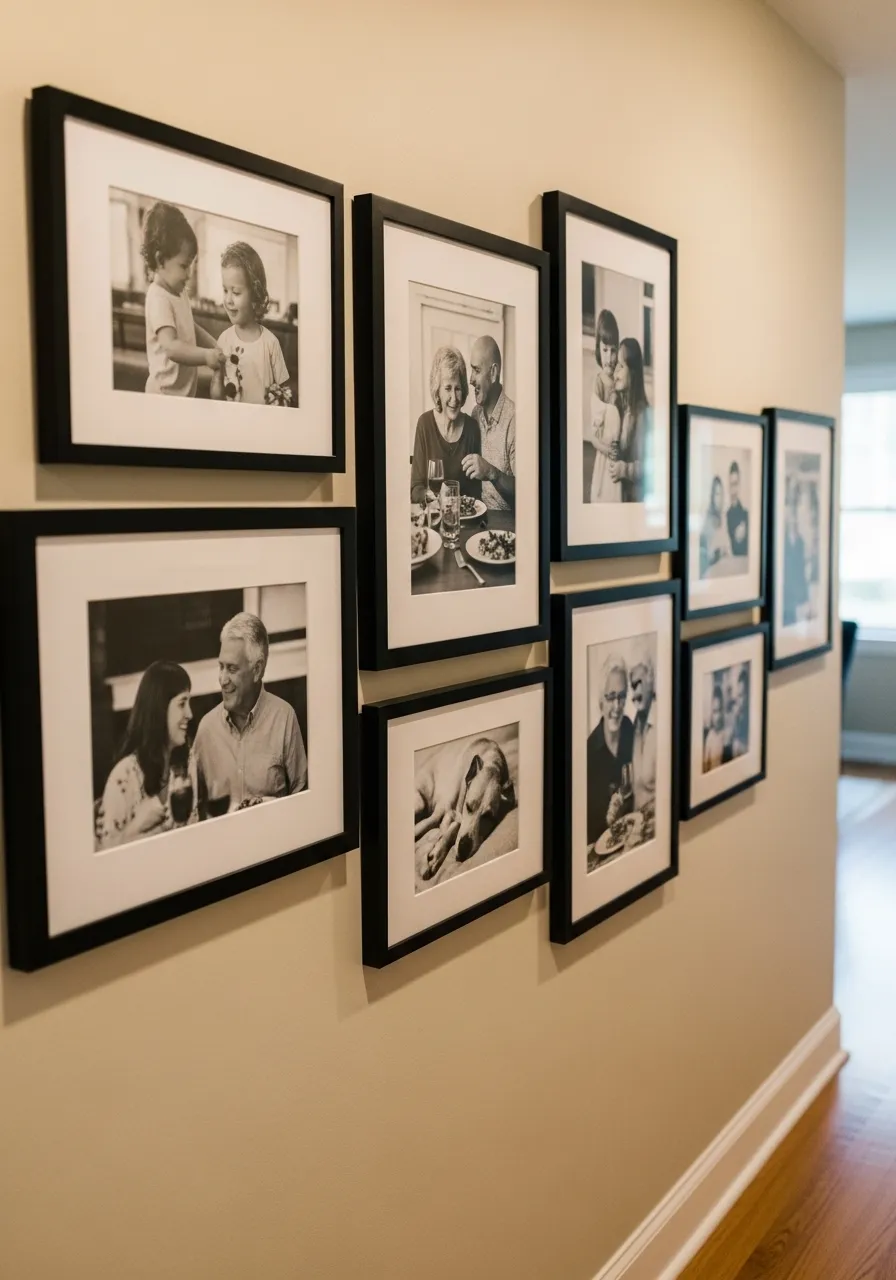
A family photo wall done in black and white feels like a gallery — not a refrigerator covered in snapshots.
The conversion to black and white is the single biggest upgrade you can make to personal photos. It creates instant cohesion across photos taken on different phones, in different lighting, over different decades.
How to convert: Lightroom Mobile (free), Snapseed (free), and VSCO (free) all do excellent black-and-white conversion. Apply a slightly warm black-and-white preset rather than a cold one — it feels more timeless.
Print at Costco, Walmart, or Walgreens. A 5×7 print costs $0.50–$1. A 8×10 costs $2–$4.
Frame with white mats. A mat — the white border inside the frame — makes even cheap frames look expensive. IKEA RIBBA frames come with a mat included.
Layout: Start with your favorite large print as the anchor. Arrange around it chronologically or by relationship groupings.
Budget: 12 prints + 12 RIBBA frames = approximately $60–$80 total.
This wall is especially powerful in hallways and staircases where people move slowly and have time to look. It makes a house feel like a home immediately.
16. The Abstract Art DIY Wall
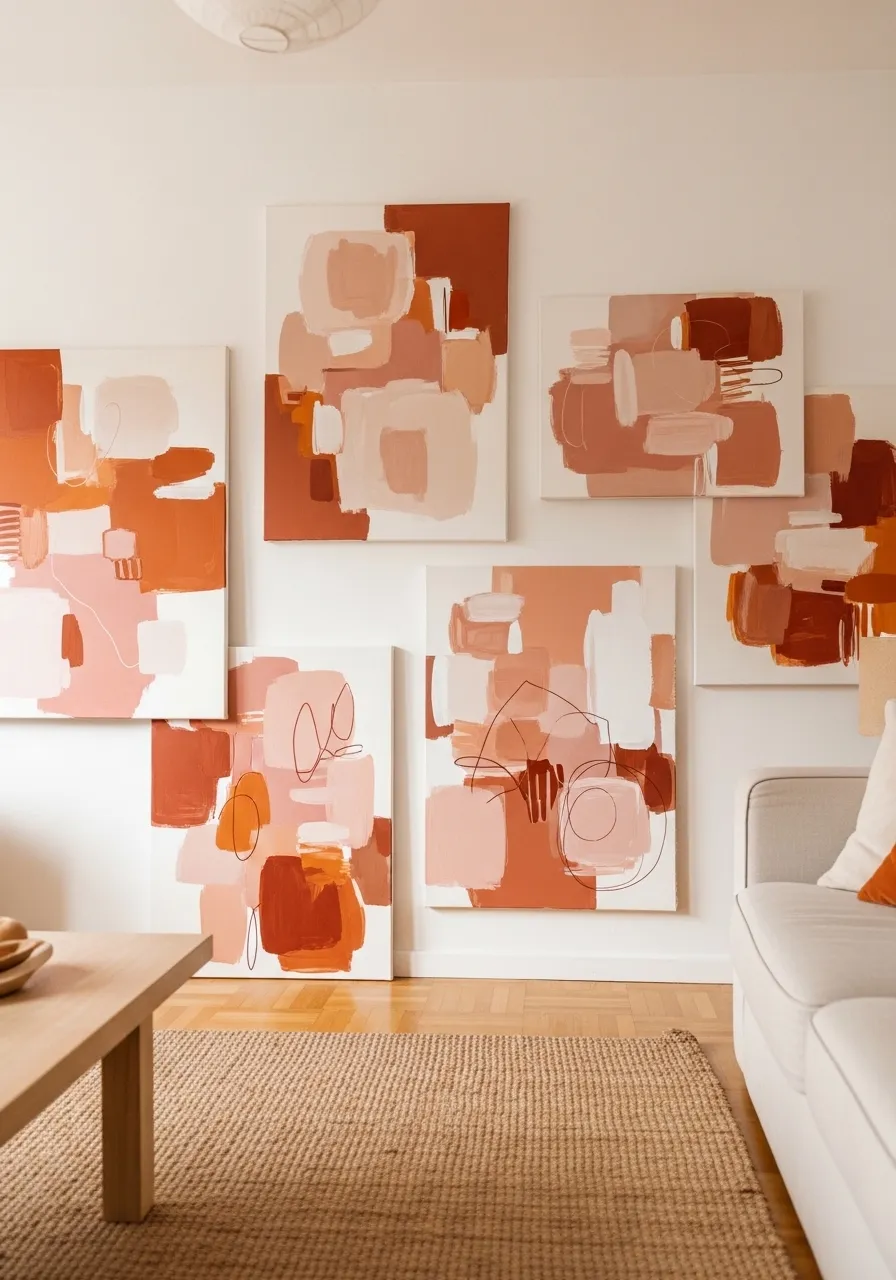
You don’t need to buy abstract art. You can make it.
Abstract painting is the most forgiving art form for non-artists because there’s no “wrong.” A few colors, some brushwork, and an intentional composition are all you need.
Materials for one 16×20 canvas:
- Stretched canvas: $5–$8 (Amazon or Michaels with coupon)
- Acrylic paint set: $10–$15 (use for multiple canvases)
- A few brushes and a palette knife: $5–$8 total
Simple techniques that work for beginners:
- Color block: Paint large sections of 2–3 complementary colors with clean edges. Let dry between coats.
- Gestural wash: Thin paint with water, apply in loose sweeping strokes.
- Palette knife texture: Load paint on a palette knife, drag and press across canvas.
Color coordination tip: Choose 2–3 paint colors that already appear in your room. Repeat them across 3–5 canvases for an intentional series.
Total cost for 5 abstract canvases: $40–$60. The same 5 pieces from a decor store would cost $200–$500+.
Hang without frames for a modern, gallery feel. The raw canvas edge looks intentional and contemporary.
17. The Minimalist Line Art Wall
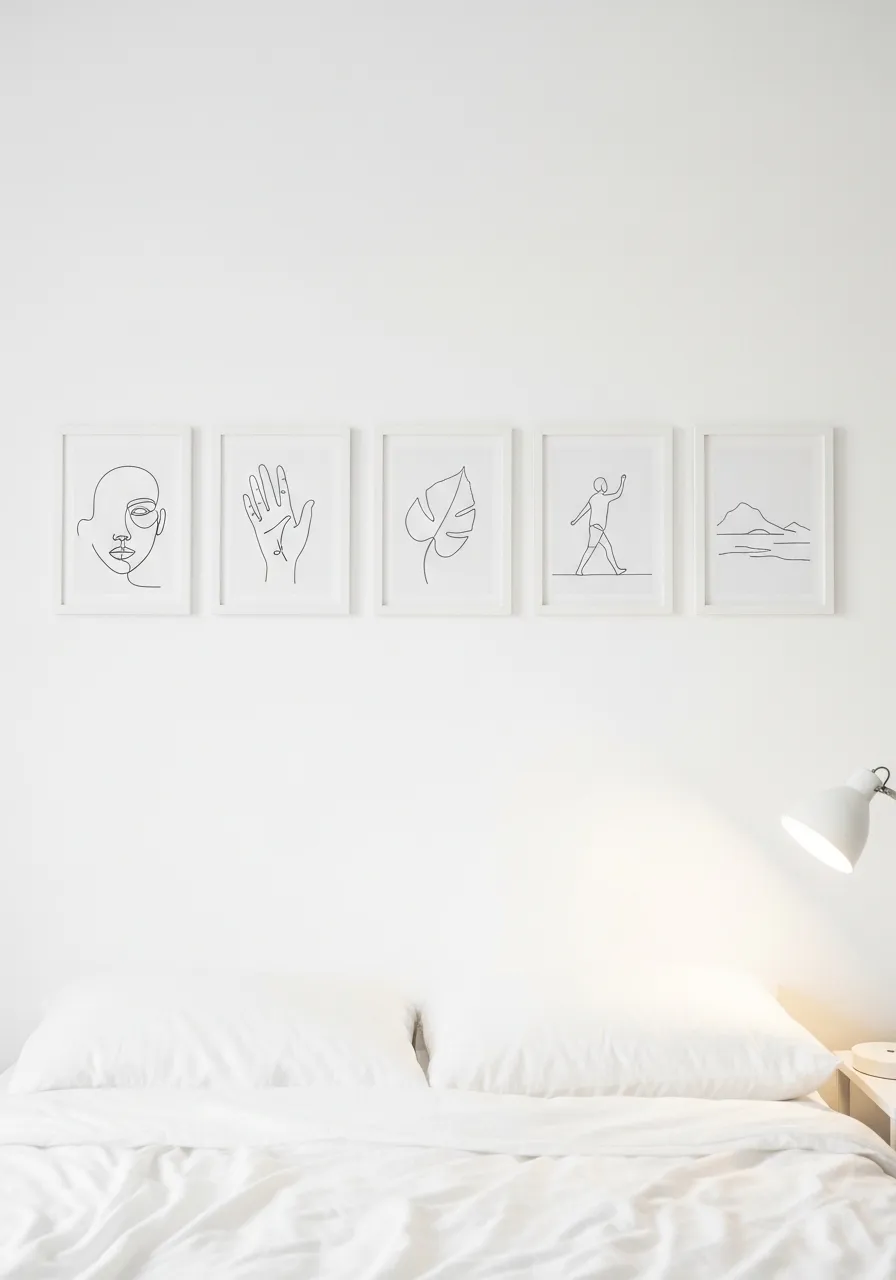
Single-line drawings are having a major moment in home decor — and they’re absurdly cheap to source and print.
The style traces a subject (a face, a figure, a flower) in one unbroken line. The result is simple, graphic, and instantly modern.
Where to find them: Etsy printables for single-line art run $2–$5 per download. Pinterest has thousands of free examples you can screenshot and print for personal use. Search “continuous line drawing printable.”
Or draw your own. Trace a photo in one line using a black marker and white paper. Scan it. Print it. Done.
Framing: Small, uniform frames work best for this style. A horizontal row of 3–5 matching white frames looks crisp and intentional.
Subjects that work well: Faces and portraits, hands, animals, flowers, abstract body forms, architectural silhouettes.
Layout options:
- Single horizontal row above a bed or sofa
- Vertical stack in a narrow hallway
- Loose cluster mixed with solid color prints for contrast
Budget: 5 prints + 5 frames from IKEA = about $25–$35 total.
This is the quickest gallery wall you can execute — download, print, frame, hang. Start to finish in two hours.
18. The Colorful Kids’ Print Wall
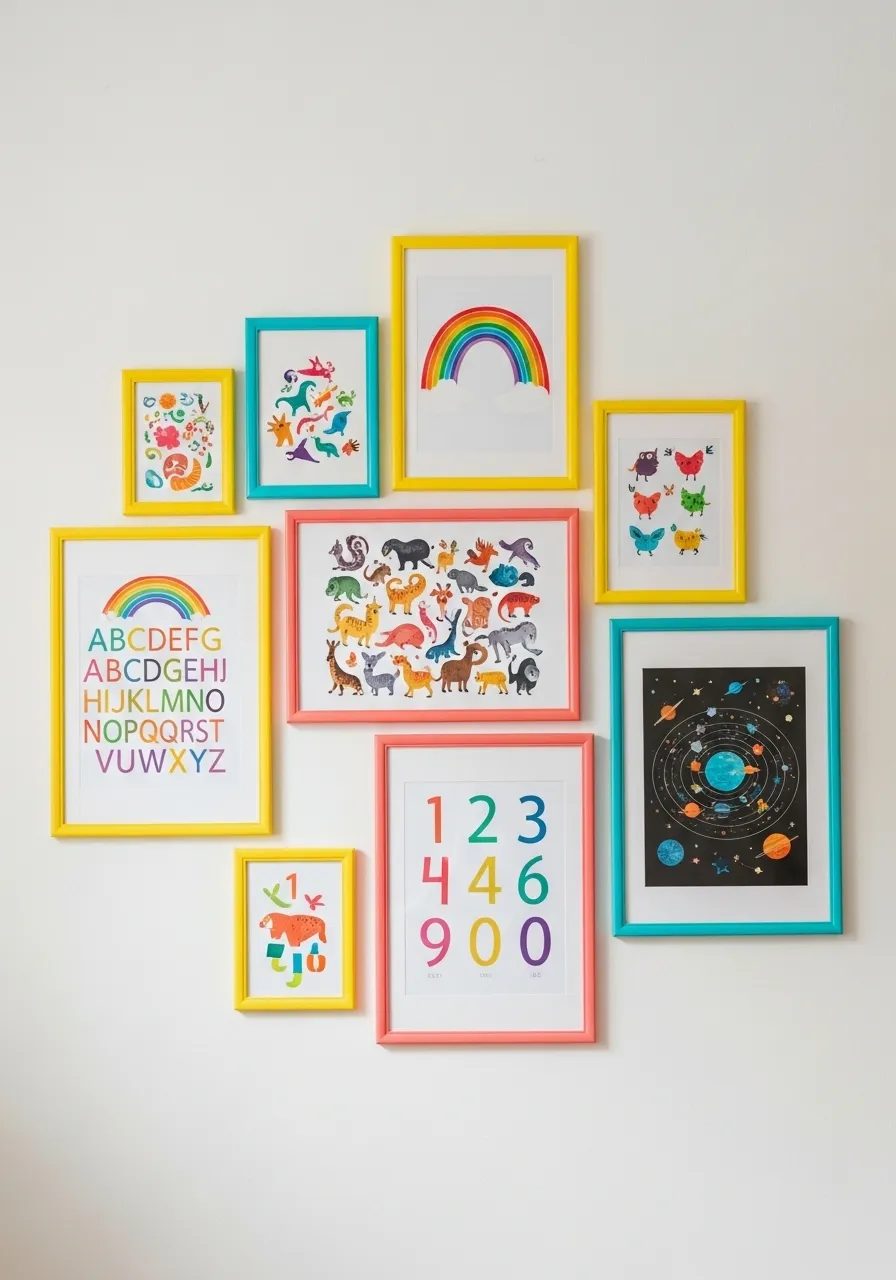
A colorful educational print wall makes a child’s room feel like a place of wonder — and it’s incredibly easy to pull off on a small budget.
What works well as content:
- Alphabet and number posters
- Animal illustration prints
- Solar system or world map
- Botanical or nature science prints
- Simple shapes and color charts
Free and cheap sources:
- Teachers Pay Teachers has free illustrated prints
- Etsy printables for kids’ rooms run $2–$5
- Pinterest boards curate hundreds of free printable options
Frame in primary colors — red, yellow, blue — or in a specific palette you’ve chosen for the room. Even basic plastic clip frames from the dollar store work perfectly for kids’ spaces.
Mix sizes for a dynamic, energetic feel. A large alphabet poster as the anchor, surrounded by smaller animal prints, feels designed rather than random.
Swap content seasonally or as interests change. Space prints in year one, dinosaurs in year two. The frames stay; only the paper changes.
Budget: $0–$20 for printables, dollar store or IKEA frames. Total: $15–$40 for a full wall.
This is one of the most rewarding gallery walls to build because kids genuinely notice and respond to it every single day.
19. The Gallery Wall with Lighting
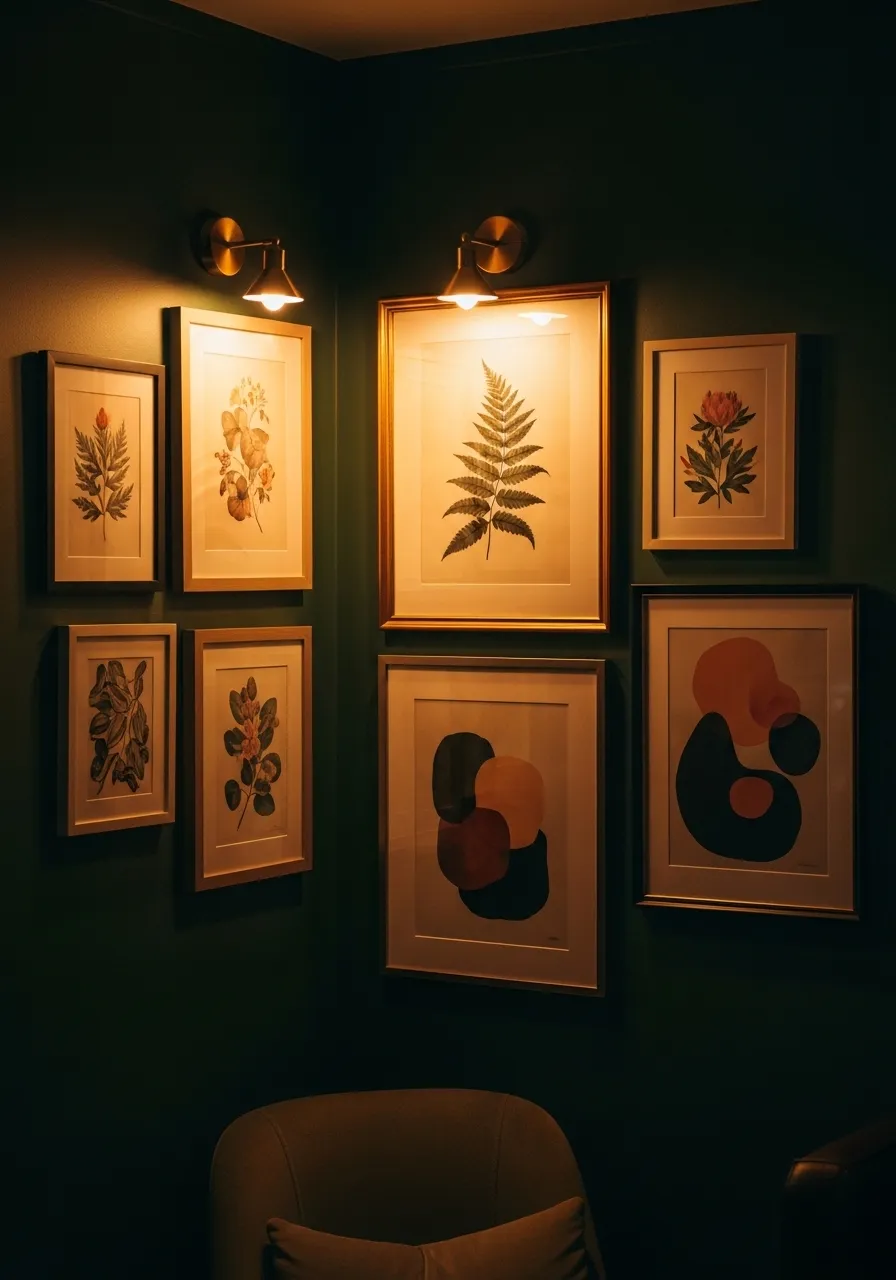
Lighting transforms a gallery wall from nice to extraordinary.
The same frames you hung six months ago suddenly look like they belong in a boutique hotel when you add a single picture light.
Picture lights are small fixtures that mount above a frame and cast warm downward light over the art. Battery-operated versions require zero wiring.
Where to buy: Amazon battery-operated picture lights run $15–$30 each. You don’t need one above every frame — just the 1–2 largest pieces.
Alternative lighting options:
- String lights woven loosely around the cluster
- A small wall sconce positioned beside the gallery arrangement
- A floor lamp with a directional head aimed at the wall
Why it works: Light draws the eye. It signals that the art matters, that it’s worth looking at. It also adds warmth to the room in the evening when overhead lights feel harsh.
Dark wall tip: If you’ve painted your gallery wall a deep color navy, black, forest green ighting becomes even more impactful. The contrast between the lit art and the dark wall is genuinely dramatic.
Budget add-on: Two battery picture lights = $30–$60. The upgrade they deliver is worth far more than the cost.
20. The Seasonal Rotating Gallery
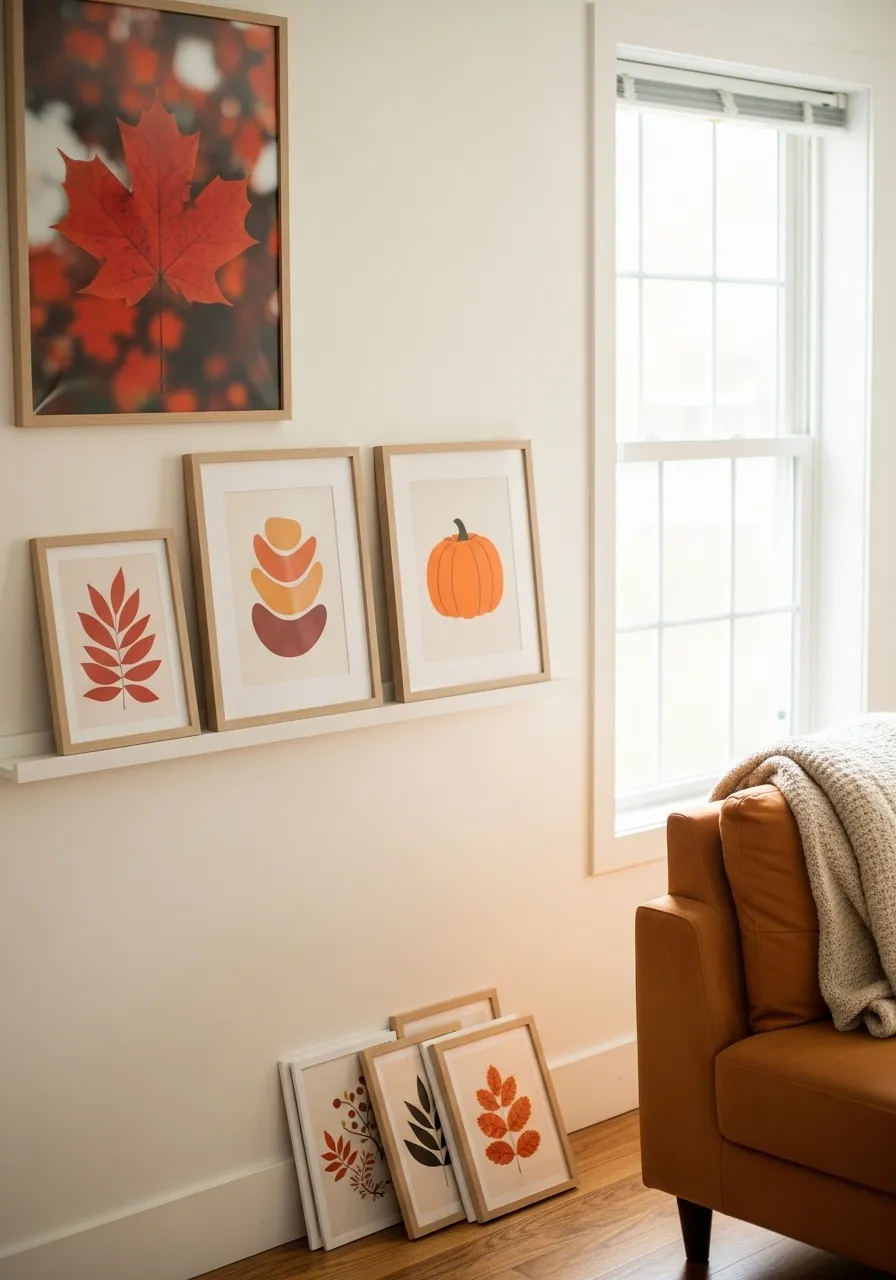
A rotating seasonal gallery wall keeps your home feeling current all year without buying new furniture or repainting.
The key is building a swap-friendly system rather than a fixed nail arrangement.
Best system for rotating galleries: Picture ledges (IKEA MOSSLANDA or similar) allow frames to lean and swap without any tools. Pull one print off, slide another on. Done in 30 seconds.
Build a small art library organized by season. Keep printed art in a flat folder or portfolio sleeve. Label by season.
What to rotate:
- Spring: Floral prints, pastel abstracts, botanical drawings
- Summer: Coastal photography, bright color-block art
- Autumn: Warm earthy tones, leaf photography, harvest colors
- Winter: Cozy interiors, snow photography, minimal graphic prints
Cost of building the library: 4 seasons x 5–8 prints each = 20–32 prints total. At $0.50–$2 per print, the full library costs $10–$65.
The frames stay the same all year. Only the paper changes.
This approach makes decorating feel like a hobby rather than a chore. Pulling out the autumn prints in September becomes a small ritual — and your home genuinely reflects the time of year.
Conclusion
A gallery wall is one of the most personal and affordable changes you can make to any room.
It doesn’t require a big budget, interior design experience, or a Pinterest-perfect home. It requires only a willingness to start — even imperfectly — and the understanding that your wall will keep improving over time.
The 20 ideas in this guide cover every style, budget, and skill level. Whether you spend $15 on washi tape and printed photos or $100 on a carefully curated mix of art and mirrors, the result is a wall that tells your story in a way no store-bought decor ever could.
Start with just three frames. Hang them this weekend. See how it feels. Add from there.
The best gallery wall is the one you actually build.