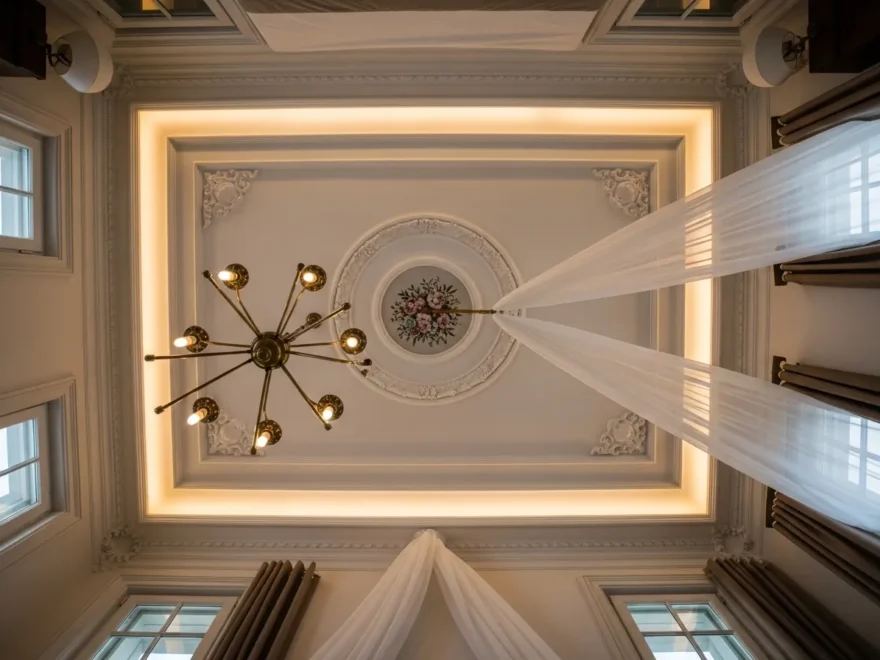
Your ceiling takes up one-third of every room you live in and most people never think about it. That is a lot of ignored real estate. A well-decorated ceiling can make a small room feel taller, a dull space feel dramatic, and a plain bedroom feel like a boutique hotel suite. The good news? You do not need a renovation budget or a contractor. Many of the best ceiling upgrades cost less than a dinner out and take a single afternoon. Whether you rent or own, live in a studio or a sprawling home, there is something here for you. Read on for 20 seriously doable ceiling decor ideas that turn your forgotten fifth wall into the most talked-about part of your space. If you’re also exploring plant wall decor ideas, adding vertical greenery and natural textures can instantly make your room feel fresher, more vibrant, and visually more dynamic without taking up floor space.
Paint It a Darker Shade Than Your Walls
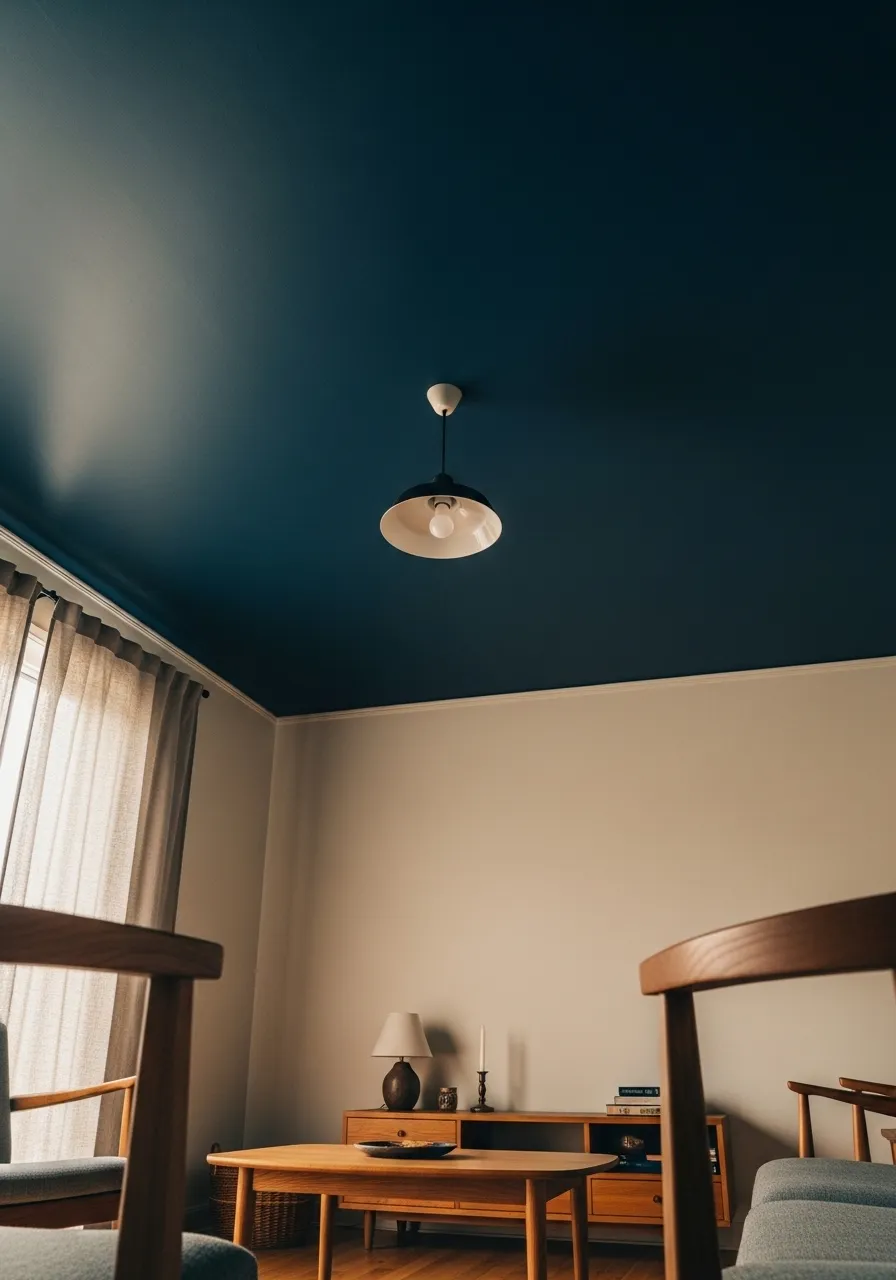
Most people assume ceilings must be white. They do not.
Painting your ceiling a shade or two darker than your walls is one of the easiest ways to create a cozy, intentional look. It makes the room feel grounded, like a cozy cocoon rather than an open box.
Deep navy, forest green, charcoal, and terracotta all work beautifully as ceiling colors.
You only need one can of paint. Ceiling paint is typically cheaper than wall paint, so this upgrade often costs under $30.
Start by taping off the edge where the wall meets the ceiling. Use a angled brush for the perimeter, then roll the rest.
Two coats are usually enough.
The psychological effect is surprising. A dark ceiling actually makes a room feel more intimate without making it smaller. Interior designers call this “bringing the sky down.”
If you are nervous about going too dark, try a deep version of your wall color first. For example, if your walls are sage green, paint the ceiling a rich hunter green.
Renters can ask permission for this one. Many landlords say yes because it is easy to paint over.
This single change can make a room feel completely redesigned overnight.
Add a Faux Tin Ceiling with Peel-and-Stick Tiles
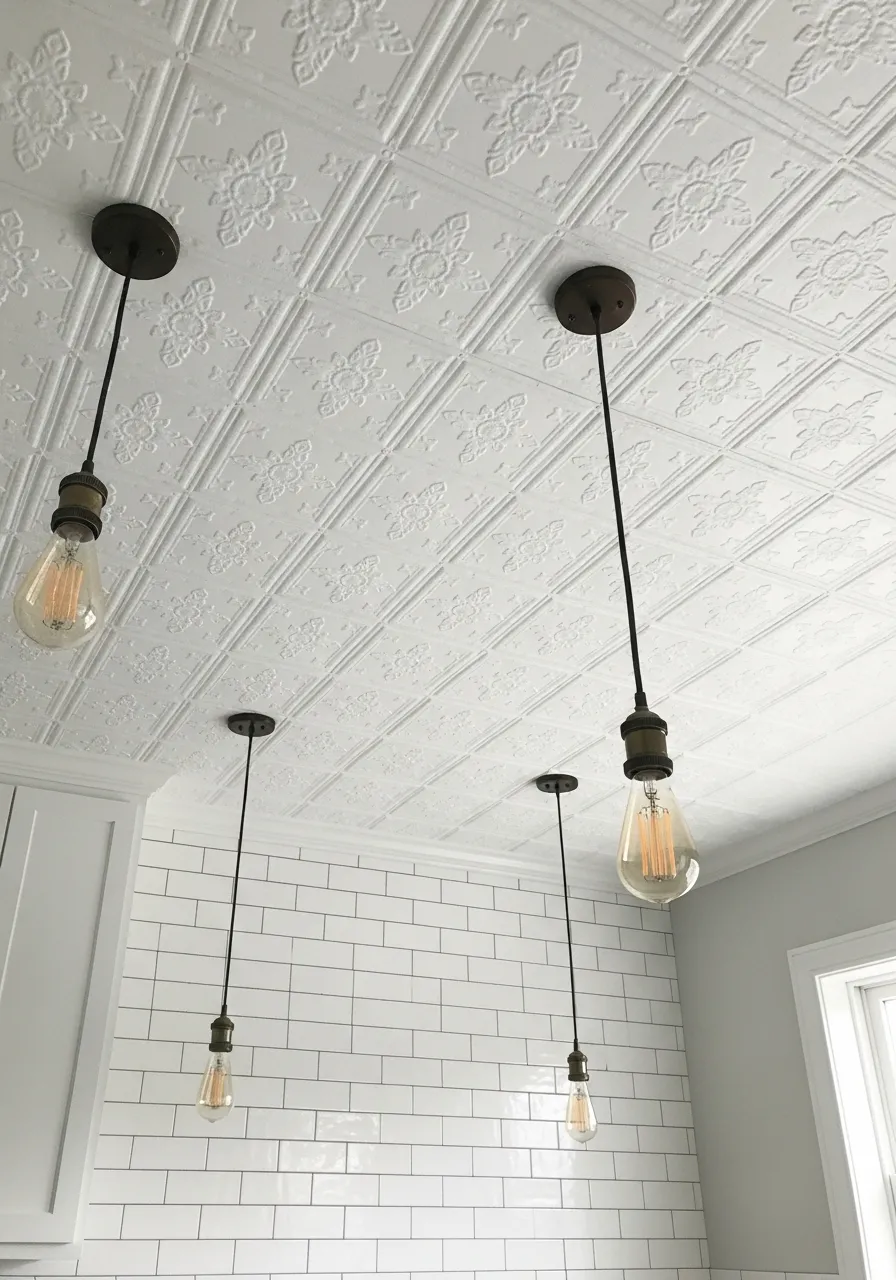
Faux tin ceiling tiles give a room serious character without any major work.
These tiles are made from lightweight PVC or polystyrene and come with embossed patterns that mimic real pressed tin. They stick right over an existing ceiling using peel-and-stick adhesive or construction glue.
Cost is usually $1 to $3 per tile. A small kitchen or bathroom ceiling might only need 20 to 30 tiles.
They come in dozens of patterns, from ornate Victorian florals to clean Art Deco grids. White and silver are the most popular finishes, but metallic gold and bronze options exist too.
Installation is surprisingly straightforward. Start from the center of the ceiling and work outward. Most tiles are 24×24 inches, so measure your space first.
Edge pieces can be cut with scissors or a utility knife.
These tiles are especially popular in kitchens, dining rooms, and home bars. They add texture where there was none and create a vintage or industrial feel depending on the style you choose.
Pair with a simple pendant light or Edison bulb fixture and the transformation looks intentional and expensive.
Renters love this option because peel-and-stick versions come down cleanly.
Hang a Statement Light Fixture
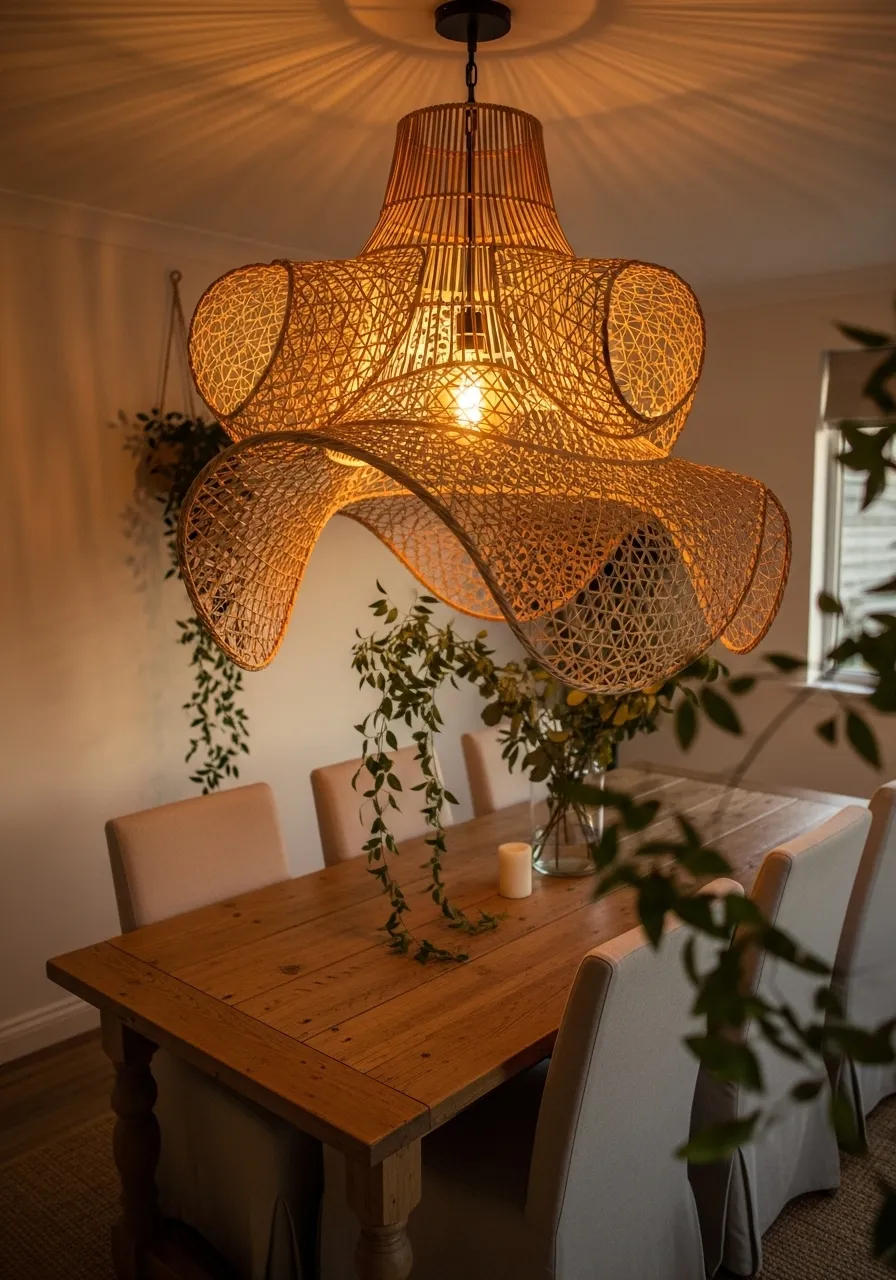
Nothing transforms a ceiling faster than a great light fixture.
Your current light might just be a builder-grade globe or a flat flush mount. Swapping it out is one of the highest-impact changes you can make in any room.
Rattan pendants, sculptural metal shades, and clustered Edison bulb fixtures are all popular right now and very affordable.
You can find statement pendants on Amazon, IKEA, or thrift stores for as little as $25. Some of the best ones cost under $60.
Swapping a light fixture is a basic DIY job. Turn off the circuit breaker, unscrew the old fixture, match the wires (black to black, white to white, ground to ground), and mount the new one.
If you are not comfortable with wiring, hire an electrician. It usually takes less than an hour and costs $50 to $100.
The scale of the fixture matters. In a dining room, go bigger than you think. A fixture that feels too large in the store often looks perfect once it is hung.
Pendant lights also work beautifully in pairs over kitchen islands, bathroom vanities, and bedside tables.
This is the one upgrade that delivers drama with almost no effort.
Create a DIY Canopy with Fabric
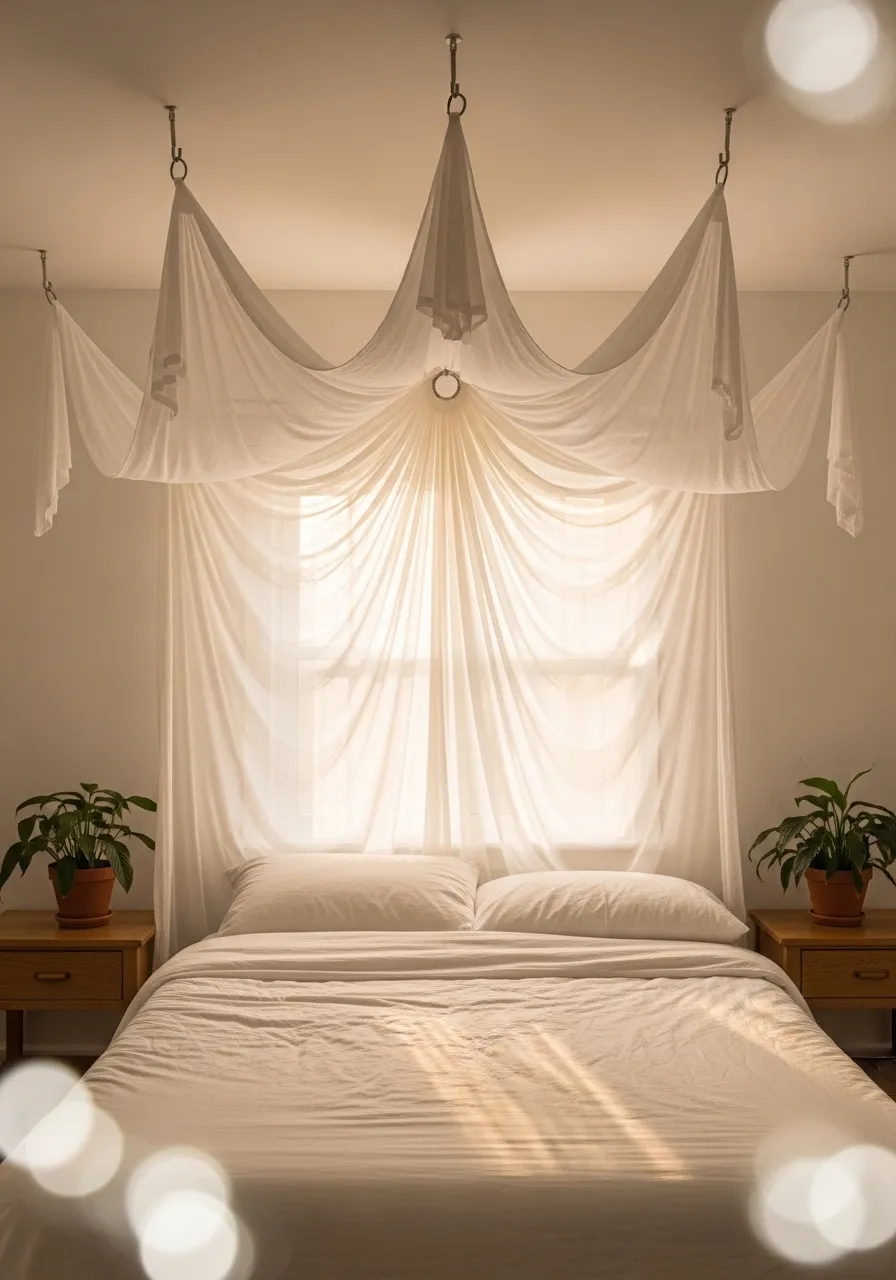
A fabric canopy turns a plain bedroom into something that looks like it belongs in a boutique hotel.
The concept is simple. You hang a fabric panel or set of sheer curtains from a central point on the ceiling, then drape them outward to the walls or bedposts.
All you need is a ceiling hook, some curtain panels, and curtain rings.
Sheer white or ivory fabric works best for a light, airy feel. For something more dramatic, try deep velvet or heavy linen.
The central hook screws into a ceiling joist. If you cannot find a joist where you want the hook, use a toggle bolt rated for the weight of your fabric.
For a queen bed, four panels of 84-inch curtains usually provide enough fabric to drape elegantly. Attach the panels to the central ring and pull each one outward to a small wall hook or clip.
This look costs around $30 to $60 in materials depending on the fabric you choose.
Thrift stores are great for inexpensive curtain panels in soft, neutral tones.
The canopy creates a sense of enclosure around the sleeping area, which many people find incredibly calming. It also doubles as a sound absorber, softening echoes in hard-walled bedrooms.
Use Wallpaper on the Ceiling
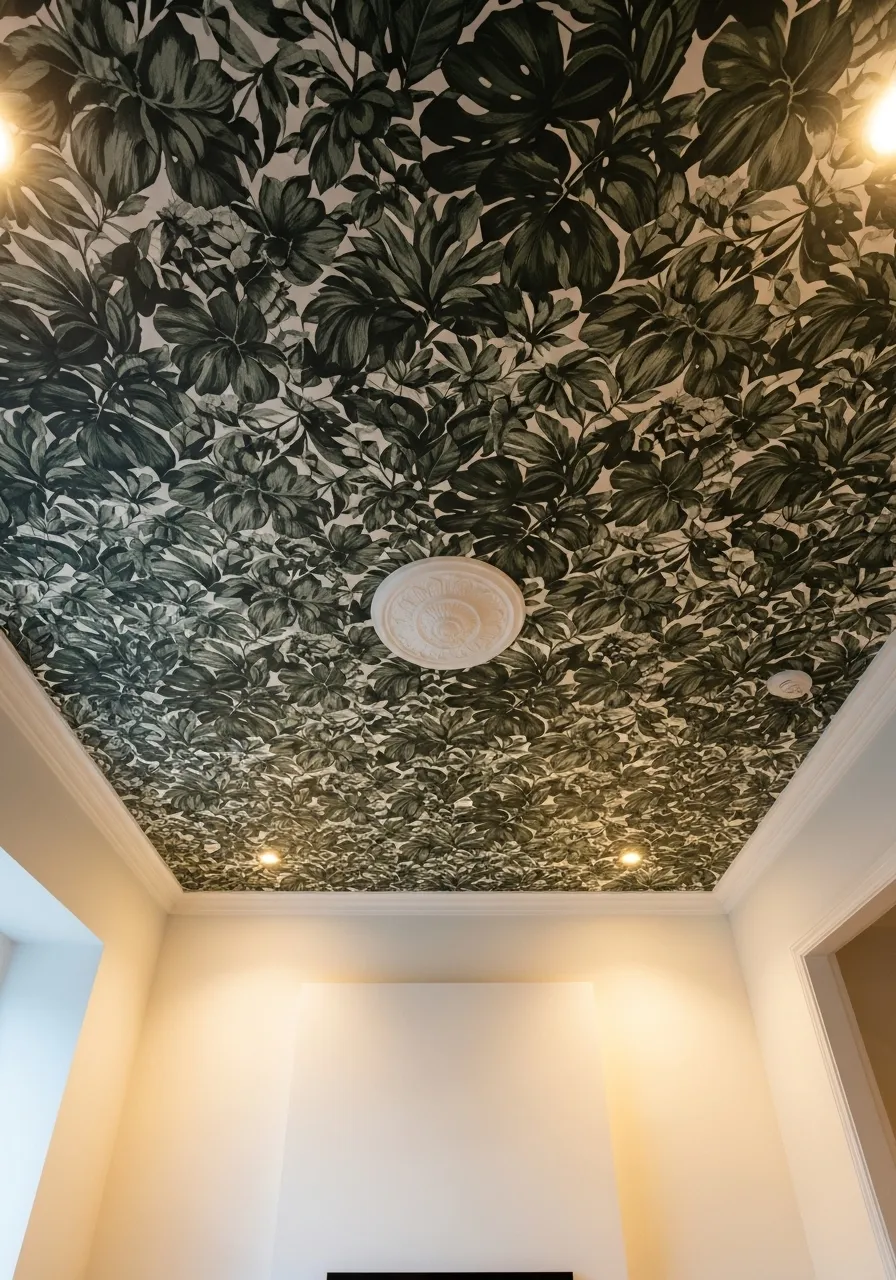
Wallpaper on the ceiling is unexpected, affordable, and absolutely striking.
This is called the “fifth wall” treatment and interior designers have been using it for years. It works especially well in small rooms where a large wallpaper pattern might feel overwhelming on the walls.
Floral, geometric, maximalist, and abstract patterns all look incredible overhead.
Peel-and-stick wallpaper has made this much easier for renters and beginners. You do not need paste, a steamer, or any special tools.
Start by measuring your ceiling area and order a bit extra for pattern matching and trimming. A typical bedroom ceiling might need 30 to 50 square feet.
The application process is the same as a wall, just overhead. Work in small sections and use a wide smoothing tool to push out any air bubbles.
A second person makes the job much easier since you are working upside down.
Bold botanical prints and moody dark florals look especially dramatic on ceilings. Geometric patterns in contrasting colors create a graphic, intentional look.
Even a subtle tone-on-tone texture wallpaper adds visual interest without being overwhelming.
Budget option: use one roll of your favorite wallpaper as a ceiling medallion or accent patch just above the bed. It creates the same effect with far less material.
Install Crown Molding for an Instant Classic Look
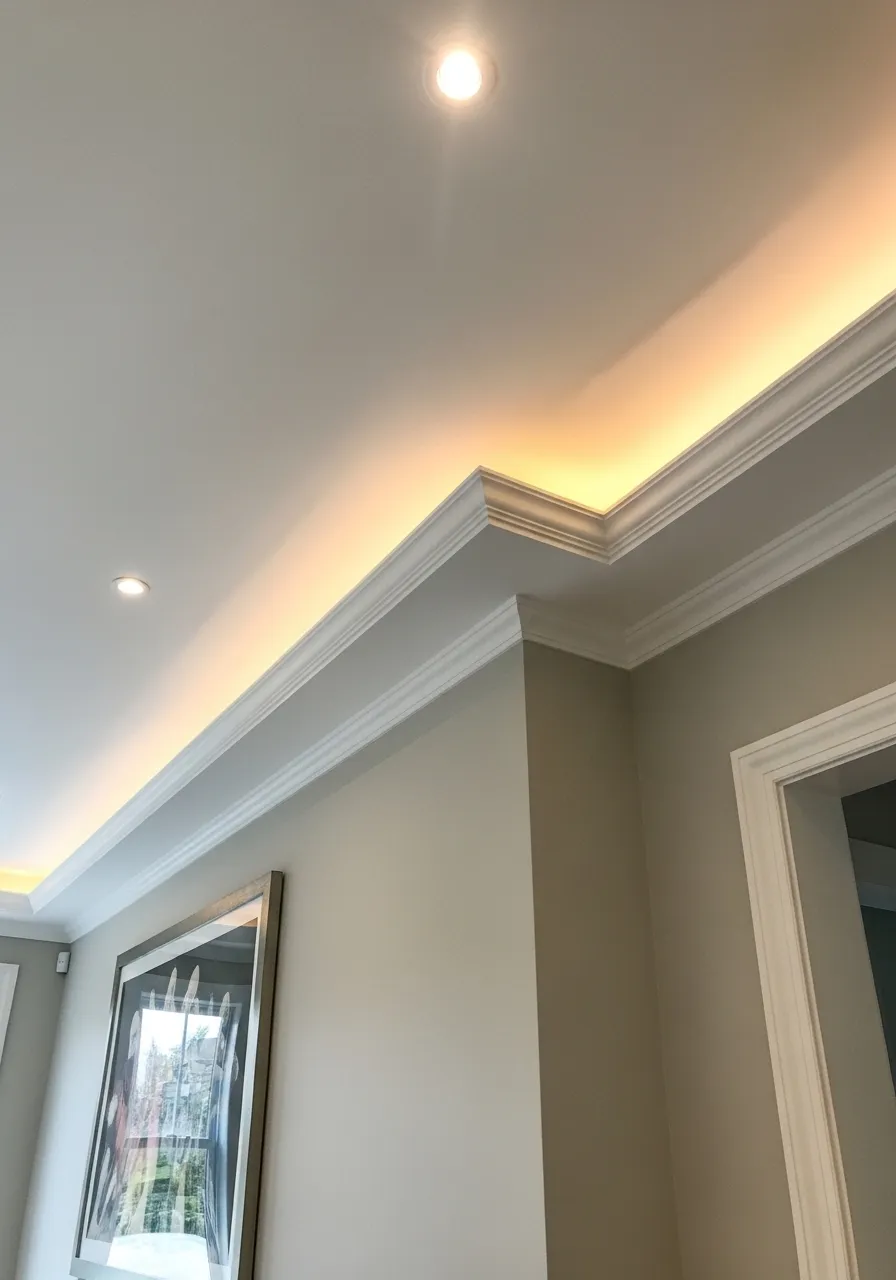
Crown molding is one of the oldest ceiling tricks in the book and it still works beautifully.
It is the decorative trim that runs along the seam where your ceiling meets the wall. Even simple crown molding makes a space feel more finished, more architectural, and more expensive.
Lightweight polyurethane molding is the easiest option for DIYers. It comes in long strips, cuts with a regular miter saw, and glues directly to the wall and ceiling surface.
A basic profile starts at around $1 to $3 per linear foot. A 12×12 room has about 48 linear feet of perimeter, putting the material cost at $50 to $150.
Caulk and paint are the finishing touches that make it look seamless.
Paint the molding the same color as your ceiling for a subtle, clean look. Or paint it bright white while keeping a colored wall below for a classic contrast.
Foam crown molding is another budget option. It is even lighter and easier to cut. Some styles simply peel and stick into place.
This upgrade is permanent and works best in owned homes, though foam versions can sometimes be removed carefully.
Crown molding pairs especially well with coffered ceilings, picture rails, and plaster medallions to build up a layered, traditional look over time.
Add a Ceiling Medallion Around Your Light Fixture
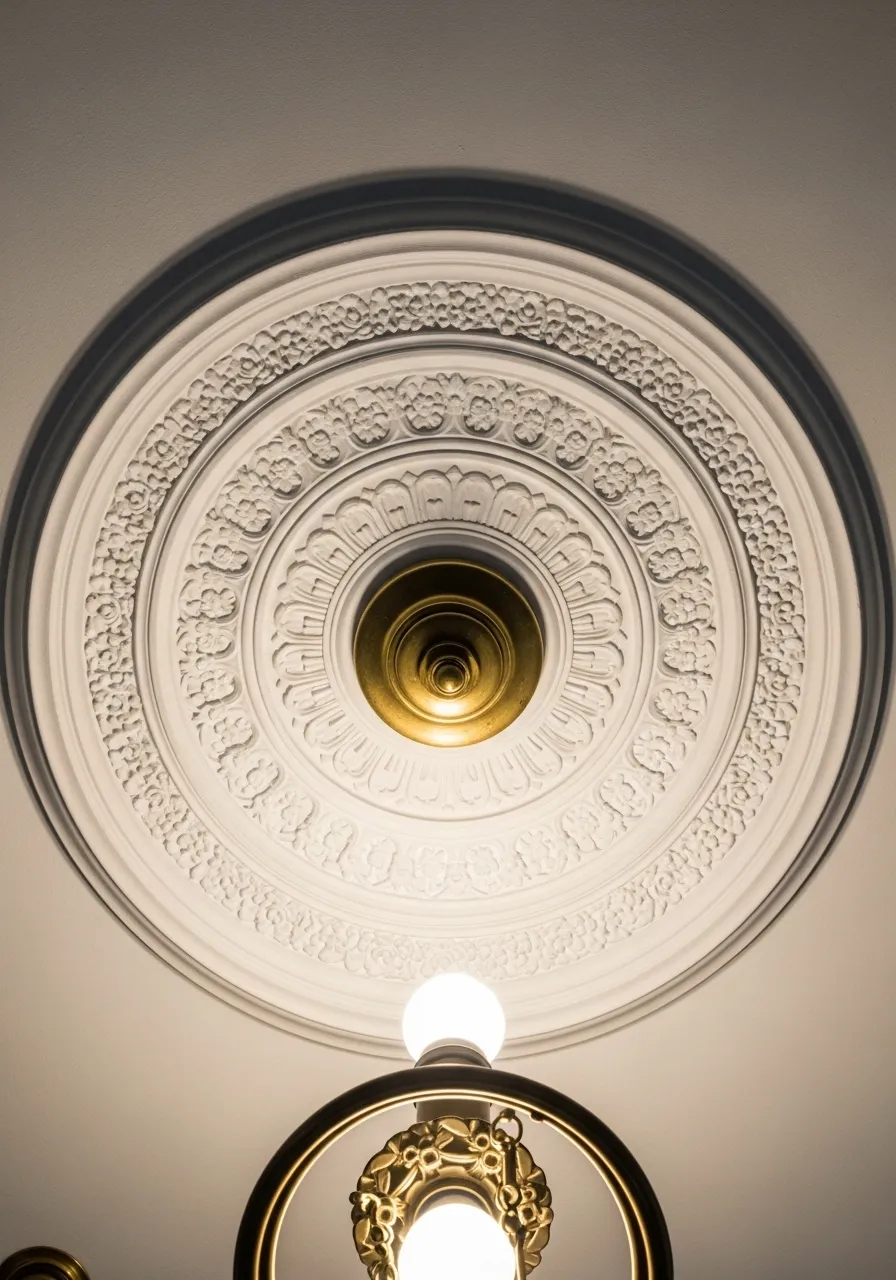
A ceiling medallion is the jewelry of the ceiling world.
It is a decorative disc that sits around your light fixture, adding architectural detail to an otherwise plain surface. In older homes, these were carved plaster. Today you can buy lightweight polyurethane or foam versions for under $20.
This might be the single easiest ceiling upgrade that exists.
Measure the diameter of your light canopy. Choose a medallion at least four to six inches wider in diameter than your fixture base.
Most medallions come with a center hole that fits standard fixture hardware. Some are solid and you drill the hole yourself.
Application is simple. Apply construction adhesive to the back, press it against the ceiling, and hold for a few minutes. Some people use painter’s tape to hold it in place while the adhesive dries overnight.
Once secure, caulk the edge where the medallion meets the ceiling to hide any gaps. Paint it the same color as your ceiling for a subtle effect or white for clean contrast.
For a bolder look, paint the medallion a metallic gold or matte black.
This $15 to $40 upgrade makes a builder-grade light fixture look like it belongs in a far more expensive home. It takes under an hour from start to finish.
String Lights Across the Ceiling
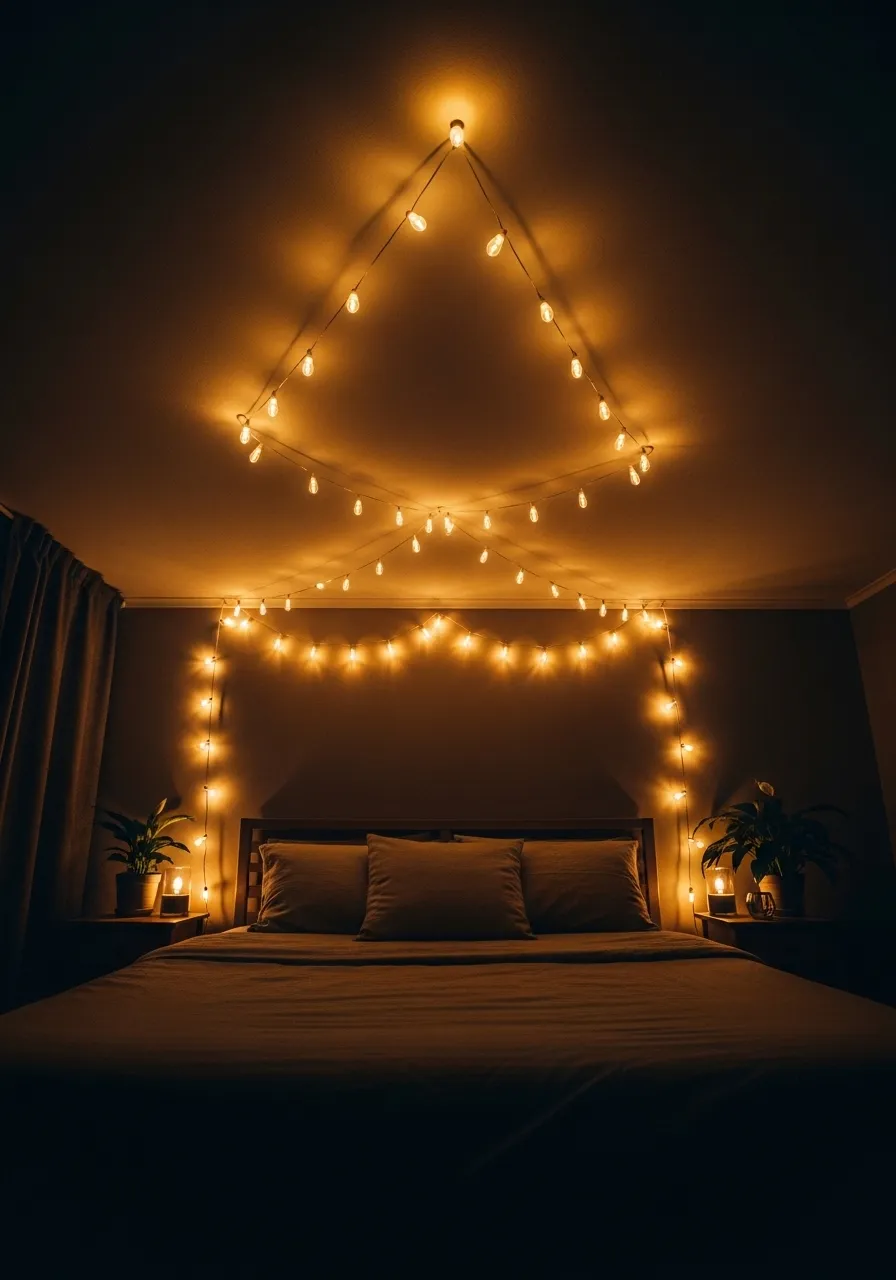
String lights on a ceiling create an atmosphere unlike almost anything else.
They are warm, magical, affordable, and require zero tools beyond a few small adhesive hooks.
Warm white Edison bulb string lights are the most popular choice. They cast a glow that feels like candlelight without the fire risk.
The simplest approach: run parallel rows of string lights from one wall to the other using adhesive command hooks. Space the rows about 12 to 18 inches apart for a full, starry ceiling effect.
For a bedroom, this setup costs $20 to $50 depending on the size of your room and how many strands you use.
Plug all the strands into one smart plug so you can turn them on and off without crawling under your bed to reach an outlet.
Alternatively, create a starburst effect by attaching all strands to a central point on the ceiling and fanning them outward to the walls. This looks especially dramatic in dining areas and small living rooms.
String lights also work beautifully draped under a sheer canopy for a layered romantic effect.
This is a renter’s best friend. Command hooks come off cleanly and the setup takes less than 30 minutes.
Paint a Geometric Pattern or Mural
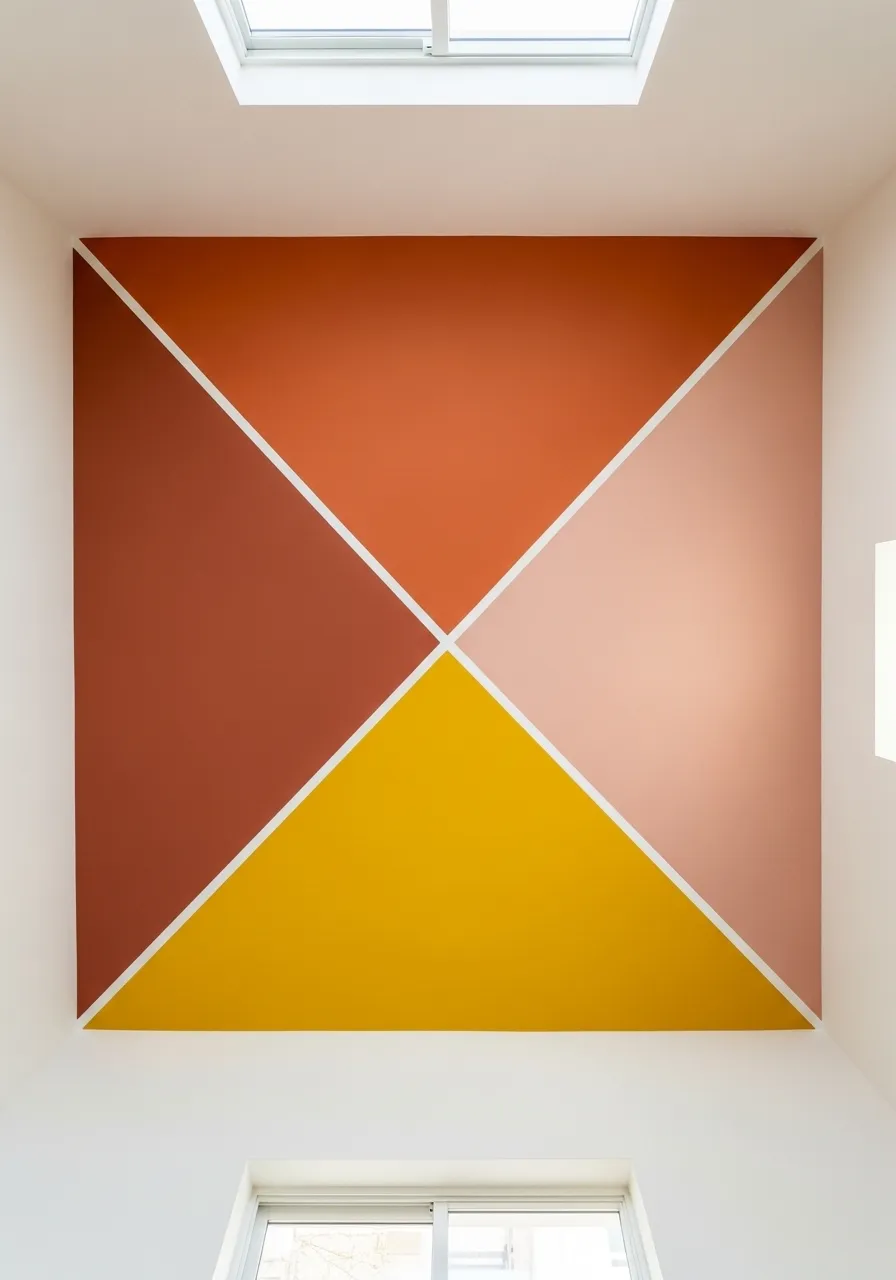
A painted ceiling pattern is one of the most personal upgrades you can do.
You do not need to be an artist. Geometric patterns using painter’s tape are completely achievable for beginners. Triangles, chevron stripes, hexagons, and sunburst shapes are all easy to create with straight lines and tape.
The key is good painter’s tape and patience.
Sketch your design on paper first. Then transfer the measurements to the ceiling using a pencil and a long ruler or chalk line.
Apply the tape carefully along your pencil marks. Press down the tape edges firmly so paint does not bleed underneath.
Paint the sections in your chosen colors, let dry, and carefully peel back the tape. The result is sharp, graphic, and completely one-of-a-kind.
For a two-color stripe pattern, you need just one can of paint and a roll of tape. Total cost can be under $15.
If you want to go bigger, hire a local mural artist for a cloud ceiling, constellation map, or abstract wash. Many emerging artists charge $150 to $400 for a ceiling mural in a small room.
Check Thumbtack, Instagram, or local art school bulletin boards to find affordable artists in your area.
Even a single geometric shape painted in a contrasting color above the bed creates a striking focal point.
Hang Macramé or Woven Textile Panels
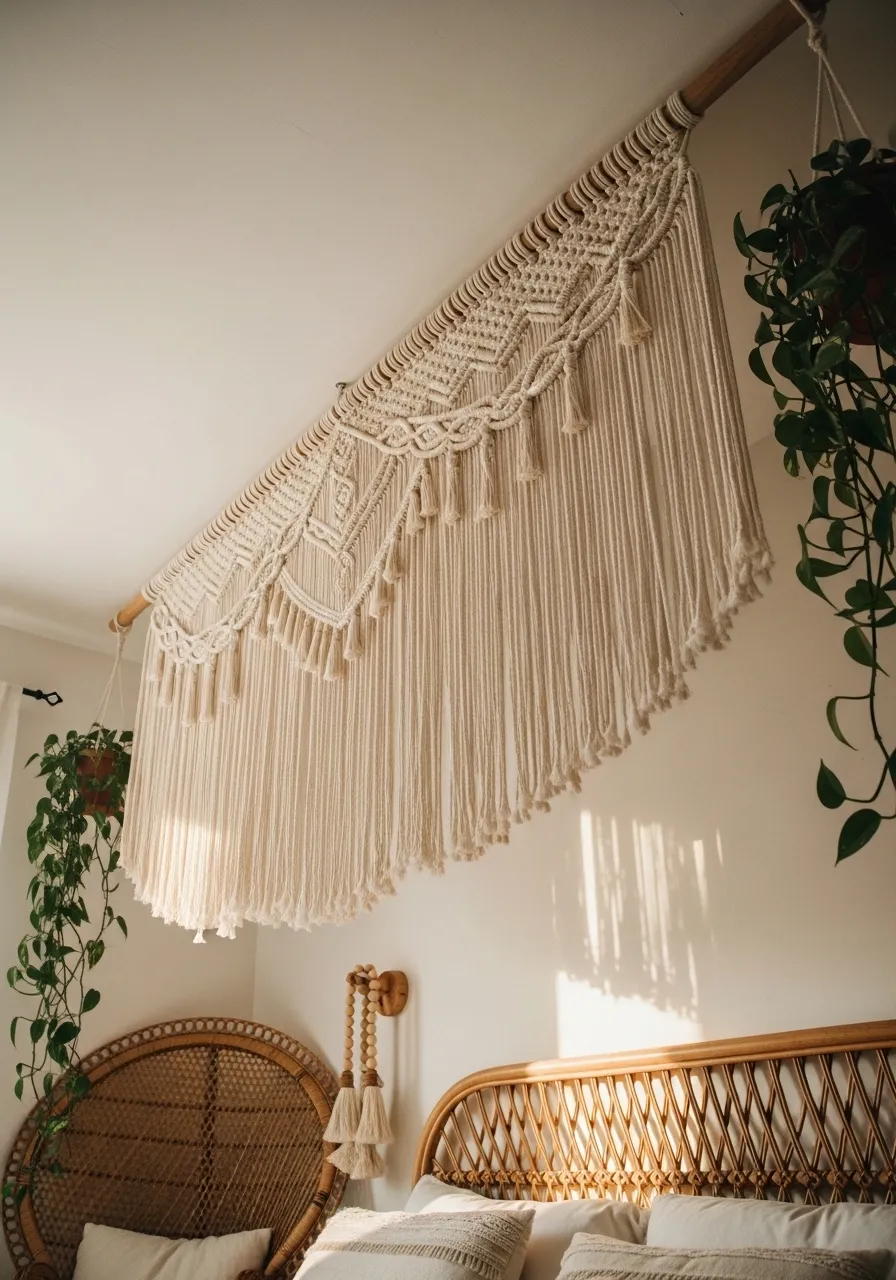
Woven textile panels bring warmth, texture, and a handmade feel to any ceiling.
Traditionally used as wall hangings, macramé and fiber art pieces work beautifully when suspended horizontally from the ceiling. They create a soft canopy-like effect above a bed, dining table, or sitting area.
A 36-inch macramé panel hung from a wooden dowel costs $30 to $80 depending on whether you buy it or make it yourself.
Making your own is genuinely beginner-friendly. A basic square knot macramé panel takes about three to four hours and uses only one type of knot. All you need is cotton macramé cord and a dowel.
Dozens of free tutorials on YouTube walk through the process step by step.
For a ceiling installation, attach the dowel to two ceiling hooks using clear fishing line or jute rope for a natural look.
Cluster two or three panels at different heights and widths for a layered, organic canopy.
This works especially well in bedrooms, nurseries, reading nooks, and home yoga spaces.
The texture of woven fiber absorbs sound and softens the hard lines of a room. It is also one of the few ceiling decor options that is completely removable and can follow you to your next home.
Add Recessed Lighting for a Clean, Modern Look
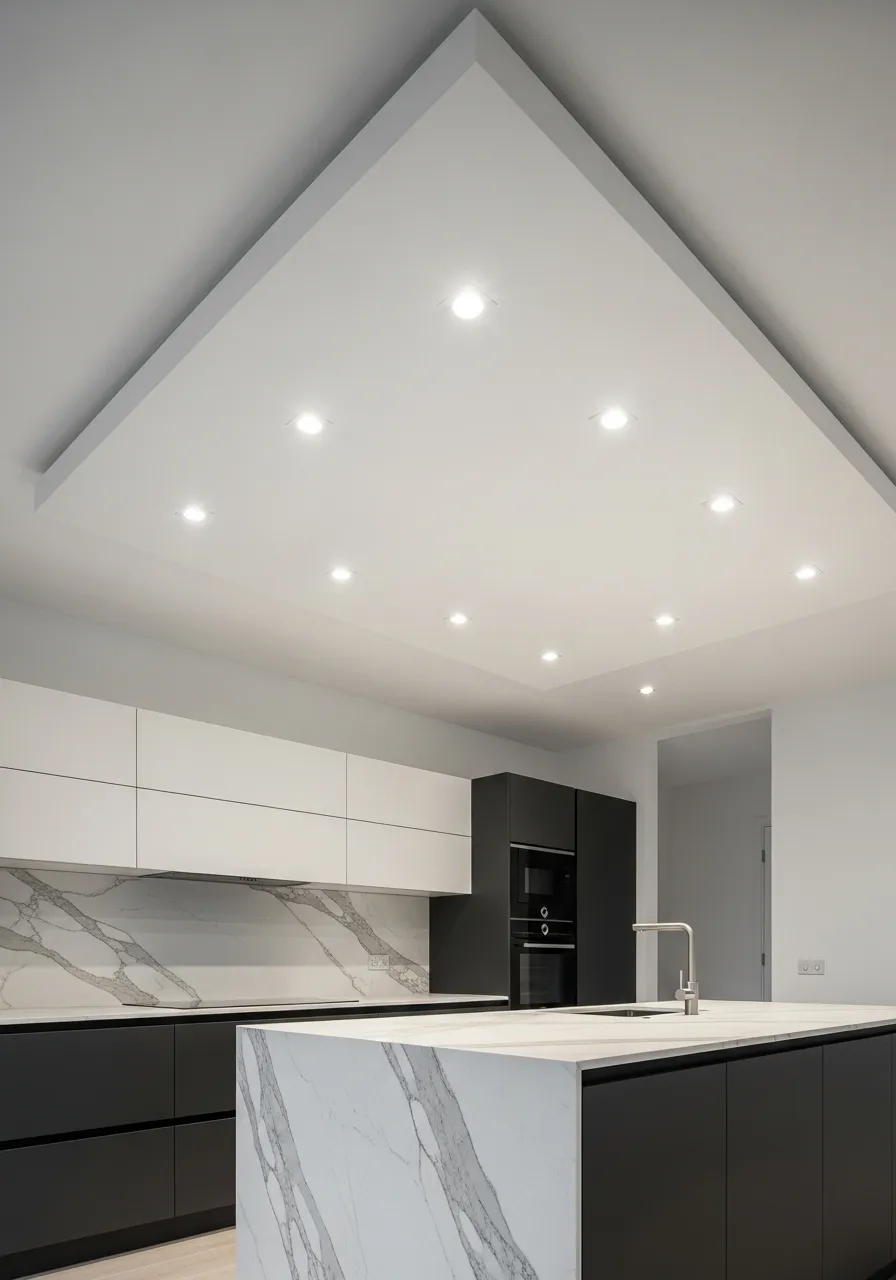
Recessed lighting is the most polished ceiling upgrade for a modern or minimal home.
Unlike surface-mounted fixtures, recessed lights sit flush inside the ceiling. They create a clean, uncluttered look while providing excellent ambient and task lighting.
LED retrofit kits make this accessible without full rewiring. These kits fit into existing light fixture holes and convert a standard junction box into a recessed light in minutes.
If you are adding brand new recessed lights, you will need to run electrical wire and cut holes in the drywall. This is a job for a licensed electrician in most cases.
The electrician cost for installing four to six new recessed lights typically runs $200 to $500 depending on your location and ceiling type.
Choose warm white LEDs (2700K to 3000K) for living areas and bedrooms. Cool white (4000K) works better in kitchens and home offices.
Dimmer switches paired with recessed lighting are a game-changer. They let you shift the mood from bright and functional to soft and relaxed with a single slider.
For existing fixtures, LED retrofit kits cost as little as $15 each and take under 10 minutes to install per light.
This is one upgrade that adds genuine resale value to a home.
Create a Coffered Ceiling with Paint
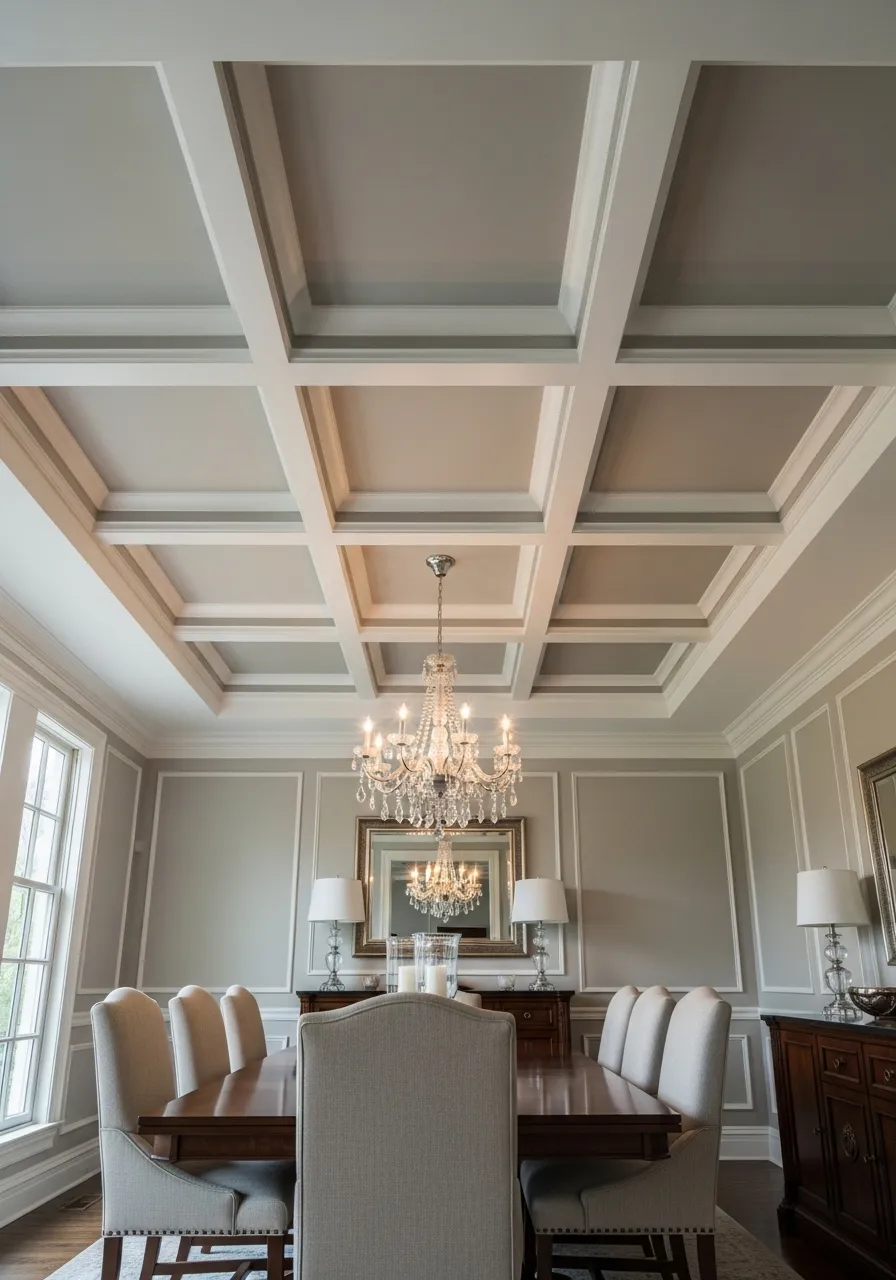
A coffered ceiling looks like a major renovation but you can fake it with paint.
Real coffered ceilings are built from wood beams and panels. The faux version uses paint to create the illusion of recessed panels using shadow and highlight.
Two colors are all you need: a lighter shade and a slightly darker shade.
Start by mapping out your grid with pencil and a ruler. A typical grid has squares or rectangles spaced 18 to 24 inches apart across the ceiling.
Use painter’s tape to outline each “beam.” Paint the outer section of each square in the darker shade to simulate shadow depth. Paint the inner panel in the lighter shade.
When the tape comes off, the result looks remarkably three-dimensional from below.
This effect costs the price of two cans of paint, usually under $50 total.
You can also create a faux coffered look using flat molding strips adhered to the ceiling in a grid pattern. This gives actual physical depth instead of just painted depth. Thin MDF molding strips cost $1 to $2 per foot.
Either version adds architectural character to a flat ceiling and makes a room feel more formal and intentional.
This works especially well in dining rooms, home offices, and living rooms where you want a traditional, polished feel.
Hang Driftwood or Branch Installations
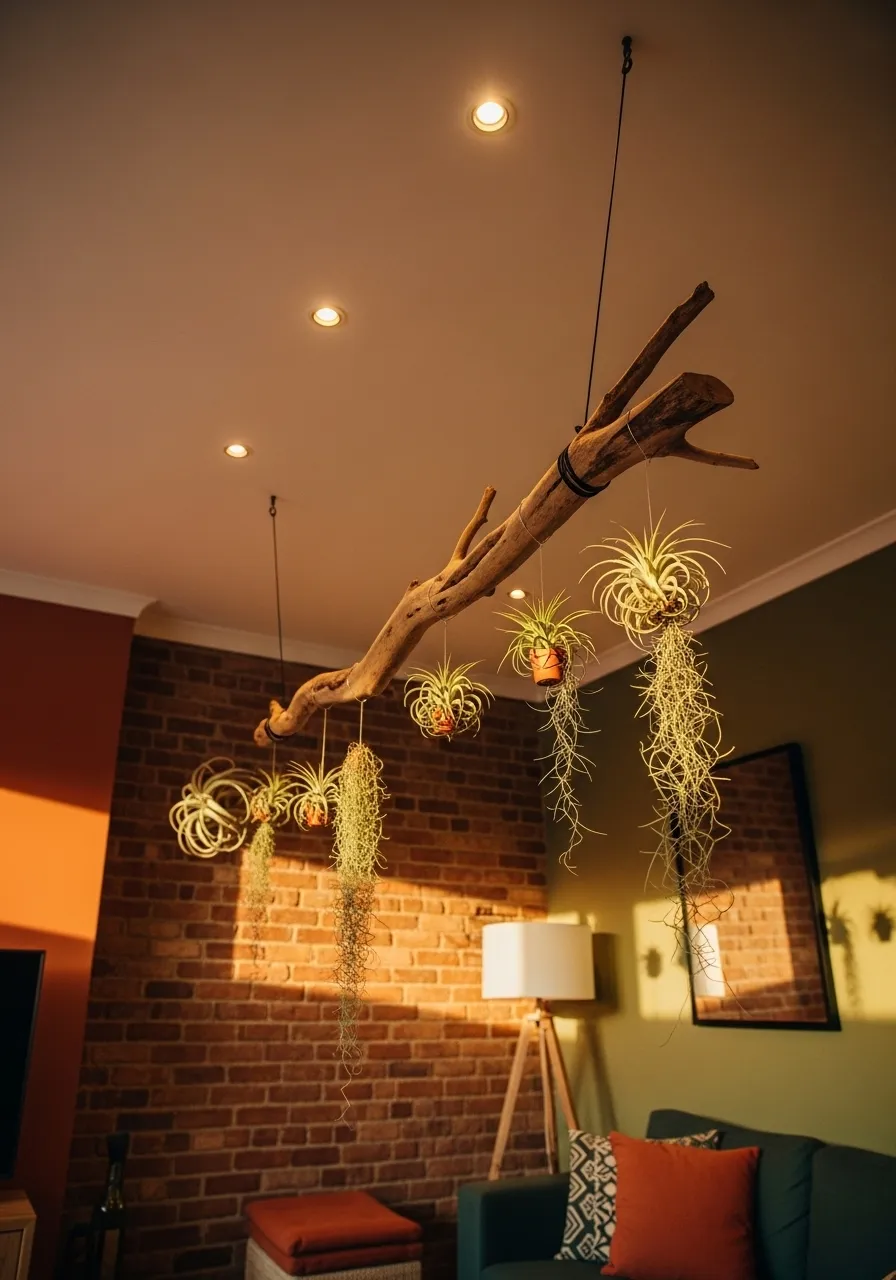
Natural wood suspended from a ceiling brings an organic, sculptural energy to a room.
Driftwood, thick branches, bamboo poles, and reclaimed beams can all become ceiling art when hung with intention.
The most basic version is a single branch hung horizontally from two ceiling hooks using rope, leather cord, or thin metal cable.
From the branch you can hang trailing air plants, dried flowers, small pendant lights, macramé pieces, or hanging terrariums.
This is popular in living rooms, dining areas, and entryways.
Sourcing the materials costs almost nothing. Driftwood can be found at beaches, riverbeds, or craft stores. Thick branches can be collected after a storm or purchased at a garden center.
Let the wood dry fully before bringing it inside to prevent moisture damage or insects.
Mount two ceiling hooks directly into joists for a secure installation. Toggle bolts work if you cannot find a joist above your desired spot.
Use rope rated for at least 10 to 20 pounds for safety, even if your branch weighs far less.
The visual effect is like having a piece of nature sculpture permanently installed in your room. It softens modern interiors and adds incredible texture to spaces that feel too sterile.
Install Wood Planks for a Shiplap or Barn Wood Ceiling
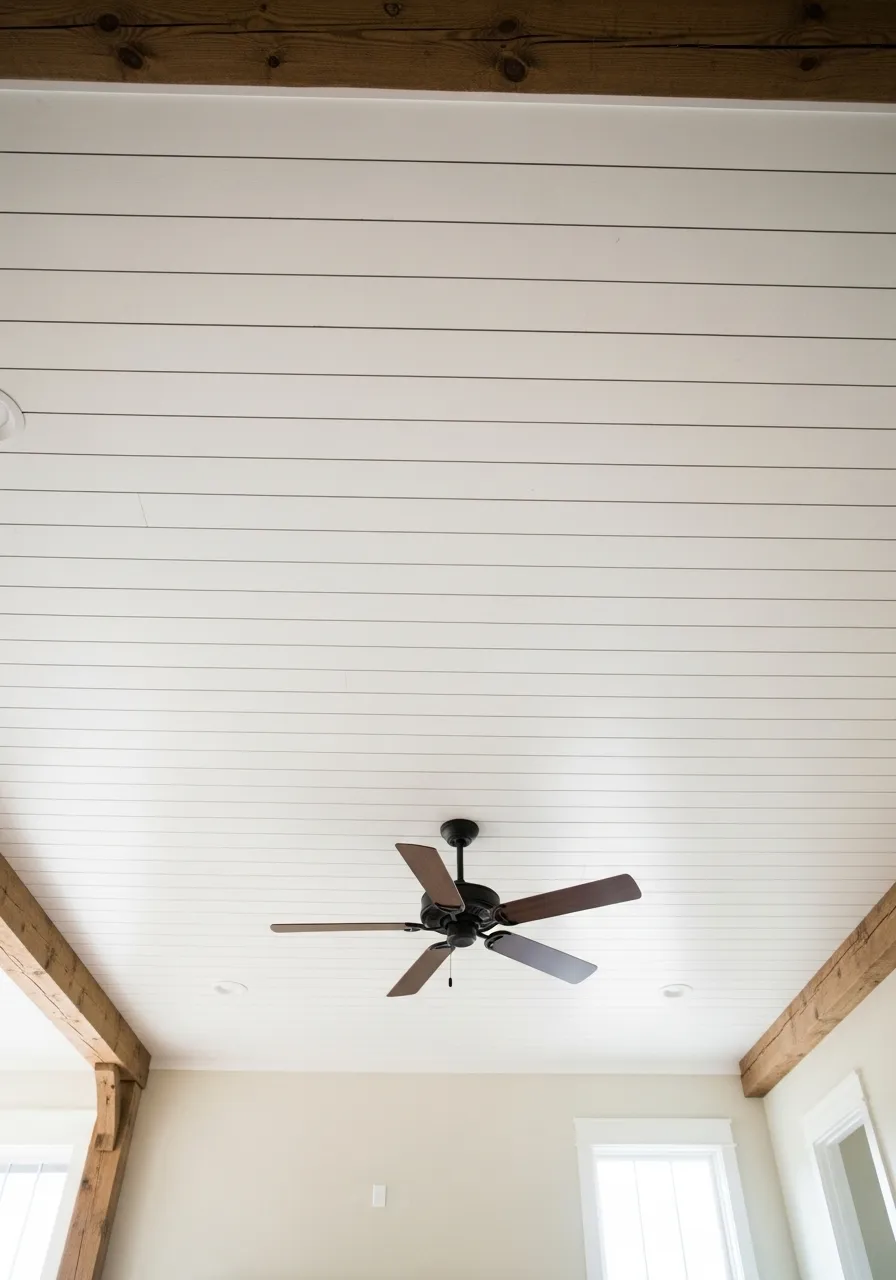
Wood plank ceilings are warm, textured, and deeply satisfying.
Real shiplap or tongue-and-groove ceiling planks create a farmhouse or Scandinavian feel instantly. They bring natural material into the room at the most unexpected angle.
Lightweight peel-and-stick wood plank tiles have made this accessible without carpentry skills. They look like real wood but weigh almost nothing and apply directly to a smooth ceiling surface.
Real wood planks are a more involved project. You need a nail gun, furring strips, and at least one helper to hold planks overhead while you fasten them.
Primed pine planks from a home improvement store are the most affordable option. A 12×12 room might use 30 to 40 boards, costing $150 to $300 in materials.
Leave small gaps between planks for a casual shiplap look. Butt them tightly together for a smoother, more formal result.
Stain options include natural honey tones, grey weathered finishes, and whitewash for a beachy coastal feel.
White-painted shiplap is the most popular finish for farmhouse and coastal interiors.
Paint one thick accent beam along the center of the ceiling or install a faux beam kit for even more depth. Faux beam kits are hollow shells of real-looking wood that slip over a mounted board.
Hang a Grid of Potted Plants
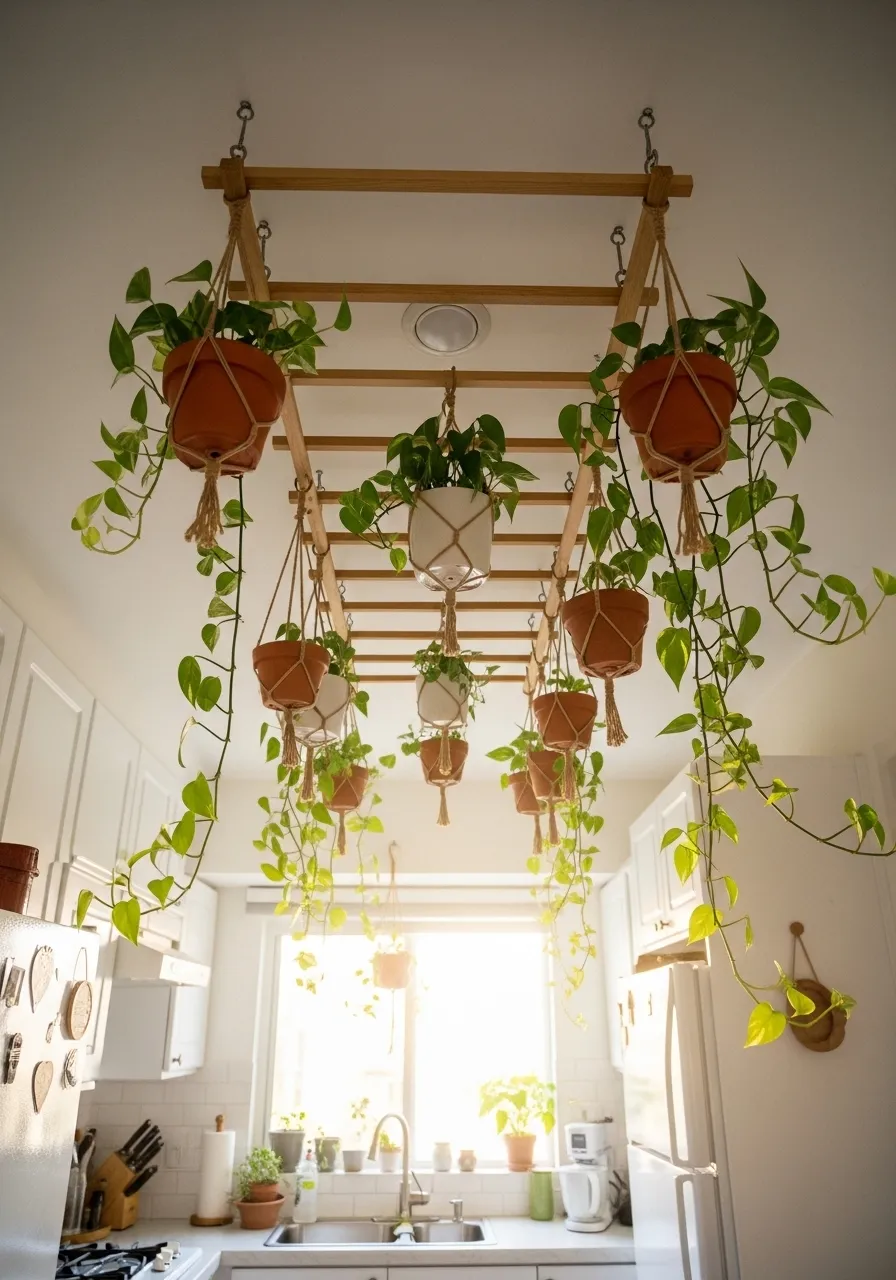
Hanging plants from the ceiling turn a flat, unused overhead space into a living garden.
This works in kitchens, living rooms, sunrooms, and any space that gets decent natural light.
A ceiling-mounted drying rack or wooden ladder hung horizontally serves as the perfect base. These hold multiple hooks and spread the weight load across a larger ceiling area.
Mount the rack using two to four ceiling hooks screwed into joists. Then hang individual pots from S-hooks using macramé hangers, jute rope, or metal chains.
Plants that thrive in hanging ceiling positions include pothos, string of pearls, trailing philodendron, spider plants, and heartleaf philodendron.
These are all low maintenance and tolerate a range of light conditions.
Lightweight plastic nursery pots with drainage holes work best for ceiling installations. Keep a tray or small towel handy for watering days.
Group pots at different heights for a cascading, layered effect. Mix different plant species and pot colors for a more collected, curated look.
The whole setup including rack, hooks, pots, and plants might run $50 to $120 depending on how many plants you use.
This is one ceiling upgrade that literally grows and changes over time, getting more beautiful with each passing month.
Add Exposed Beams (Real or Faux)
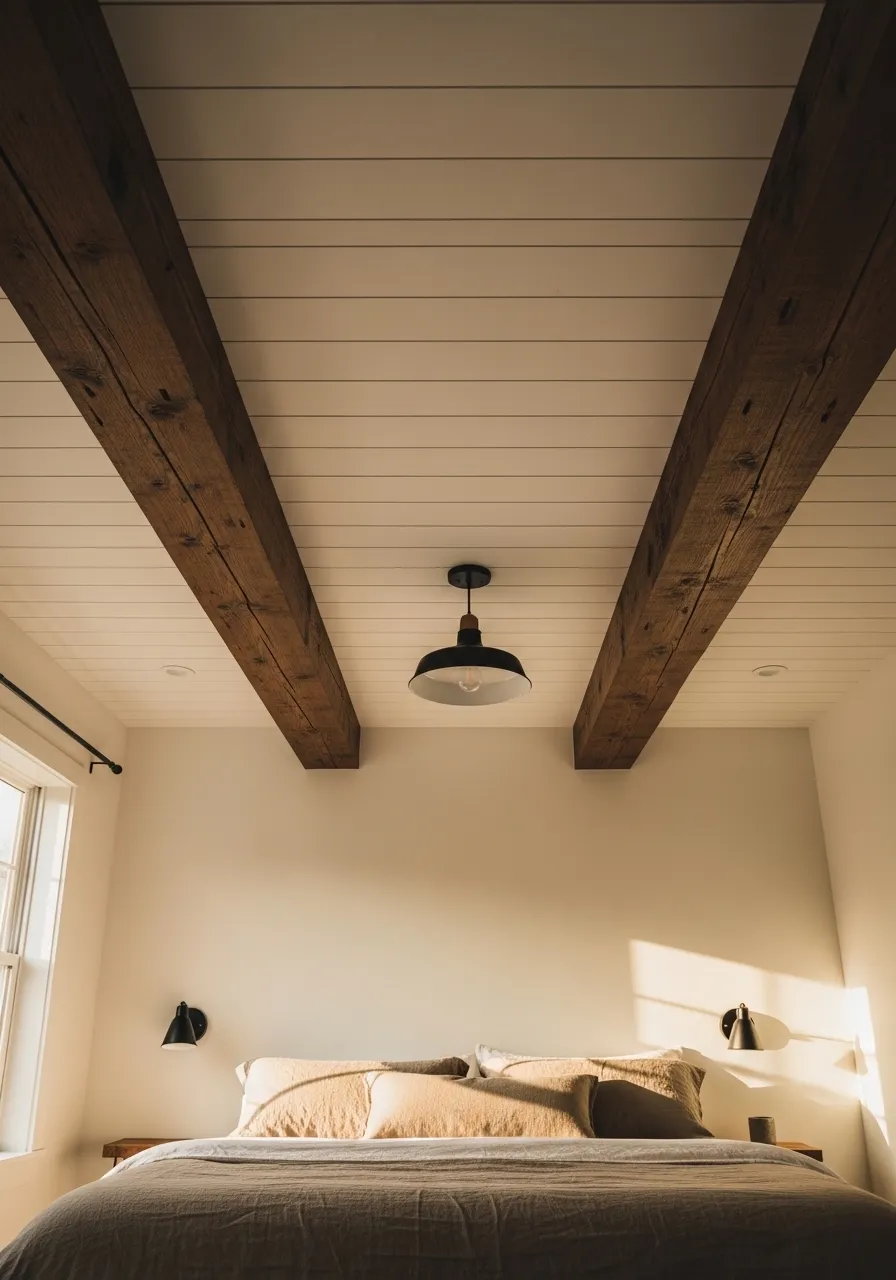
Exposed ceiling beams create an architectural presence that is hard to match.
In older homes, removing the drywall sometimes reveals real structural beams underneath. If that is an option for you, exposing them is one of the most dramatic ceiling upgrades possible.
For everyone else, faux beam kits are a genuine and affordable solution.
Faux beams are three-sided hollow shells made from real wood, polyurethane, or high-density foam. They slide over a 2×4 board mounted to the ceiling and look exactly like solid structural beams from below.
A set of two to three faux beams for a living room costs $150 to $400 depending on the material, finish, and size.
Knotty wood tones work best in farmhouse and rustic rooms. Smooth painted beams suit modern and coastal spaces. Heavily weathered grey beams suit industrial and bohemian interiors.
The installation involves mounting a 2×4 or 2×6 board to the ceiling directly into joists, then sliding the faux beam shell over it and securing with finish nails or screws.
One or two people can complete a typical room in a weekend.
This single change makes a flat ceiling look like it has history, character, and structural purpose, none of which require tearing anything down.
Mirror Tiles or Mirrored Ceiling Panels
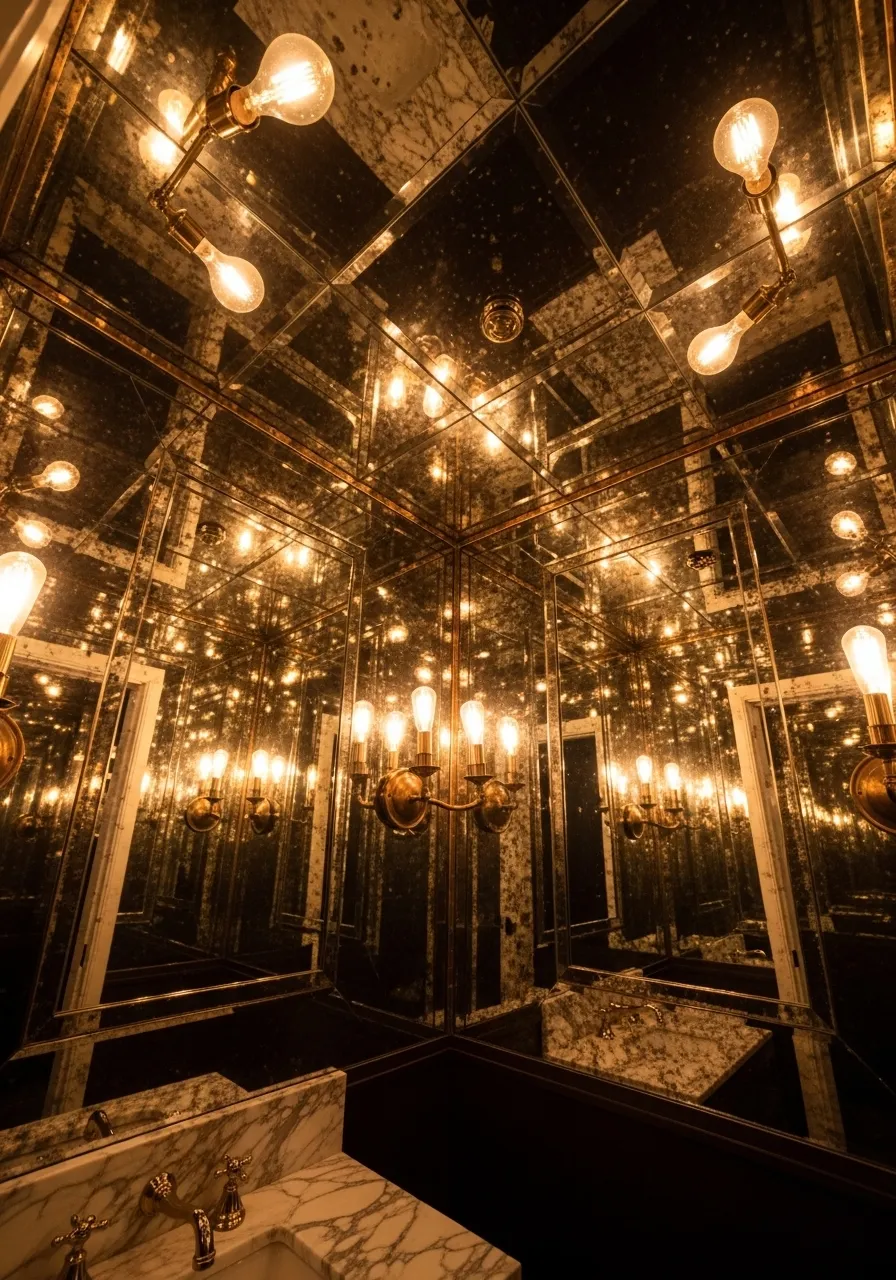
Mirrored ceilings are bold, glamorous, and surprisingly practical in small spaces.
Mirrors on the ceiling reflect light and create the illusion of height. A low-ceilinged room feels noticeably taller when overhead surfaces reflect the space back at you.
Stick-on mirror tiles are the easiest starting point. They come in square, hexagonal, and rectangular formats. Each tile has a peel-and-stick adhesive backing.
A box of 24 four-inch square mirror tiles costs around $10 to $20.
For a full ceiling installation, use larger 12×12 inch mirror tiles secured with mirror adhesive glue rather than just peel-and-stick backing.
Work in a grid pattern starting from the center. Use a level or chalk line to keep rows straight. Even small misalignments become visible in the reflections.
This works beautifully in powder rooms, small entryways, home bars, and dining rooms where you want drama.
Antique mirror tiles have a slightly smoky, aged finish that is less intense than bright standard mirror. They reflect light more softly and give a moody, sophisticated result.
Pair mirrored ceiling tiles with warm amber bulbs rather than cool white lights to prevent the look from feeling clinical.
Clean with glass cleaner and a lint-free cloth. Avoid spray bottles directly on the tiles to protect the adhesive backing.
Use Stencils for a Repeating Pattern
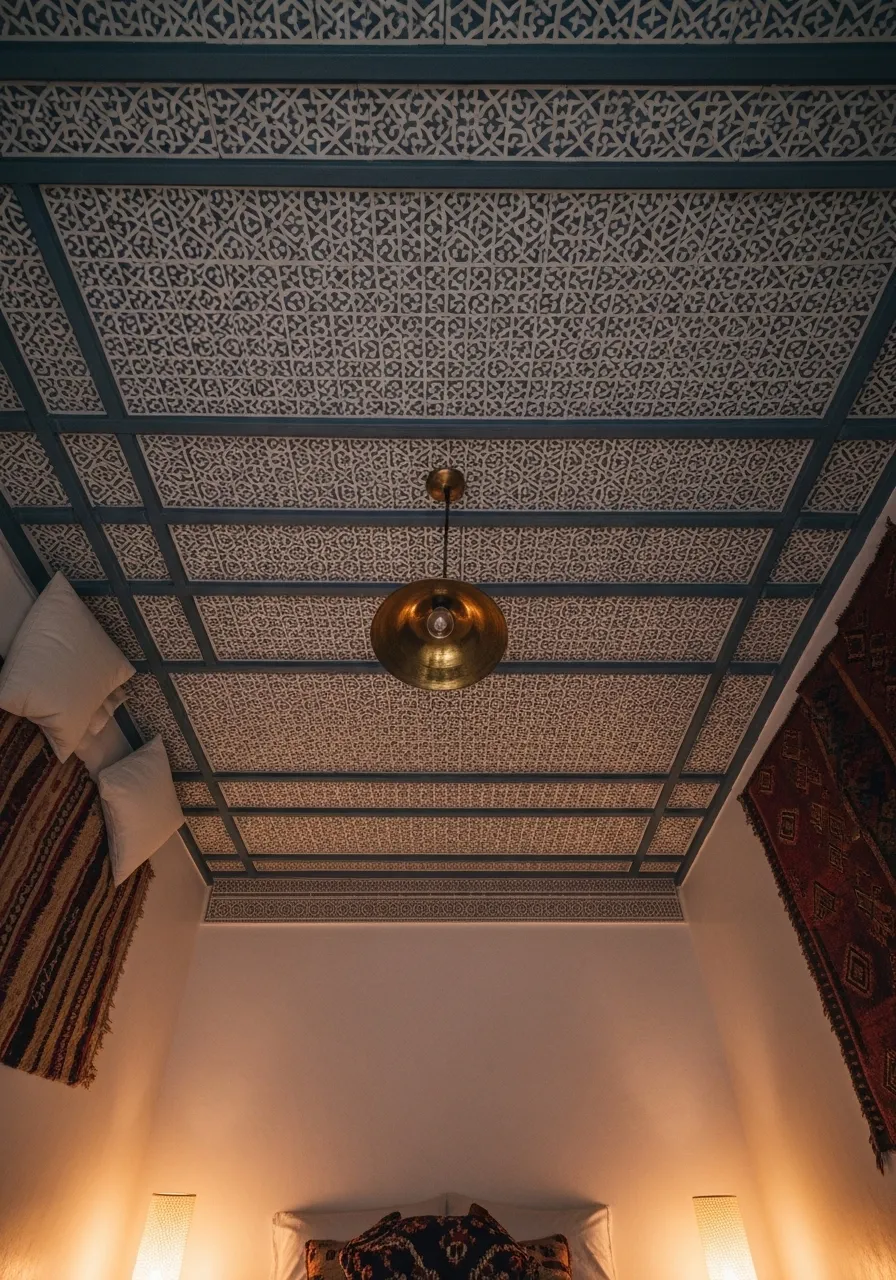
Stenciling a ceiling pattern is one of the most affordable ways to add real artistry to a room.
Ceiling stencils cost $15 to $40 and are completely reusable. You roll or brush paint through the stencil, move it along the ceiling in a repeating grid, and the pattern builds up quickly.
Popular styles include Moroccan tile, Art Deco geometric, Indian block print, and damask.
Choose a color that is just two or three shades different from your base ceiling color for a subtle, textured effect. Or go high contrast with a deep color on white for a bold, graphic result.
The key is keeping your stencil registration consistent. Most stencils have alignment marks or corner holes to help you line up each repeat accurately.
Apply the stencil paint with a dense foam roller or a round stippling brush. Use minimal paint and build up in light layers to avoid bleeding under the stencil edges.
Work in sections across the ceiling from one end to the other.
This project takes a weekend but requires no special skills. The result looks like expensive custom wallpaper or hand-painted tile work.
Great for bathrooms, bedrooms, and dining rooms where you want a pattern without committing to full wallpaper.
Hang a Dreamcatcher or Woven Hoop Installation

A large dreamcatcher or woven hoop hanging from the ceiling is one of the most affordable statement pieces you can make.
Single dreamcatchers work in nurseries, meditation spaces, and boho-style bedrooms. A cluster of different sized hoops hung at varying heights creates a gallery installation feel.
Embroidery hoops, grapevine wreaths, and willow rings all serve as bases for this kind of ceiling art.
Wrap the outer ring in yarn, leather cord, or twine for a finished look. Fill the center with a basic woven web using crochet thread or string. Hang feathers, dried flowers, beads, or ribbon from the bottom.
Full kits are available online for $10 to $25. Making your own is even cheaper at around $5 to $10 in materials.
Suspend from a single ceiling hook using a length of clear fishing line for a floating, minimal look. Or use braided jute rope for a more visible, intentional hanging.
Cluster five to seven hoops of varying sizes above a reading chair or bed. Hang them at different heights between six and 18 inches from the ceiling.
This creates a modern fiber art installation that feels collected and hand-crafted rather than store-bought, even when the individual pieces are very affordable.
Install a Skylight or Sun Tunnel (or Fake One)
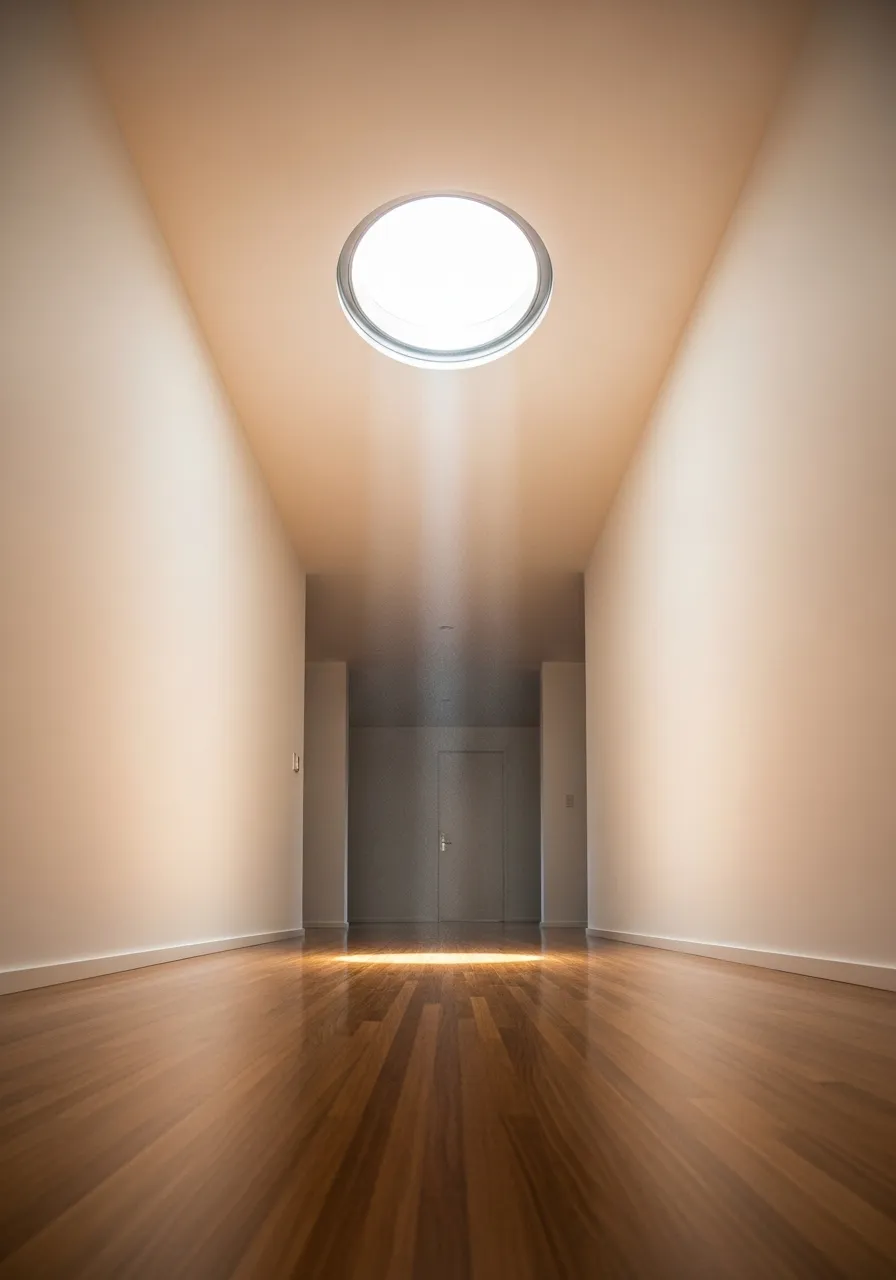
Natural light from above changes everything about how a room feels.
A real skylight is a significant renovation costing $1,500 to $4,000 installed. But a solar tube or sun tunnel is a much more accessible option at $200 to $600 including installation.
A sun tunnel is a reflective metal tube that runs from the roof to the ceiling, capturing daylight and directing it straight into the room below. No room alteration or drywall work is required beyond cutting a small hole.
For renters or those not ready for any cutting, the faux skylight option has gotten remarkably convincing.
Sky ceiling panels are LED flat panels printed with a photo-realistic image of a blue sky with clouds. They mount flush to the ceiling and glow with soft daylight-mimicking light.
These panels cost $80 to $300 depending on size and are installed like a normal light fixture.
The effect is psychological but real. Rooms with real or simulated natural overhead light feel more open, calming, and connected to the outdoors.
This works especially well in interior bathrooms, dark hallways, home offices, and basements.
Pair a sky panel with 5000K cool white light for the most realistic daylight simulation and a few hours of genuine mood improvement every single day.
Drape Fabric Across the Entire Ceiling

Full ceiling fabric draping is dramatic, romantic, and completely reversible.
This technique, popular in event design and Middle Eastern-inspired interiors, involves gathering long lengths of lightweight fabric from a central point and draping them outward to the walls.
Sheer organza, voile, and lightweight muslin are the most popular choices because they billow softly and diffuse light beautifully.
Start with a strong central ceiling hook. Run a second hook or curtain rod along each of the four walls near the ceiling line.
Gather all fabric lengths at the center hook using a large ring or carabiner. Pull each panel outward toward a wall hook, leaving a gentle swag in the middle.
A 10×10 room might need 10 to 12 panels of 108-inch curtains for full coverage.
This fabric can be purchased inexpensively in bulk from fabric wholesalers or discount curtain stores.
Budget for around $60 to $150 in fabric for a typical bedroom depending on ceiling height and how full you want the draping.
String fairy lights between the fabric layers for an otherworldly glow at night.
This look works in bedrooms, dining rooms, sunrooms, and home event spaces. It is a complete atmosphere shift that takes only a few hours and leaves no permanent marks.
Conclusion
Your ceiling has been waiting this whole time.
Every idea in this list is doable without major construction, a large budget, or professional help. Some cost as little as $10. Others take just one afternoon. The point is to stop ignoring the space above your head and start treating it as part of your design.
Start with one small change. Swap the light fixture. Add a medallion. Paint it a shade darker than your walls. Then see how the room shifts.
You will quickly realize that the ceiling is not just structural background. It is one of the most expressive surfaces in your home, and now you know exactly what to do with it.