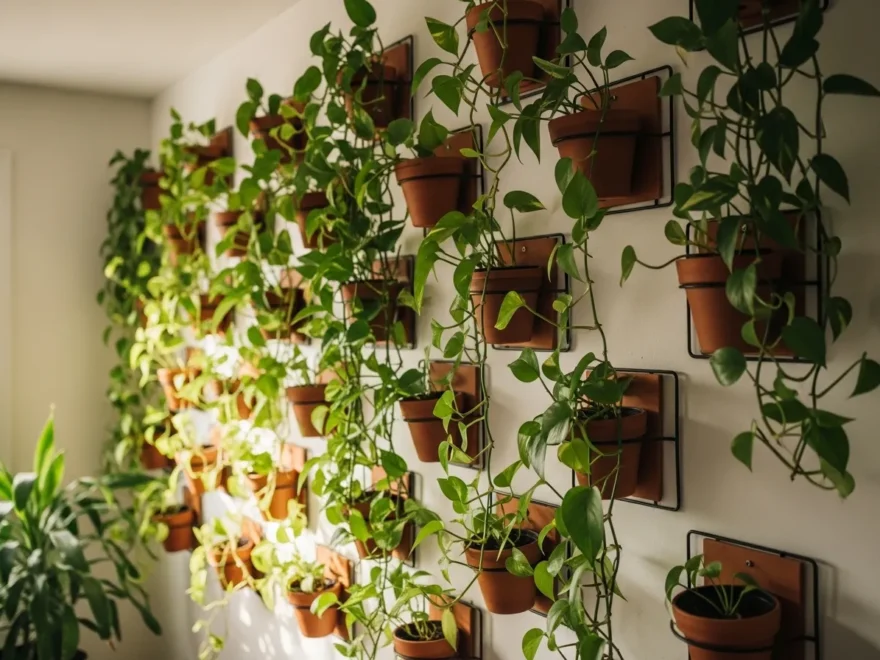
Your walls deserve more than blank paint. Plant wall decor ideas turn any surface, big or small into a living, breathing statement. Whether you rent a tiny apartment or own a sprawling home, there is a plant wall idea that fits your space, your budget, and your skill level. This guide walks you through 18 practical, wallet-friendly ways to bring greenery to your walls. No gardening degree required. No expensive contractor needed. Just simple ideas you can act on today. If you’re also exploring home office decor ideas, adding greenery, smart lighting, and organized layouts can help create a workspace that feels calmer, more productive, and visually refreshing.
1. Pegboard Plant Display
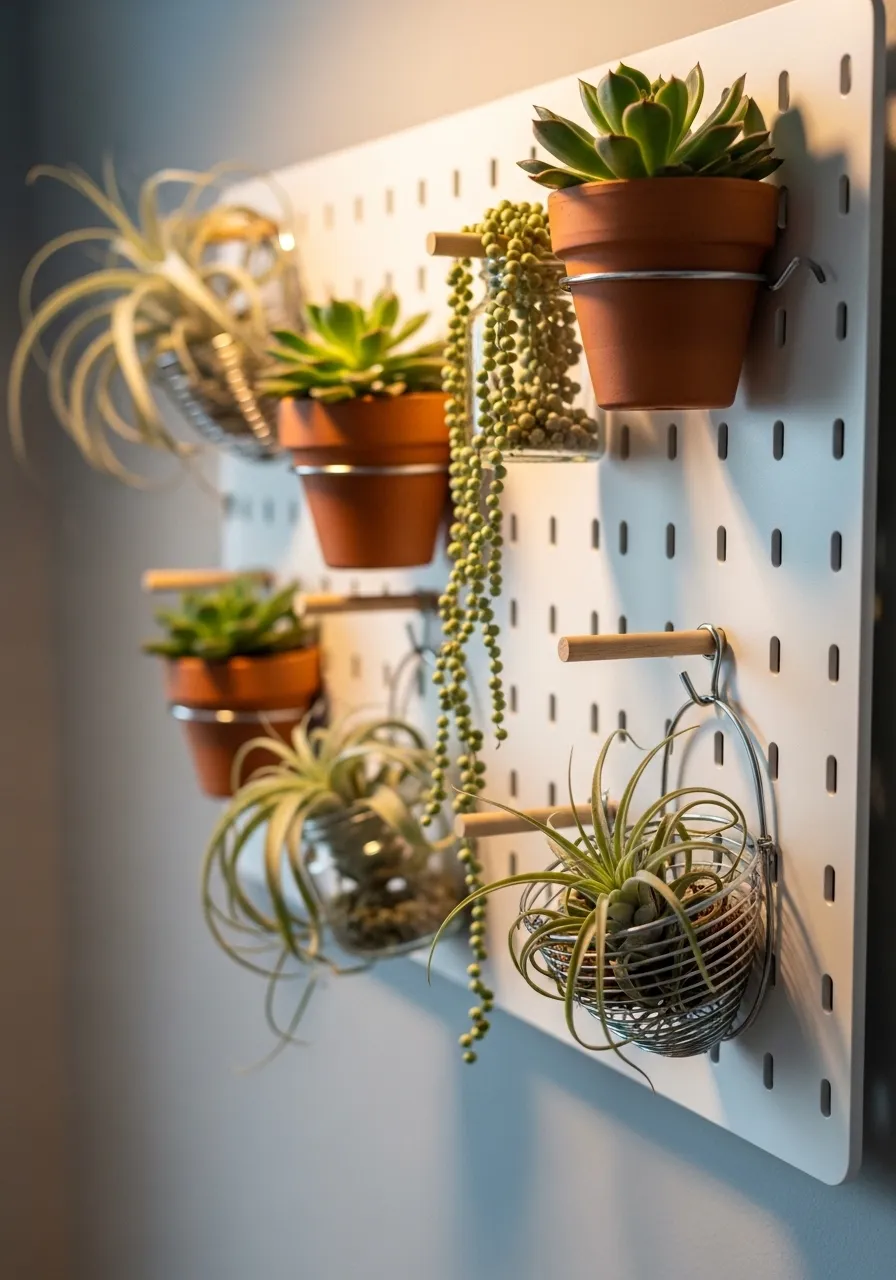
A pegboard is one of the most affordable starting points for a plant wall.
You can find a standard 2×4 foot pegboard at any hardware store for under $20. Paint it white, black, or leave it natural wood — whatever matches your room.
Add hooks and wooden dowels to hang small pots, mason jars, and trailing plants. The beauty here is flexibility. You can rearrange everything in minutes without a single nail hole.
Start with easy plants like pothos, string of pearls, or succulents. These tolerate a little neglect and look great cascading from hooks.
Mounting is simple. Use two wall anchors and screws. Keep a small gap between the pegboard and the wall so air circulates — this prevents moisture buildup.
Budget tip: Shop pegboard accessories in the garage-organization aisle. They are the exact same product as “plant pegboard kits” but cost half the price.
This works especially well in kitchens, home offices, and entryways. It doubles as both decor and storage. Hang small scissors, twine, or a watering can alongside your plants for a functional, lived-in look.
Total cost to start: under $40.
2. Floating Shelf Ledge Garden
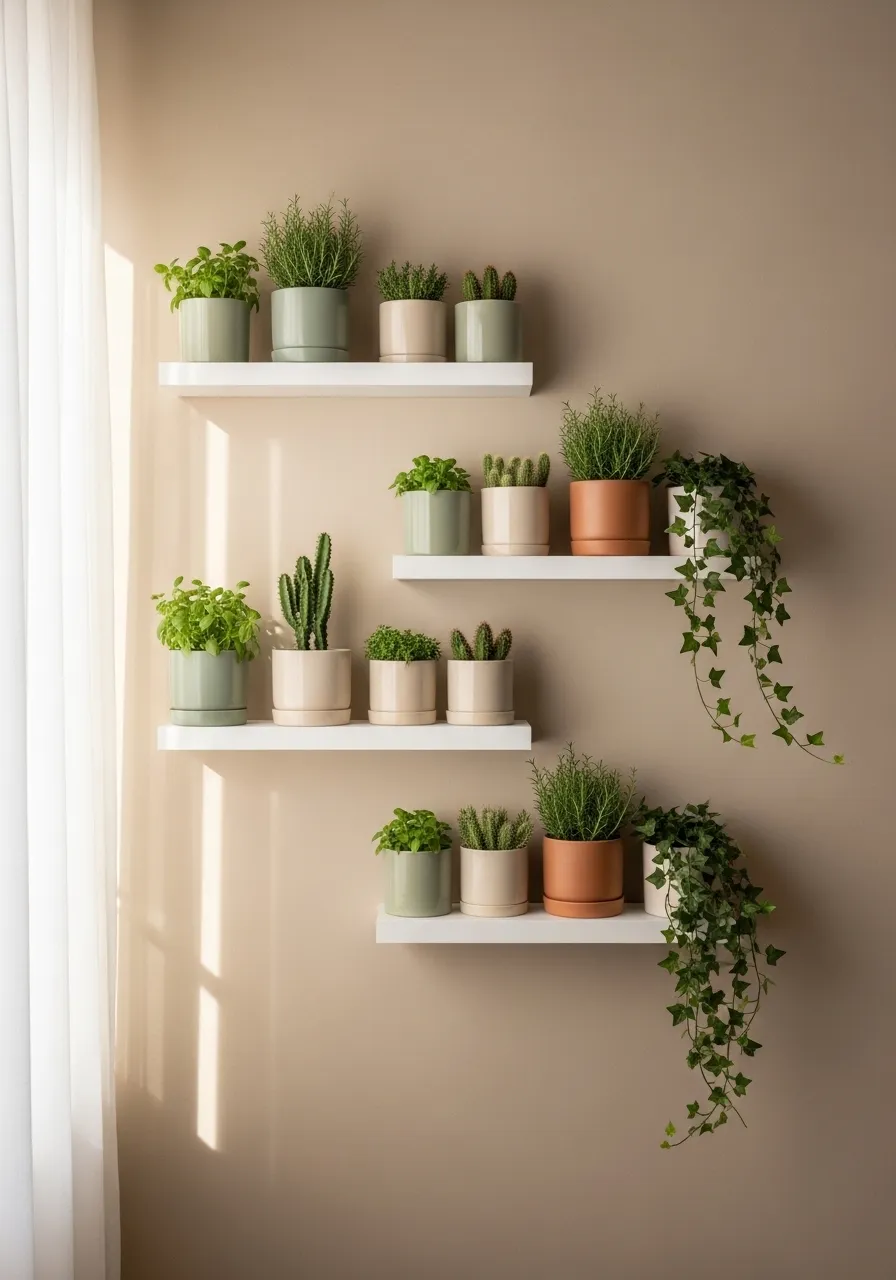
Floating shelves are a classic for a reason. They are simple, clean, and work in any room.
Stagger three shelves at different heights instead of lining them up at the same level. This creates visual movement and makes the display feel more organic, less like a shelf unit.
Use shelves that are 4–6 inches deep. Anything wider and the plants start to look too far from the wall. Anything narrower and the pots become wobbly.
Best plants for this setup: small pothos cuttings in propagation vases, cacti, aloe, and herbs like basil or thyme. Trailing plants on the highest shelf look especially good as they drape down naturally.
Mix pot sizes and materials. Pair a terracotta pot with a small white ceramic one. Add a woven basket liner for texture.
DIY tip: IKEA MOSSLANDA picture ledges cost around $10 each and work perfectly as plant shelves. They have a small lip that stops pots from sliding off.
Install with a stud finder for a secure mount. If you are renting, use heavy-duty adhesive strips rated for 10+ pounds per shelf.
Total cost: $30–$60 for three shelves.
3. Macramé Plant Hanger Wall Cluster
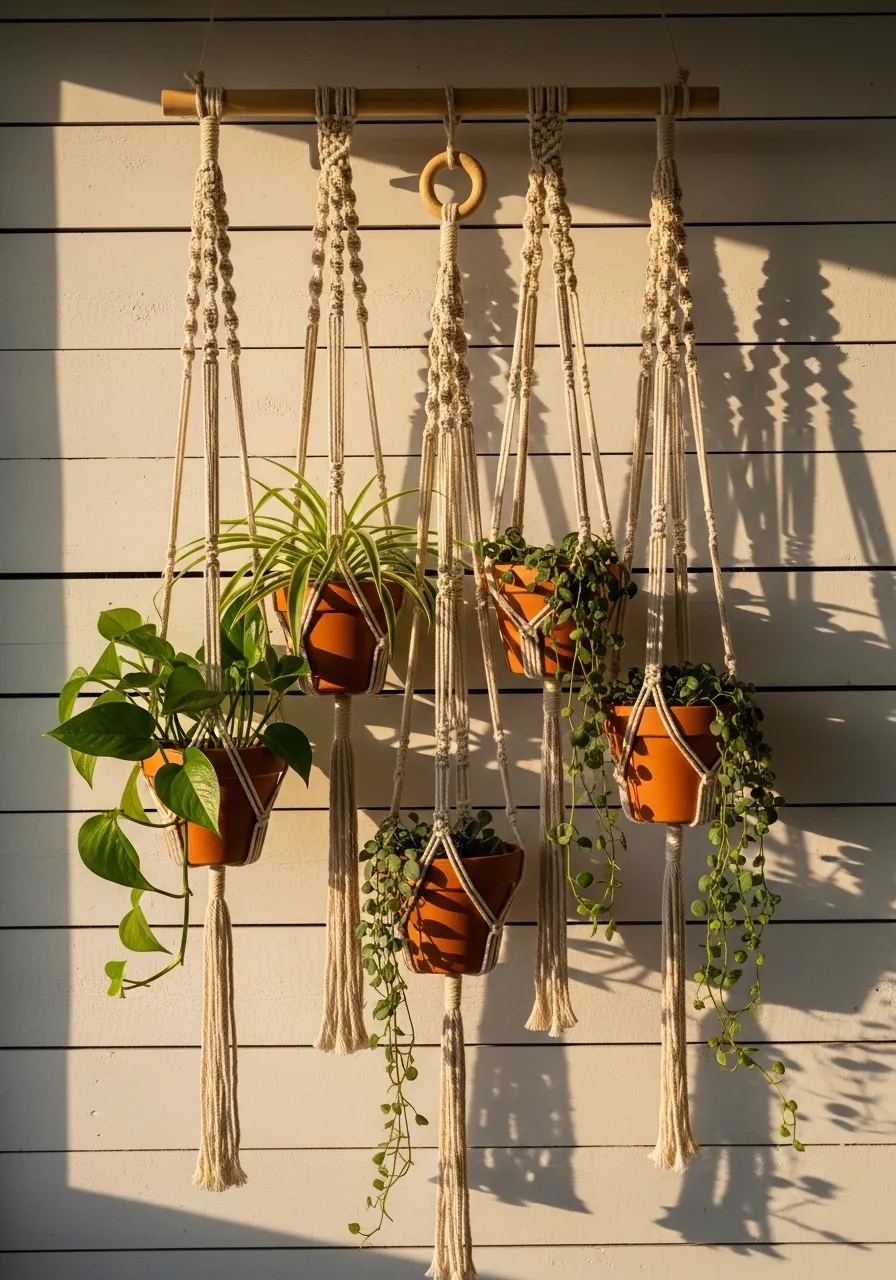
One macramé hanger looks nice. A cluster of five or six looks like art.
You do not need to make them yourself — though that is an option. A set of three basic macramé hangers costs $15–$25 online or at any home goods store.
Mount them at different heights using simple cup hooks screwed into the wall or ceiling. Vary the drop lengths — some low, some high — so the plants form a flowing, layered arrangement.
Pothos and spider plants are perfect for this style. Their long, cascading leaves look dramatic hanging in the air.
To DIY your own: Basic macramé uses only one knot — the square knot. You can learn it from a 10-minute YouTube video. Use 3mm natural cotton rope and a wooden dowel. A single hanger takes about 45 minutes to make and costs roughly $5 in materials.
Keep the color palette simple. Natural rope, terracotta pots, and green plants already have a lot going on visually. Adding brightly painted pots can look cluttered.
Maintenance tip: Macramé holds moisture. Let it dry fully between waterings to avoid mildew in the rope.
Total cost: $20–$50 for a cluster.
4. Repurposed Pallet Vertical Garden
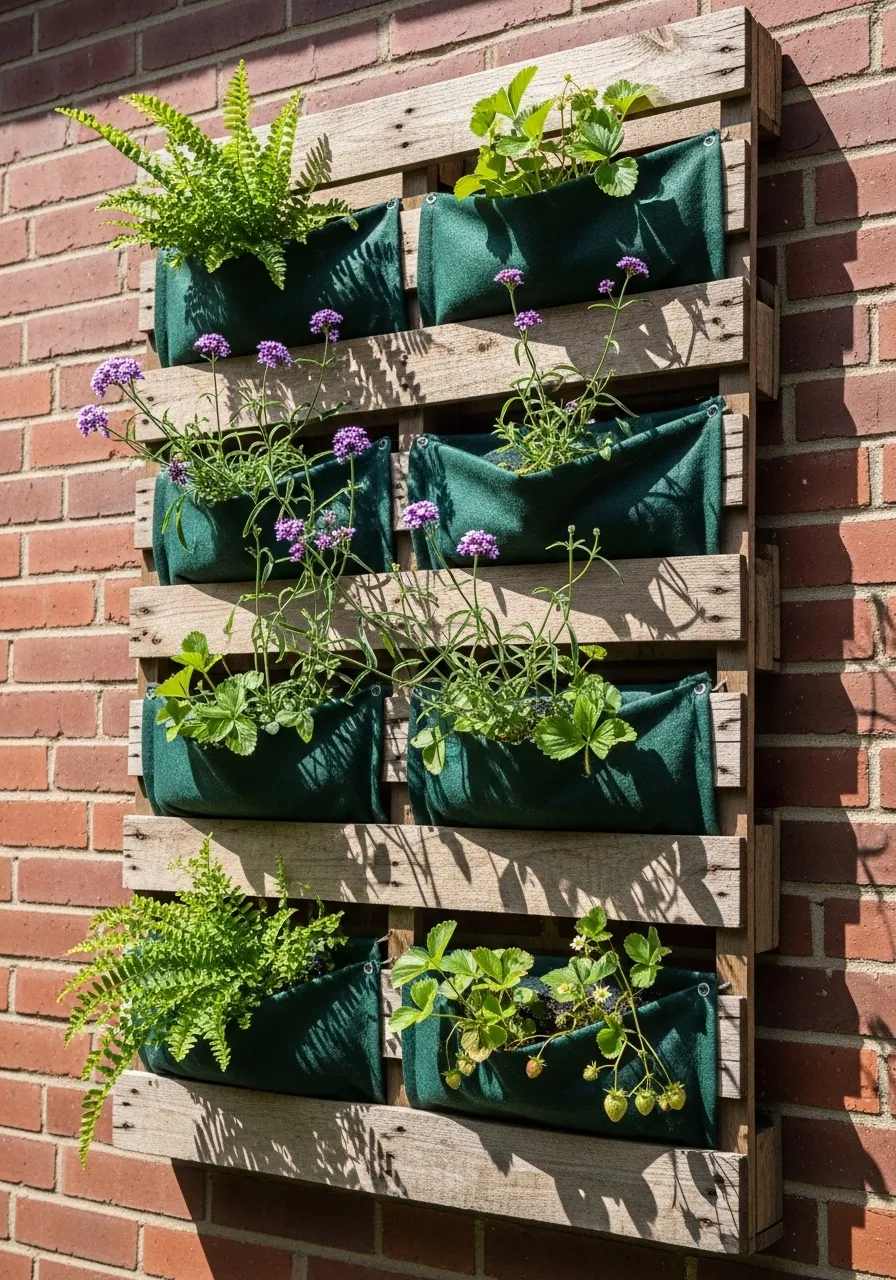
A wooden pallet becomes a planter in an afternoon.
Find a free or cheap pallet — many grocery stores, garden centers, and hardware stores give them away. Look for ones stamped “HT” (heat-treated), not “MB” (methyl bromide treated). The HT ones are safe for plants.
Sand it lightly. Staple landscape fabric to the back and sides to create pockets that hold soil. Leave the front slats open so plants can grow through.
Fill it with: lettuce, herbs, succulents, pansies, or strawberries. These do well in shallow soil and don’t mind the confined space.
Mount it upright on an exterior wall with two heavy-duty L-brackets. For an indoor version, lean it against the wall at a slight angle or mount it flat.
Budget tip: Use garden soil from a bulk bag rather than buying individual small bags. A 40-lb bag costs $5–$8 and fills the entire pallet easily.
Water slowly so the soil absorbs before it runs out. A drip system with a $10 timer makes this even easier if you tend to forget watering.
This is one of the most satisfying DIY plant walls you can build in a single weekend.
Total cost: $0–$30.
5. Grid Wire Trellis with Climbing Vines
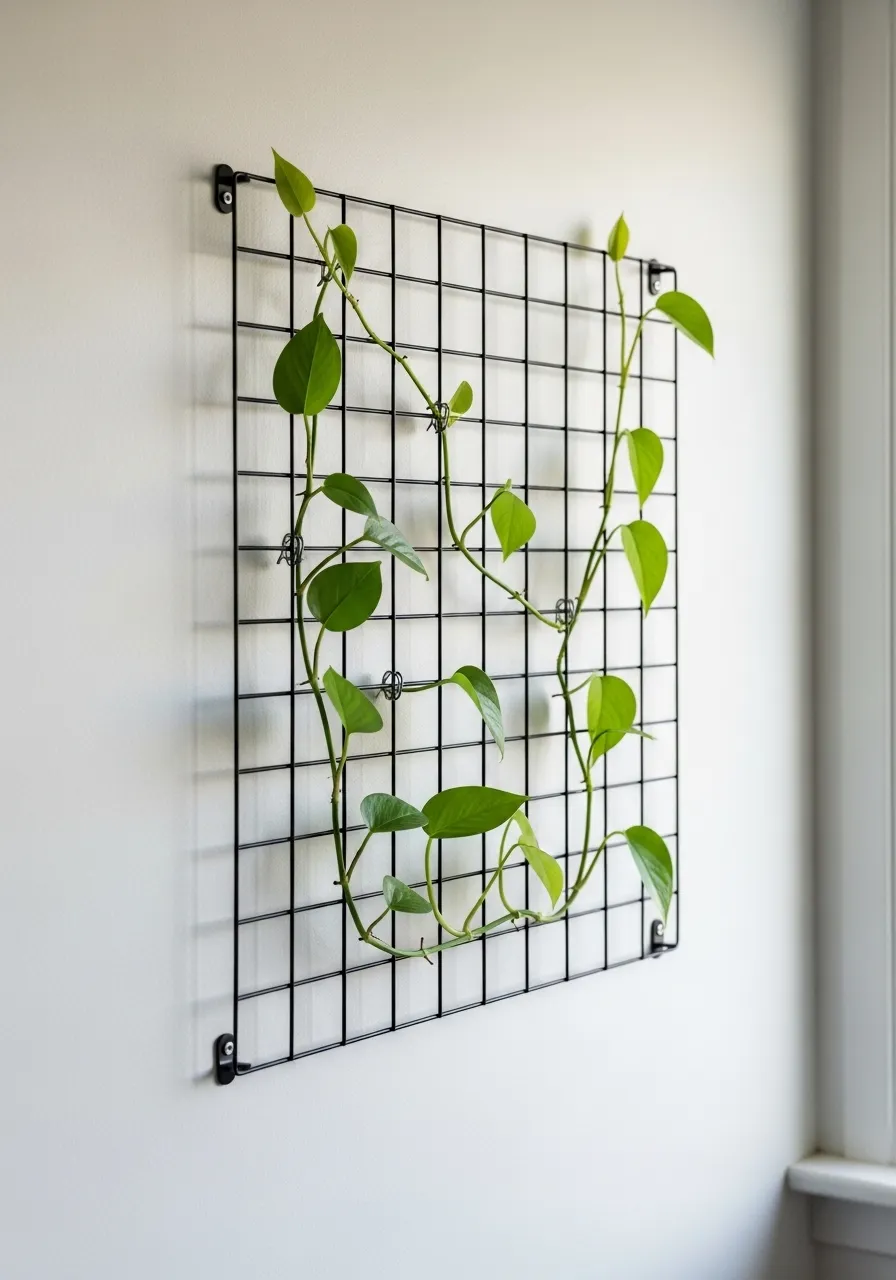
A wire grid trellis turns a bare wall into a living tapestry — slowly, over months.
Start with a simple metal grid panel, often called a “grid panel” or “wire memo board.” These come in black, gold, or white and cost $15–$30. Mount flush to the wall using standoffs (small screws with spacers) to allow airflow behind the panel.
Choose a climbing or trailing plant: pothos, monstera, philodendron, English ivy, or jasmine for outdoors. Use small clips or twist ties to guide stems along the grid wires.
The magic happens over time. In 3–6 months, the vine fills in and the grid disappears behind a wall of leaves.
Position this near a window. Climbing plants need at least moderate light to grow quickly. A north-facing wall will work but growth will be slow.
DIY tip: Make your own trellis using concrete reinforcing mesh (rebar mesh). A 3×5 foot section costs about $8 at a hardware store. Cut it to size with wire cutters, spray paint it black, and mount it.
Clean the leaves every few weeks with a damp cloth. Dusty leaves look dull and absorb less light.
Total cost: $15–$40.
6. Shadow Box Succulent Frame
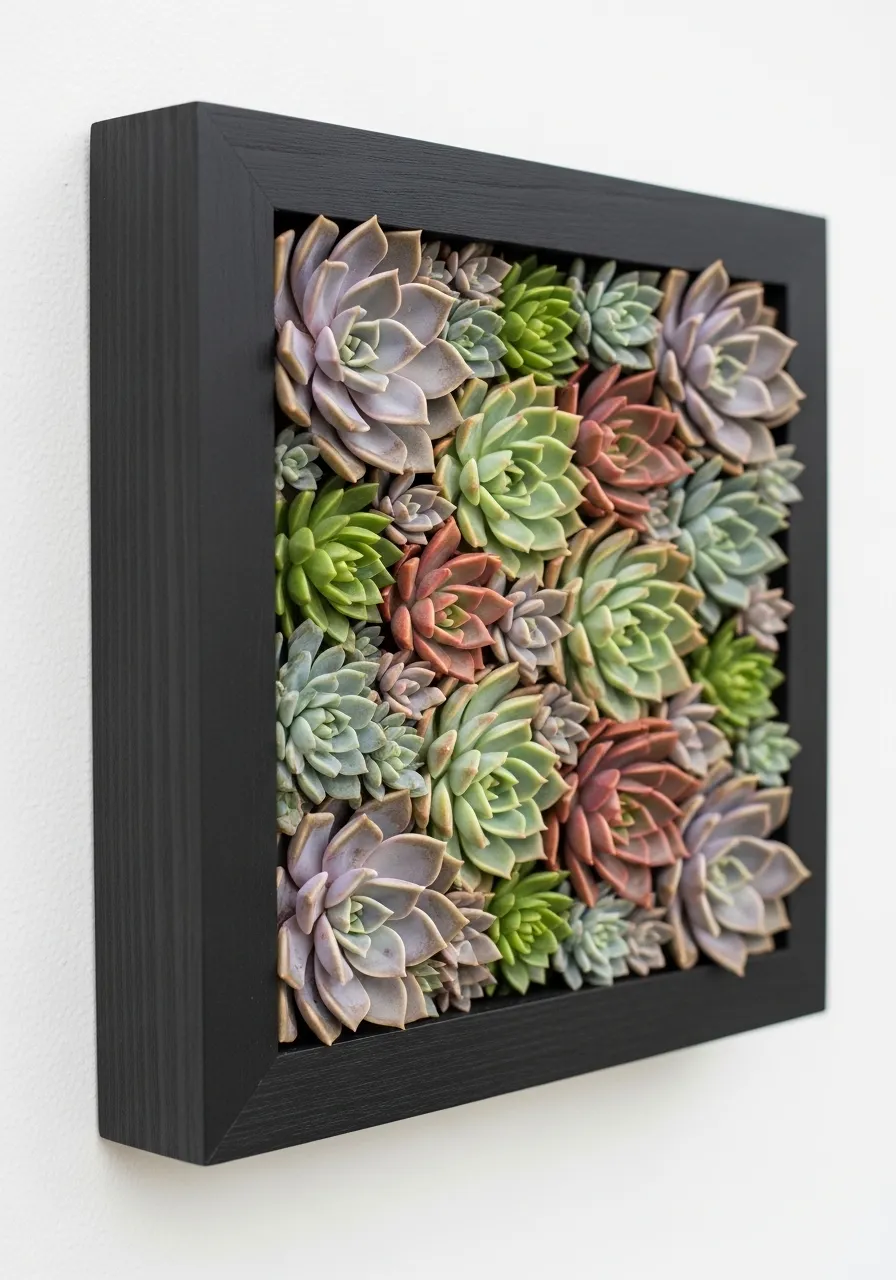
This is the plant wall idea that always stops guests mid-sentence.
A succulent frame looks exactly like a painting — until people realize it is alive.
Buy or build a shallow wooden frame at least 3–4 inches deep. Line the inside with hardware cloth (metal mesh) and fill with a mix of cactus soil and perlite. Secure a backing of landscape fabric to hold the soil in.
Plant succulents tightly through the mesh openings. Use echeveria, sedum, haworthia, and aloe for the best color variety. Pick up individual small succulents at nurseries for $1–$3 each.
Important step: Lay it flat for 2–3 weeks after planting to let roots establish before hanging it vertically. Water it flat once a week during this period.
Once mounted, water every 2–3 weeks by taking it down and laying it flat for an hour, then re-hanging.
This works best near a bright window or under a grow light. Succulents tolerate low water but not low light.
Budget tip: Use IKEA shadow box frames as your base. The RIBBA deep frame works well for this project.
Total cost: $25–$60 depending on the number of succulents.
7. Air Plant Driftwood Wall Mount
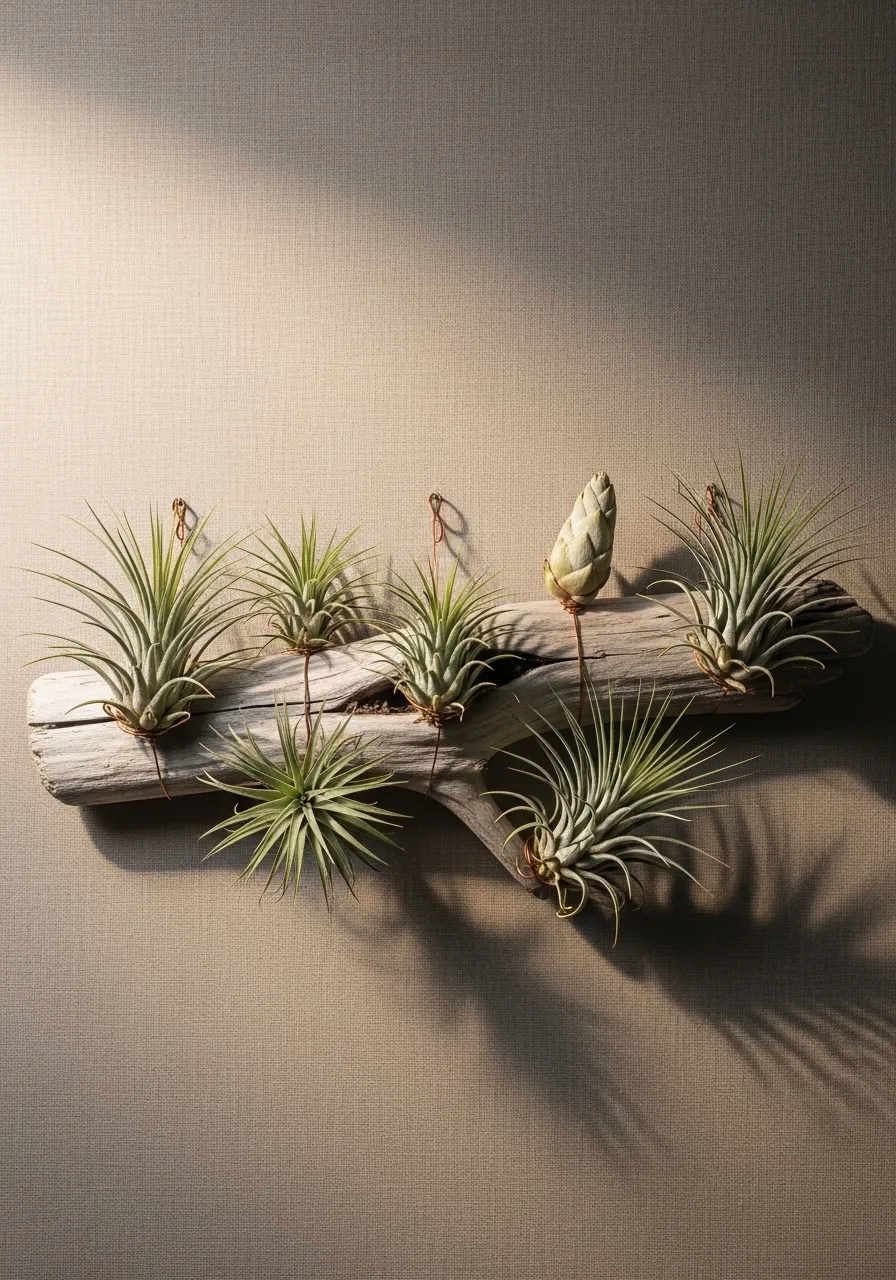
Air plants require no soil. No pot. No mess. That makes them uniquely wall-friendly.
Tillandsia (air plants) absorb moisture through their leaves. All you need to mount them is a piece of driftwood, a cork board, some wire, or even just a nail.
Find driftwood at beach stores, craft shops, or online for $5–$20. Drill small holes or use copper wire to nestle air plants into crevices. They look stunning against the natural wood grain.
Care is minimal: Mist 2–3 times a week or soak in water for 20 minutes once a week, then shake dry before returning to the wall. Never let them sit in standing water.
Try a gallery-style arrangement: mount three pieces of driftwood at different angles on a white wall, each holding one or two air plants. Simple. Graphic. Very effective.
You can also glue air plants directly to decorative stones, shells, or small frames using non-toxic craft glue or fishing line.
Budget tip: Buy air plants in bulk online. A set of 10 assorted tillandsia usually runs $15–$20 and gives you plenty to work with.
Total cost: $20–$45.
8. Hanging Rope Ladder Plant Display
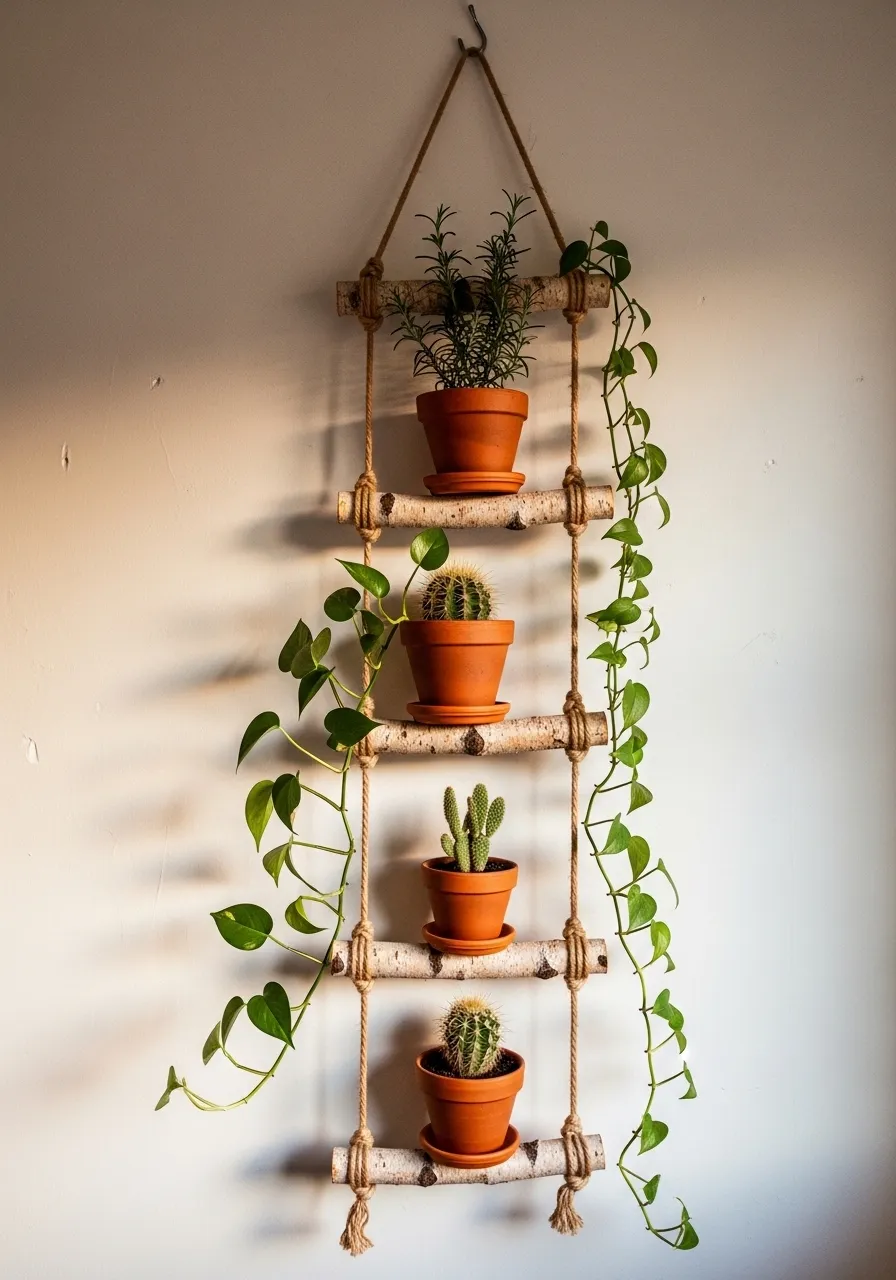
A rope ladder is one of the easiest DIY plant displays you can make in an evening.
You need: two lengths of thick natural rope (jute or hemp), four to six wooden dowels or birch branches, and a drill. Thread the rope through holes drilled in each dowel, knot below each rung, and hang from a ceiling hook or curtain rod.
Rest pots directly on the rungs. No need to attach them — the rungs act as natural shelves.
This is excellent for trailing plants: pothos, string of pearls, philodendron, and ivy all look incredible cascading between ladder rungs.
Position near a window for best plant health. The ladder naturally catches light from multiple angles.
Make yours custom: stain the dowels dark walnut, bleach the rope for a lighter look, or leave everything raw for a natural aesthetic.
Budget tip: Use thick branches collected from your yard or a park as the rungs instead of buying dowels. This gives a more organic, natural look — and it is completely free.
This works especially well in bedrooms, reading nooks, and sunlit hallways.
Total cost: $10–$25 in materials if DIYing.
9. Mounted Tin Can Herb Wall
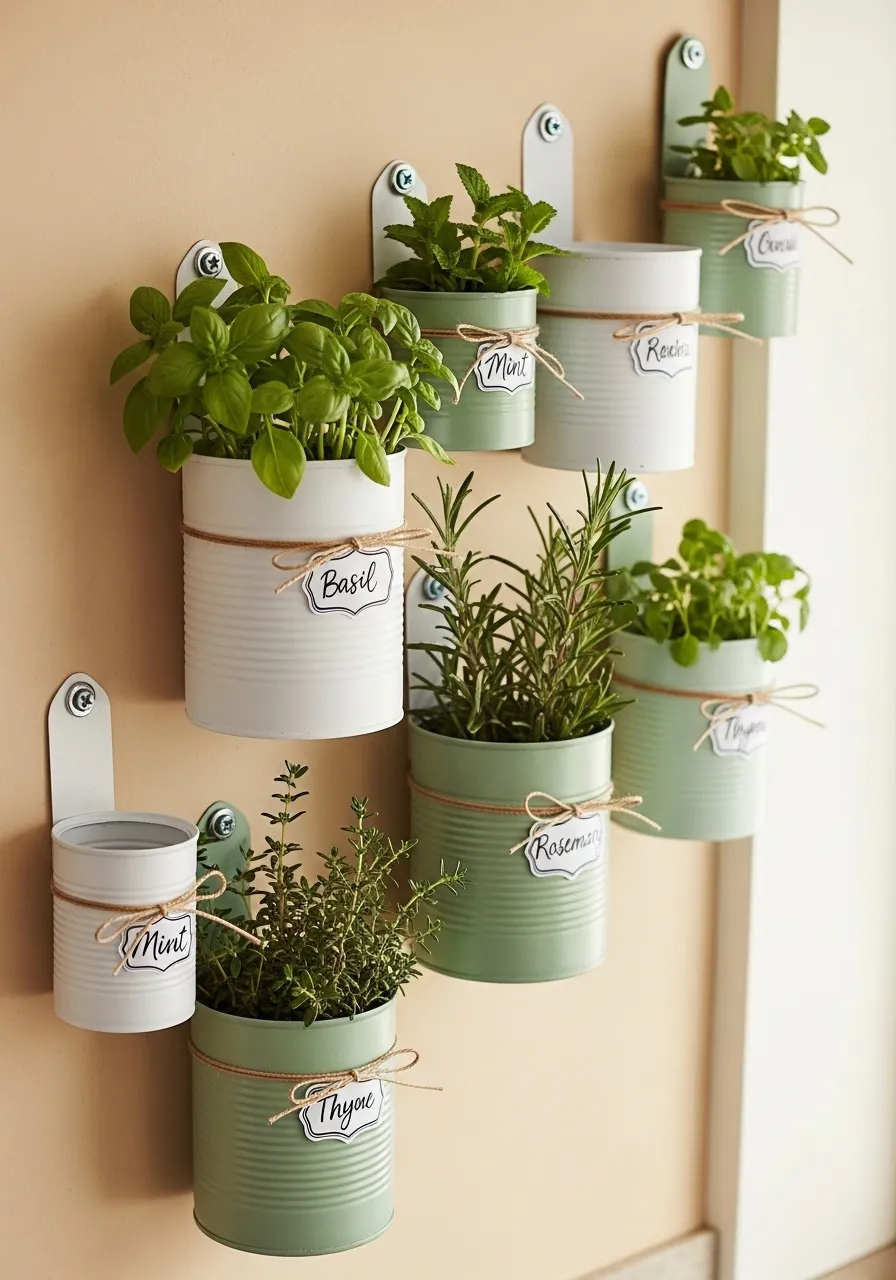
This is the most practical plant wall idea in this entire guide.
A kitchen herb wall puts your most-used herbs within arm’s reach while saving counter and cabinet space. And it costs almost nothing to build.
Save tin cans — soup cans, coffee cans, any size works. Drill a small drainage hole in the bottom of each can. Spray paint them in a cohesive color palette: all white, all terracotta, or two complementary shades.
Mount them to the wall using a single screw through the back, or attach to a horizontal piece of wood for a more polished look.
Best herbs for this: basil, mint, thyme, rosemary, parsley, and chives. These all do well in small containers and love a sunny kitchen window nearby.
Water carefully — tin cans are small and drain fast. Check soil moisture every 1–2 days, especially in warm weather.
Label each can with a small chalk tag or hand-lettered wooden disc. This makes the display feel intentional, not thrown together.
Budget tip: Ask friends and neighbors to save their cans. Most people are happy to hand over a grocery bag full of them.
Total cost: $5–$15 (mostly just spray paint and screws).
10. Living Moss Wall Panel
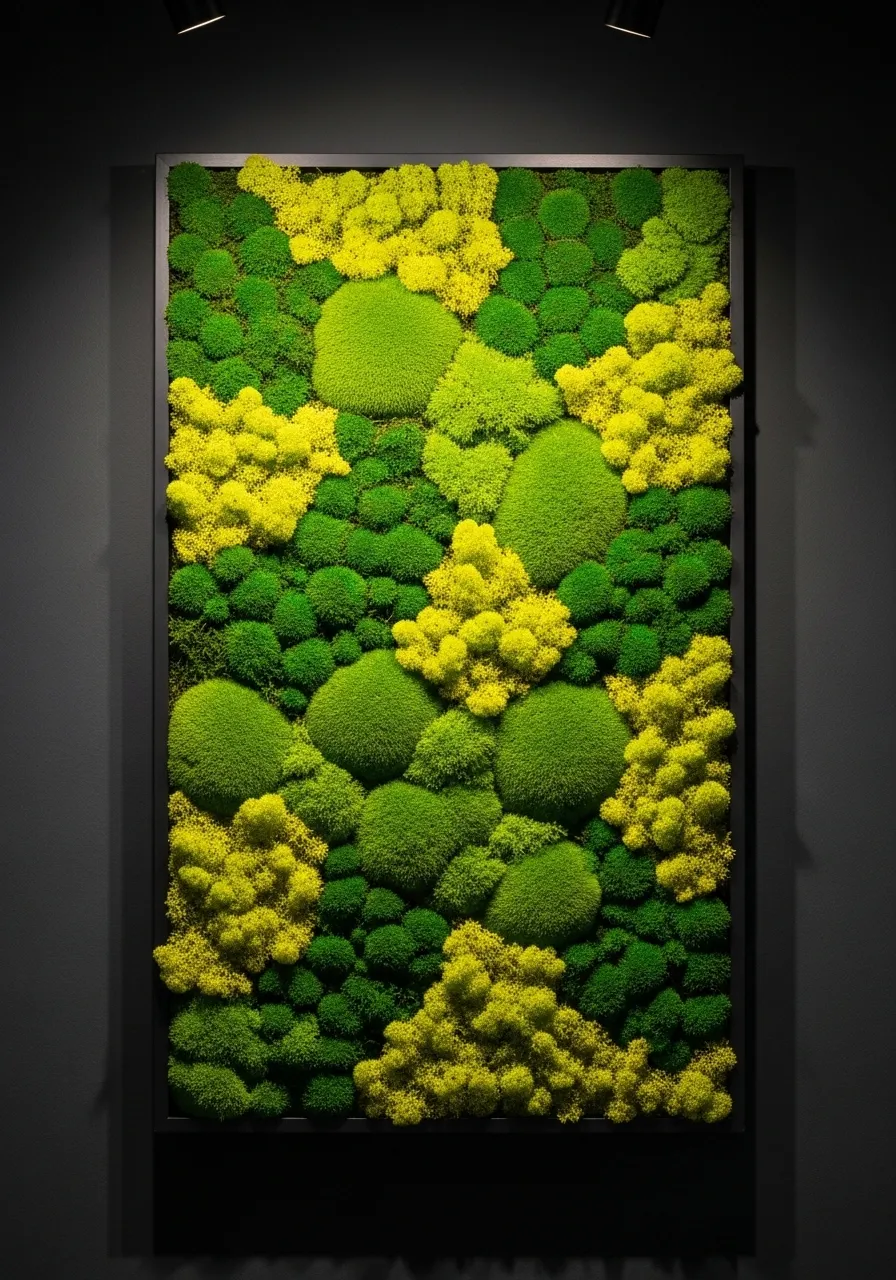
A moss wall sounds expensive. It does not have to be.
Preserved moss requires no watering, no sunlight, and no maintenance. It stays green and lush indefinitely. This makes it ideal for windowless rooms, dark hallways, or offices.
Buy preserved sheet moss and reindeer moss in bags from craft stores or online. A few bags in the $5–$10 range give you enough to cover a 12×12 inch panel.
Build a frame from a shadow box, a wooden board with a lip, or even a repurposed picture frame. Hot-glue the moss directly to the backing in layers — mix flat sheet moss with mounded cushion moss for texture variation.
For living moss, you need a more humid environment and indirect light. Mist it 2–3 times a week. It grows slowly but looks incredible in bathrooms near showers.
Budget tip: Use a $5 thrift store frame as your base. Sand it, paint it, and build your moss panel inside. The finished result looks like it cost ten times as much.
This is a great option for renters because it hangs like a painting. No water, no mess, no landlord complaints.
Total cost: $20–$50 for a medium panel.
11. Woven Basket Wall Gallery
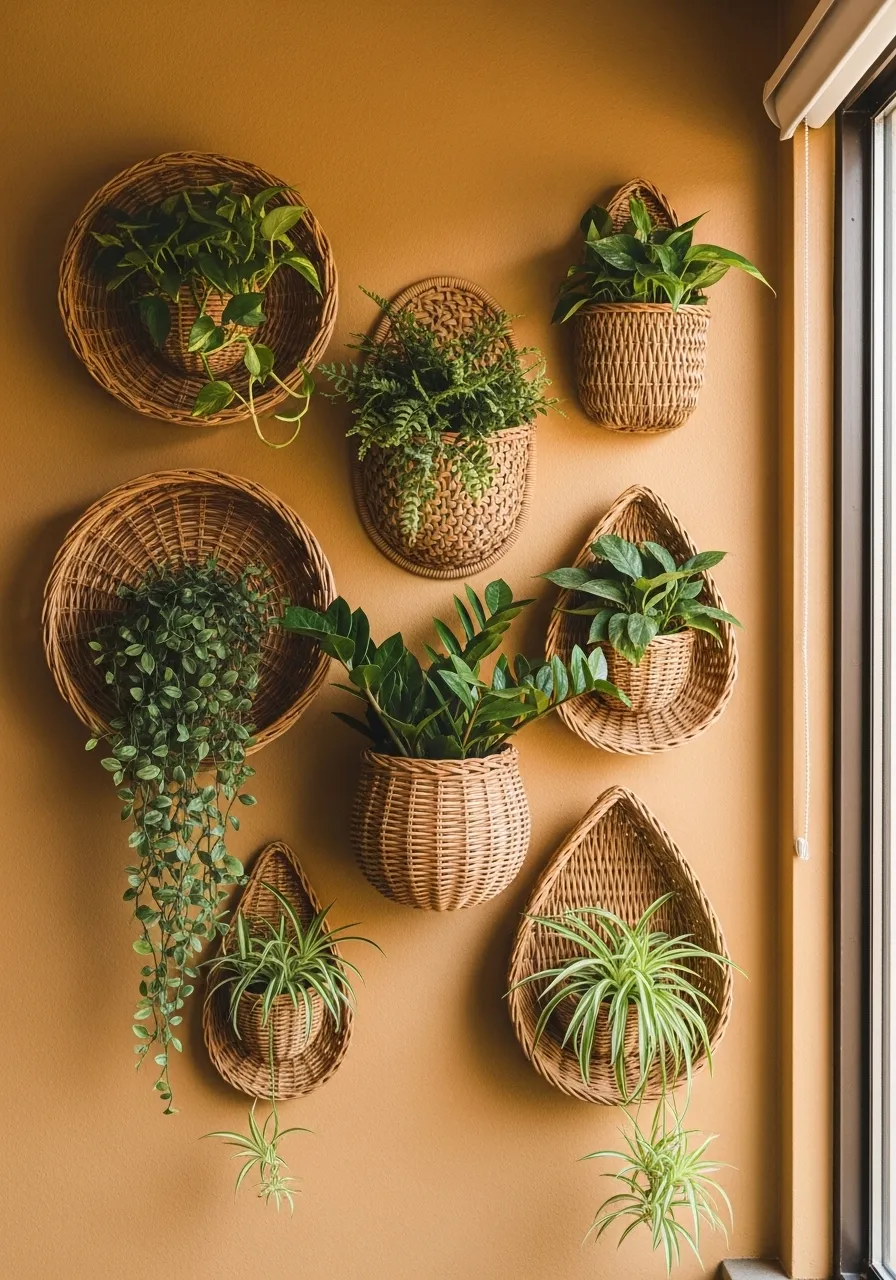
Baskets are underrated as plant wall decor.
Hang woven baskets directly on the wall the same way you would hang decorative wall baskets — but fill them with plants. This creates a lush, textural display that combines boho warmth with living greenery.
Use baskets with a flat back for the easiest mounting. Drill or tie a small loop to the back and hang from a nail or hook.
Line each basket with a plastic bag or a coconut fiber liner to hold soil. Place a small pot inside rather than planting directly in the basket if you want to protect the weave from moisture.
Good plants for baskets: pothos, spider plants, ferns, ivy, and peace lilies. All tolerate being slightly root-bound and don’t need huge containers.
Mix basket sizes, weave textures, and shapes for a gallery wall effect. Odd numbers — 5, 7, or 9 baskets — tend to look more dynamic than even groupings.
Budget tip: Check thrift stores for woven baskets. You can often find a full set of mismatched baskets for $2–$5 each. A coat of white spray paint unifies them quickly.
Total cost: $20–$50 depending on how many you use.
12. Copper Pipe Plant Rod System
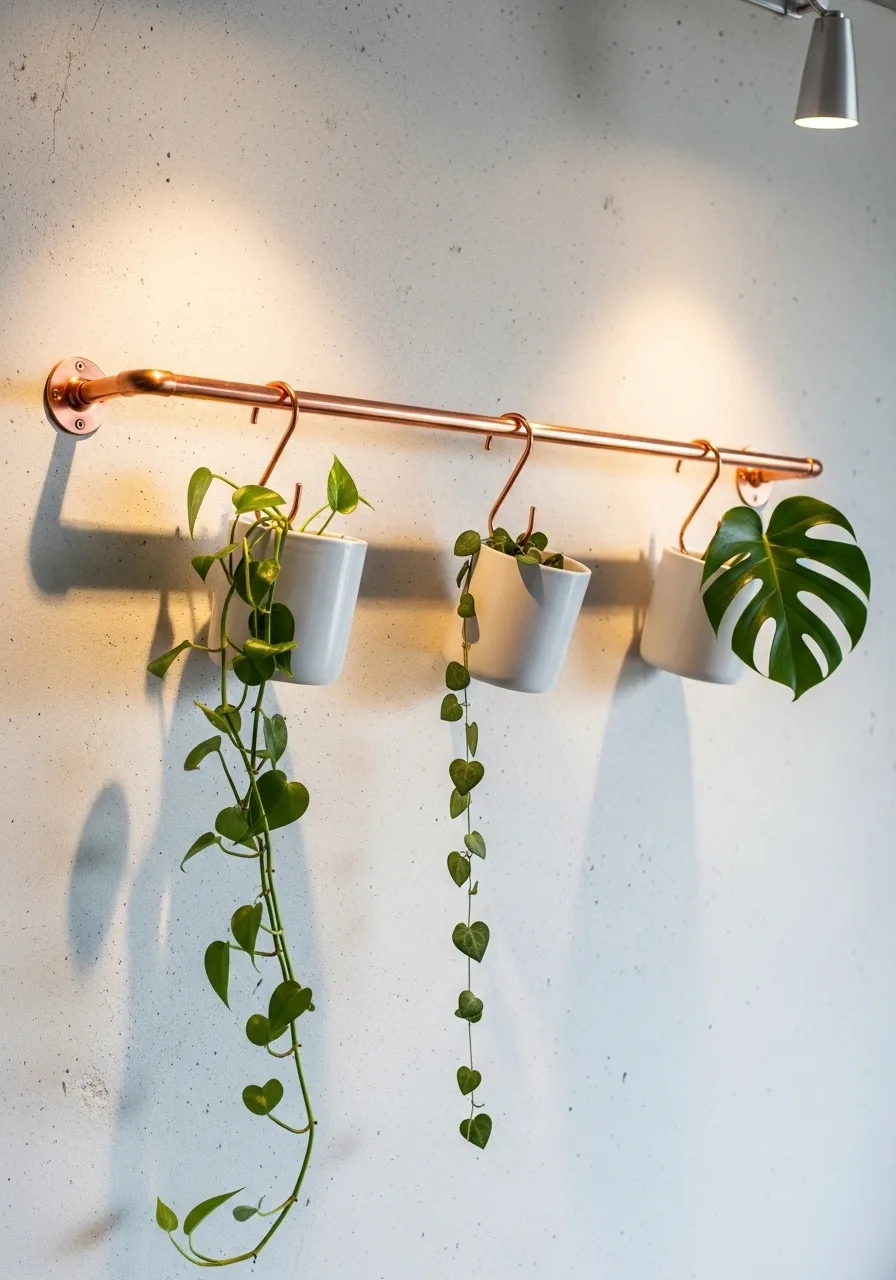
Copper pipe gives a plant display an editorial, design-forward quality.
You can buy copper pipe at any hardware store for a few dollars per foot. Cut it to your desired length with a pipe cutter (costs $8). Mount it to the wall using two copper pipe flanges — these look decorative and cost around $5–$8 each.
Hang pots from the pipe using S-hooks or short lengths of leather cord looped over the pipe.
This works beautifully as a kitchen pot rail with plants mixed in. Alternate between hanging herb pots and cooking tools for a functional, stylish display.
You can also build a floor-to-ceiling system using copper pipe and pipe fittings, creating a ladder-style frame that leans against the wall. No wall holes required — ideal for renters.
Best plants for this display: trailing varieties that show off well when suspended. Pothos, string of hearts, string of pearls, and tradescantia are all excellent choices.
Budget tip: Buy a 10-foot length of ¾-inch copper pipe and split the cost with a friend doing a similar project.
Total cost: $30–$55 for a basic rod setup.
13. Propagation Station Wall Display
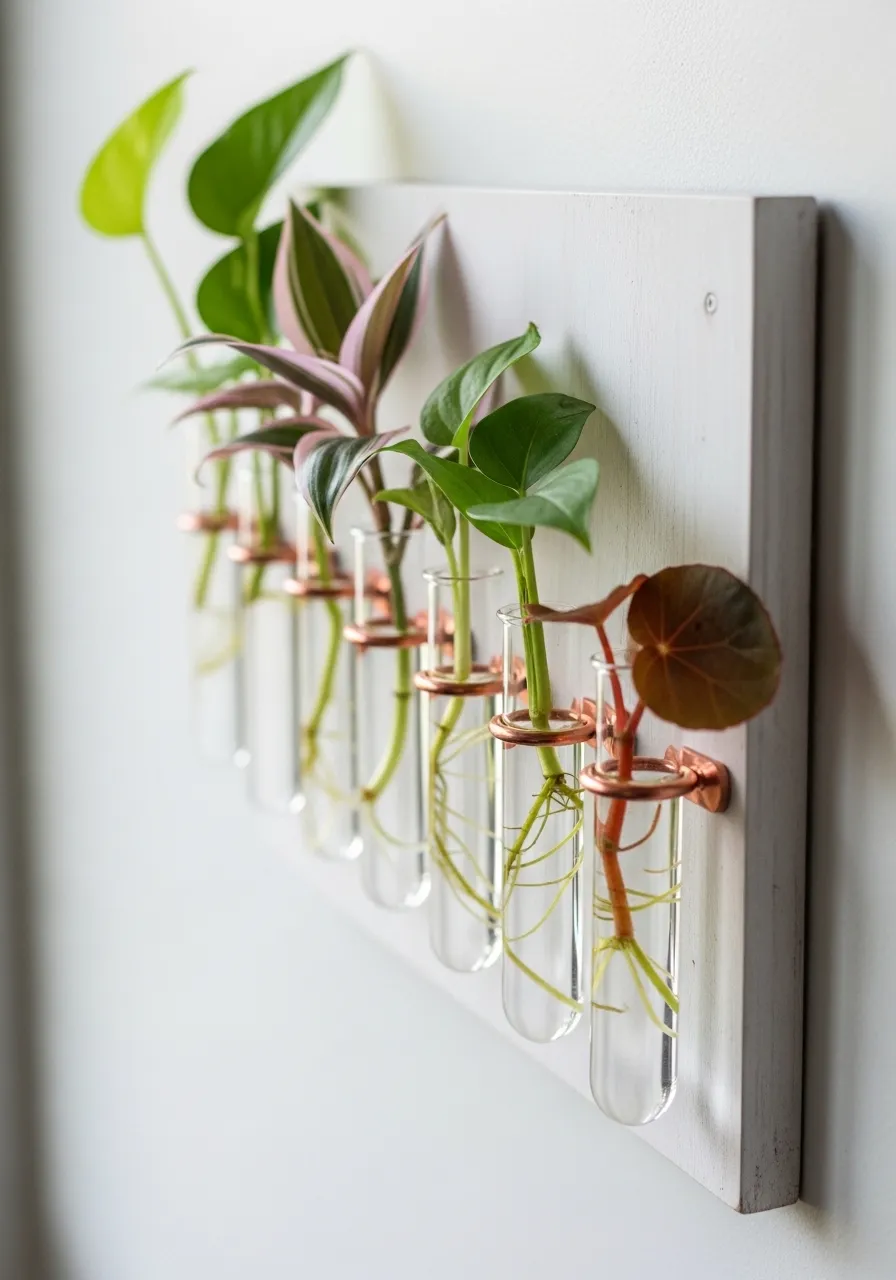
A propagation wall is living decor and a functional plant project at the same time.
Test tube propagation stations are exactly what they look like: rows of small glass vials mounted on a board, each holding a plant cutting in water. The cuttings root over time, and you can see the progress every day.
Buy a set of wall-mounted test tube holders online for $10–$20. Or drill holes in a piece of wood and insert glass bud vases. Mount the board with two screws.
Best plants for water propagation: pothos, philodendron, tradescantia, begonia, and Swedish ivy. Snip a cutting just below a node, strip the lower leaves, and place in water.
Change the water every 5–7 days to prevent algae. Add a tiny drop of liquid fertilizer once a month to speed up rooting.
Once the cutting has roots 2–3 inches long, pot it up and take a new cutting from a different plant to replace it.
This display constantly changes. It is never the same twice. That is part of the appeal.
Budget tip: Collect small glass bottles — medicine bottles, spice jars, mini juice bottles — and use those instead of test tubes.
Total cost: $10–$25.
14. Reclaimed Wood Plank Shelf Wall
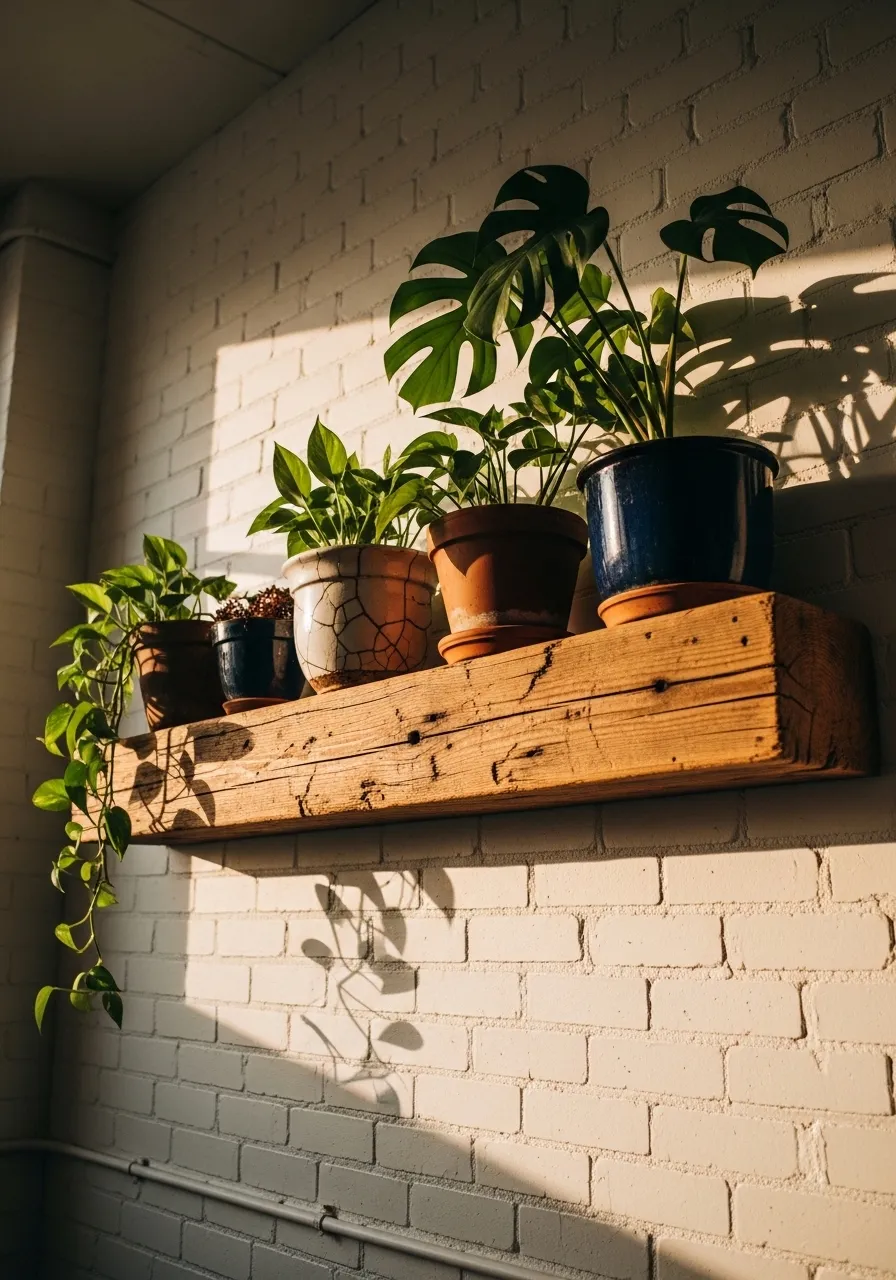
A single wide plank of reclaimed wood does more visual work than three regular shelves.
Look for barn wood, pallet planks, or old fence boards at salvage yards, Facebook Marketplace, or Habitat for Humanity ReStores. A good piece of weathered wood costs $5–$20 and is already full of character.
Sand lightly to remove splinters. Seal with a matte finishing wax or tung oil to protect against moisture from plant pots. Do not varnish — it dulls the natural texture.
Mount with two to four L-brackets screwed into wall studs. This shelf can support significant weight.
Style the display simply: Three to five plants in varied heights. Mix one tall plant (monstera, snake plant) with medium and trailing plants (pothos, ivy). Place the tallest one slightly off-center for a natural, unstudied look.
Budget tip: Thrift stores often sell old wooden cutting boards or shelving pieces. Wide planks from a demolished shed or fence section are free if you know someone doing outdoor work.
This works especially well above a sofa, bed, or home office desk.
Total cost: $10–$40 including hardware.
15. Vertical Pocket Planter
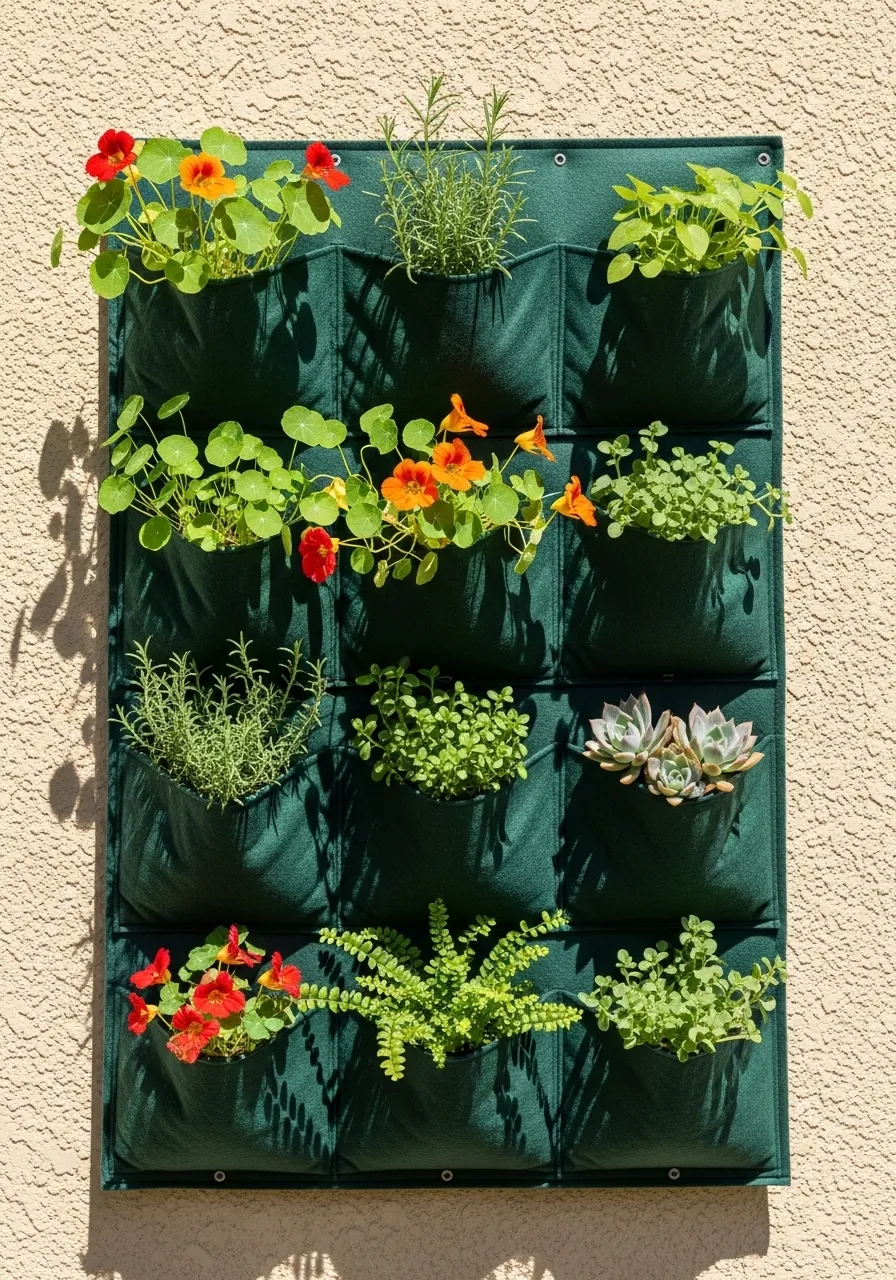
Pocket planters turn an entire wall section into a garden in minutes.
These felt or fabric vertical planters come with multiple rows of pockets. Each pocket holds one plant. Mount the top panel to a fence, wall, or garden structure using provided loops and screws.
They are especially good for outdoor walls and fences where you want maximum planting space in a small footprint. A 12-pocket planter covers about 1 square foot of wall but holds 12 plants.
Best plants for pockets: lettuce, herbs, strawberries, marigolds, impatiens, and small succulents. Avoid deep-rooted plants — the pockets are typically 4–6 inches deep.
Fill each pocket with a mix of good potting soil and perlite for drainage. The felt fabric wicks moisture, so you may need to water more frequently in hot weather.
For indoors: Look for felt pocket planters designed for interior use. These often have a waterproof liner backing to protect your wall.
A basic 12-pocket outdoor planter costs $15–$30. Get two and side-by-side the coverage becomes impressive quickly.
Budget tip: Sew your own using outdoor canvas fabric and basic pocket construction. There are free patterns online.
Total cost: $15–$35.
16. Framed Botanical Print and Real Plant Combo Wall
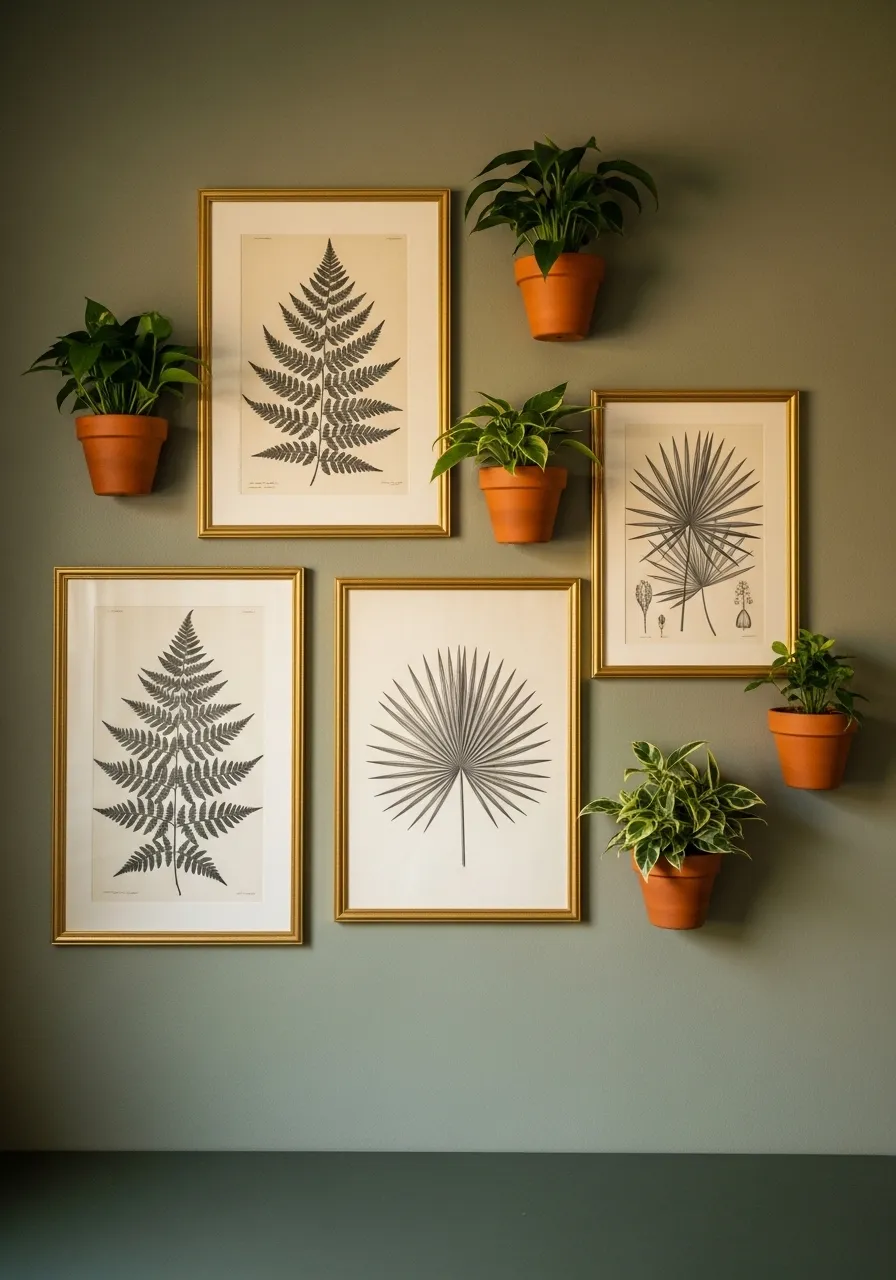
Mix framed botanical art with real living plants for a layered wall that plays with the line between art and nature.
This works as a gallery wall concept: hang a mix of framed botanical prints in matching or coordinating frames, then add one or two real mounted plants among the frames as if they were part of the art.
The contrast is the point. The 2D drawings highlight the dimensionality of the real plants. The real plants make the prints feel more intentional and less generic.
Source botanical prints for free from websites like Rawpixel or Biodiversity Heritage Library. Print at home, frame with inexpensive frames from IKEA or a thrift store.
Real plants to add to the mix: Small succulents in mounted terracotta holders, a single air plant on driftwood, or a small pothos in a wall-mounted copper cup.
Planning the layout: Lay everything on the floor first. Space real plants at least 18 inches apart so they don’t compete for light or visual attention.
Budget tip: Dollar stores often carry basic frames. Paint them all the same color for a cohesive set.
Total cost: $20–$45 for the full gallery wall.
17. Bamboo and Twine Grid Plant Wall
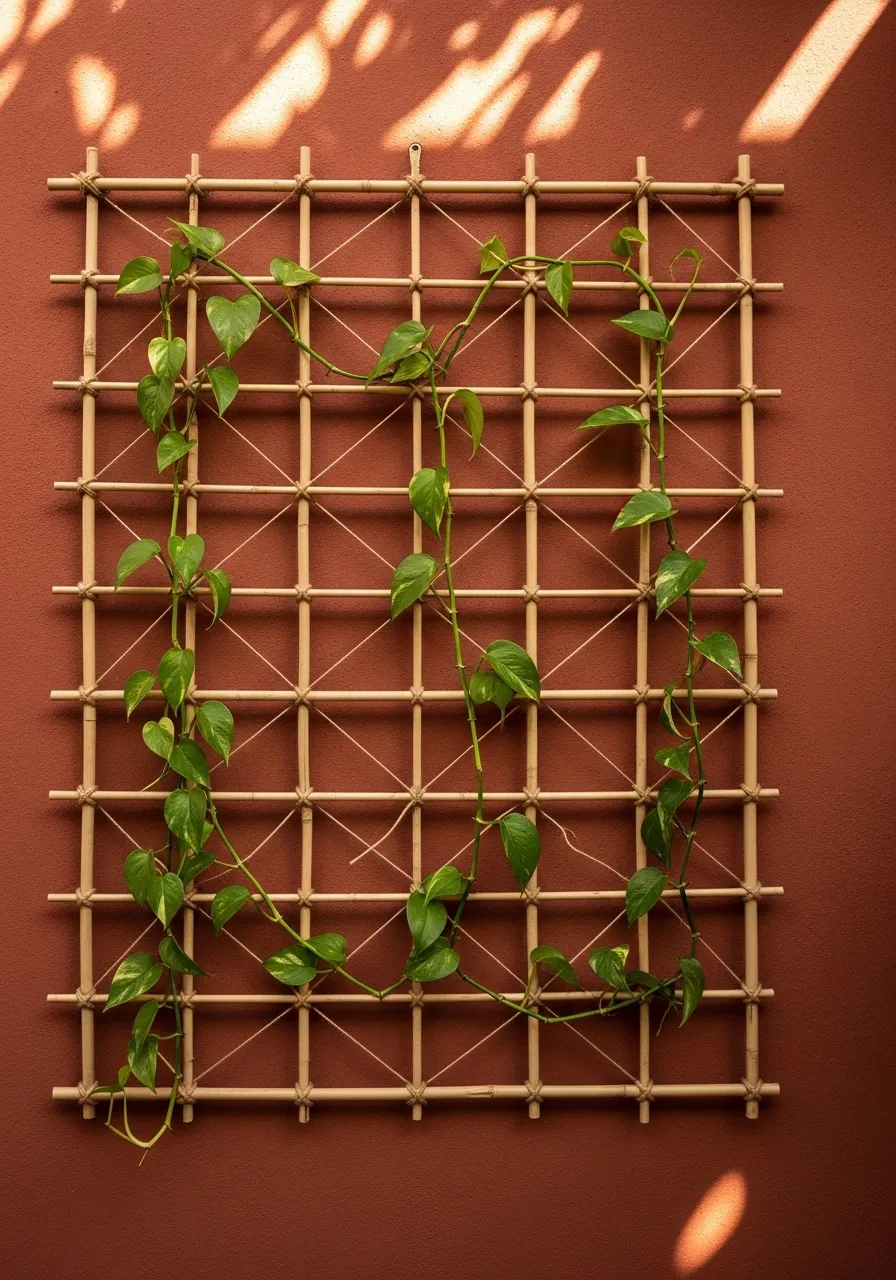
Bamboo and twine cost almost nothing and can create a surprisingly beautiful plant wall structure.
Build a bamboo grid by lashing canes together with jute twine at the intersections. No tools required beyond scissors and strong knots. Make it any size you want — small enough for a single wall panel or large enough to cover an entire fence section.
Mount it flat against the wall using a few screws through the outer canes, or lean it at an angle for a less permanent setup.
Train climbing plants through the grid using twist ties or small clips. Pothos, philodendron, sweet peas, and nasturtiums all work well and will weave naturally through the structure over time.
This is one of the most budget-friendly options in this guide. Bamboo garden canes cost $3–$5 for a pack of 25. A roll of jute twine is $2–$4.
For outdoor use: Treat the bamboo with an outdoor sealant or linseed oil to extend its life. Untreated bamboo outdoors can degrade in one to two seasons.
This style fits especially well in boho-inspired rooms, sunrooms, and outdoor garden areas.
Total cost: under $15.
18. Statement Monstera Corner Wall Feature
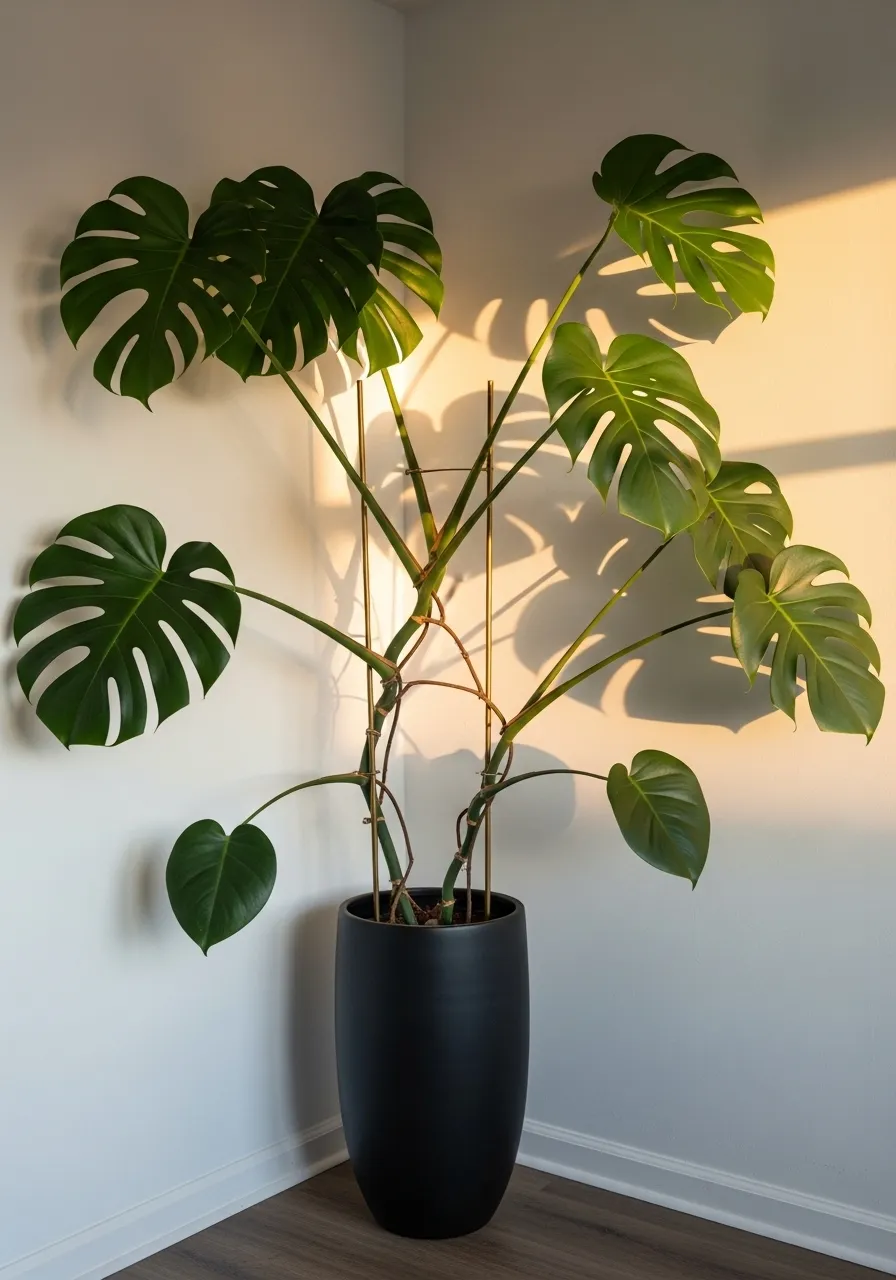
Sometimes the boldest plant wall decor requires only one plant done right.
A large monstera placed in a corner and trained along the wall becomes its own statement. The big, split leaves cast graphic shadows in natural light. They fill vertical space effortlessly. And they grow fast.
How to train it along the wall: Use a few small adhesive hooks or brass plant stakes to gently guide stems and petioles outward as they grow. No drilling required for the plant itself.
Position it in a bright, indirect light corner ideally near a window that gets morning or afternoon sun. Monstera tolerates lower light but slows considerably.
Water when the top 2 inches of soil are dry. Wipe leaves monthly with a damp cloth to remove dust. That is the entire care routine.
A small monstera in a 6-inch pot costs $10–$20 at most garden centers or big-box stores. It will double in size within one growing season given good light and regular watering.
Budget tip: Propagate new monstera plants from stem cuttings with nodes. Root in water, then pot up. Free plants from a cutting that already took 10 minutes to take.
Total cost: $15–$40 for the plant and a good pot.
Conclusion
Plant wall decor does not require a big budget, a large space, or a green thumb. As this guide shows, the best ideas are often the simplest ones: a pegboard with hooks, a few hanging baskets, a well-placed monstera, or a handmade bamboo trellis. Start with one idea that feels manageable and matches what you already have at home. Build from there.
The most important step is the first one. Pick a wall, pick a plant, and put it up. Your space will change quickly — and you will wonder why you waited so long.