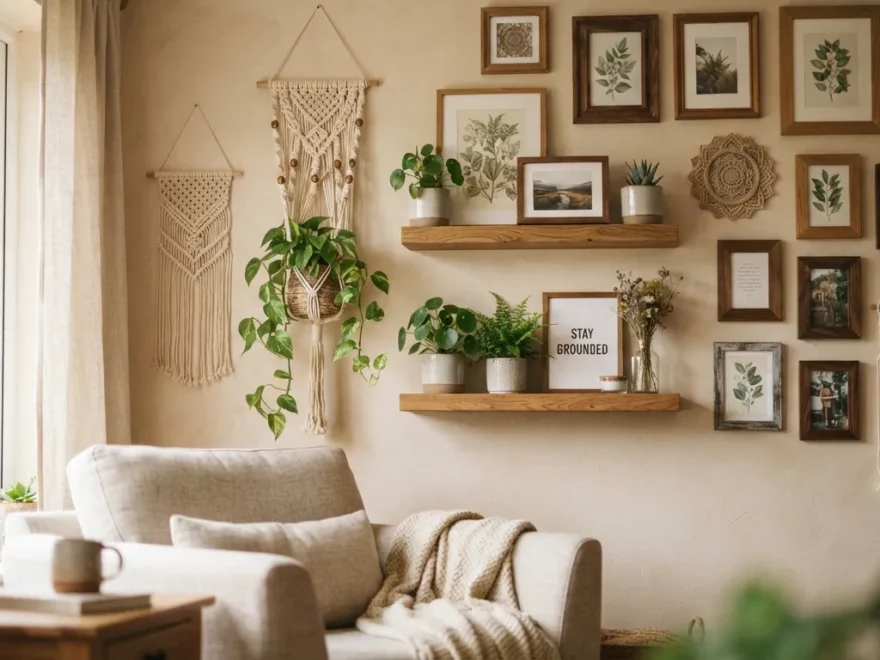
Blank walls hold more possibility than most people realize. A few hours, some basic supplies, and a little creativity can turn any empty stretch of drywall into a personal gallery that actually feels like home. You don’t need a big budget or a background in art to pull this off. Whether you’re renting an apartment, decorating a first house, or simply craving a change, there’s a wall project here that fits your skill level and your wallet. These ideas use materials you likely already have or can grab cheap at a craft store or thrift shop. Grab some tape, glue, or a hammer and nails, and get ready to fill that empty space with something you made yourself.
1. Gallery Wall of Mismatched Frames
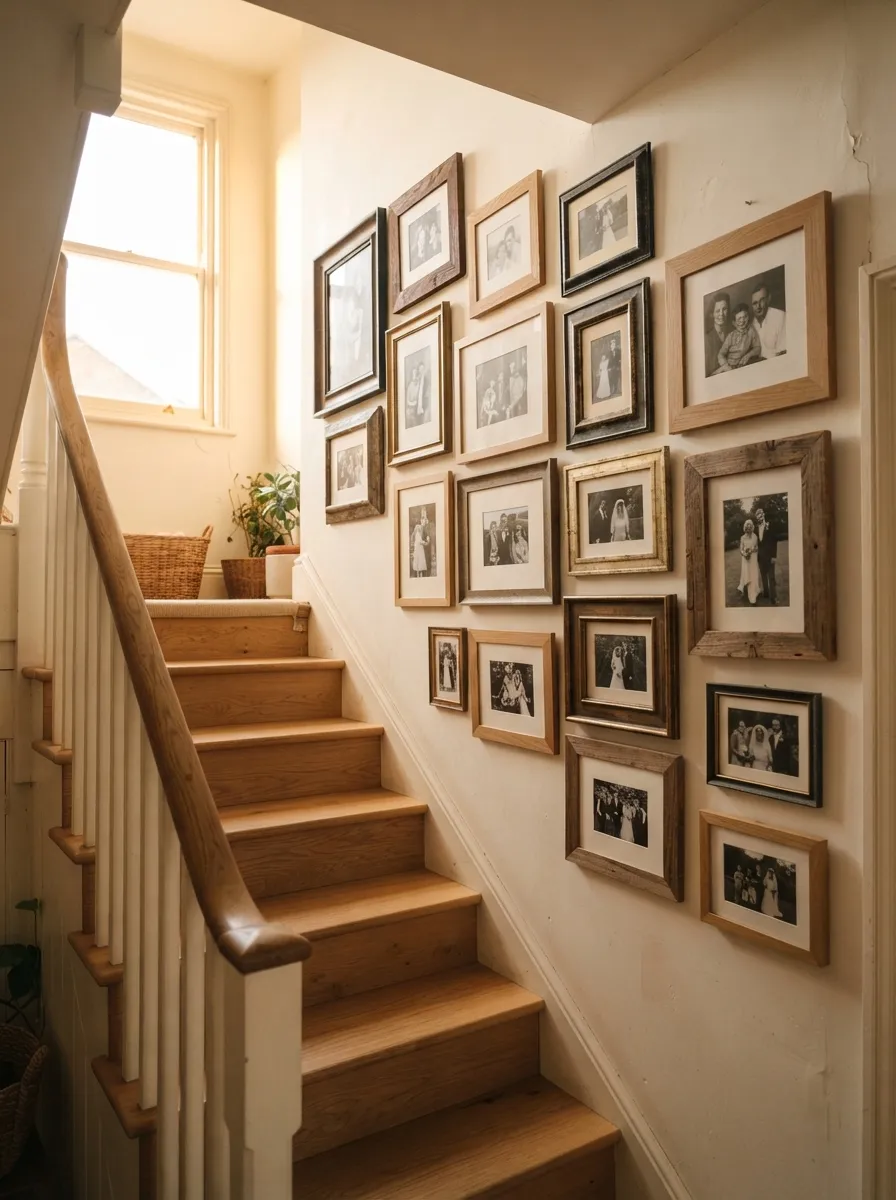
A gallery wall is one of the easiest ways to fill a large blank space fast. Grab frames from thrift stores, garage sales, or your own closet. They don’t need to match. Different colors and sizes actually make the wall feel more personal. Lay the frames out on the floor first. Move them around until you find a layout you like. Use painter’s tape to mark where each frame goes on the wall before you commit to nail holes. Mix photos, postcards, and small prints for variety. A budget tip: spray paint mismatched frames the same color to unify a chaotic mix without spending much. Start with a center anchor frame, then build outward in a loose grid or scattered pattern. Keep spacing between frames around two to three inches for a balanced look. This project works in hallways, staircases, and above sofas. It costs very little if you already own photos and frames, and it turns everyday memories into a display worth looking at every day.
2. Washi Tape Geometric Patterns
3. Woven Macrame Wall Hanging
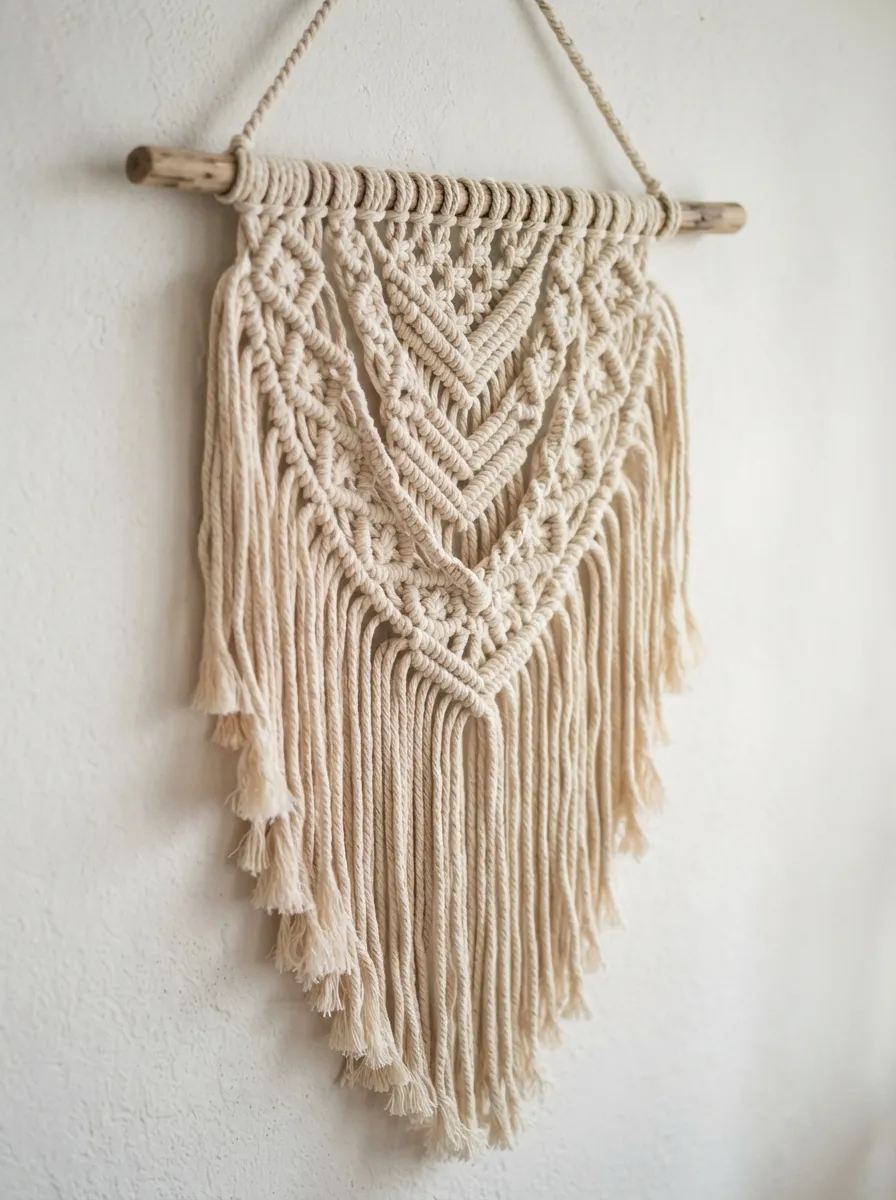
Macrame brings texture to a flat wall without much effort. You can buy a beginner kit online, or learn a few basic knots from free video tutorials. The square knot and the spiral knot are enough to build a simple, attractive hanging. Cotton rope is soft, affordable, and easy to work with. Cut several lengths, tie them to a wooden dowel, and start knotting from the top down. A budget tip: buy plain cotton cord in bulk instead of pre-packaged craft kits to cut costs in half. Trim the bottom fringe into a triangle or straight line once your knotting is done. Hang the finished piece with a small nail or command hook. This project suits bedrooms, reading nooks, and entryways where a soft, organic texture adds warmth. It also makes a thoughtful handmade gift. Once you learn the basic knots, you can size up to bigger, more detailed pieces for larger walls.
4. Painted Canvas Abstract Art
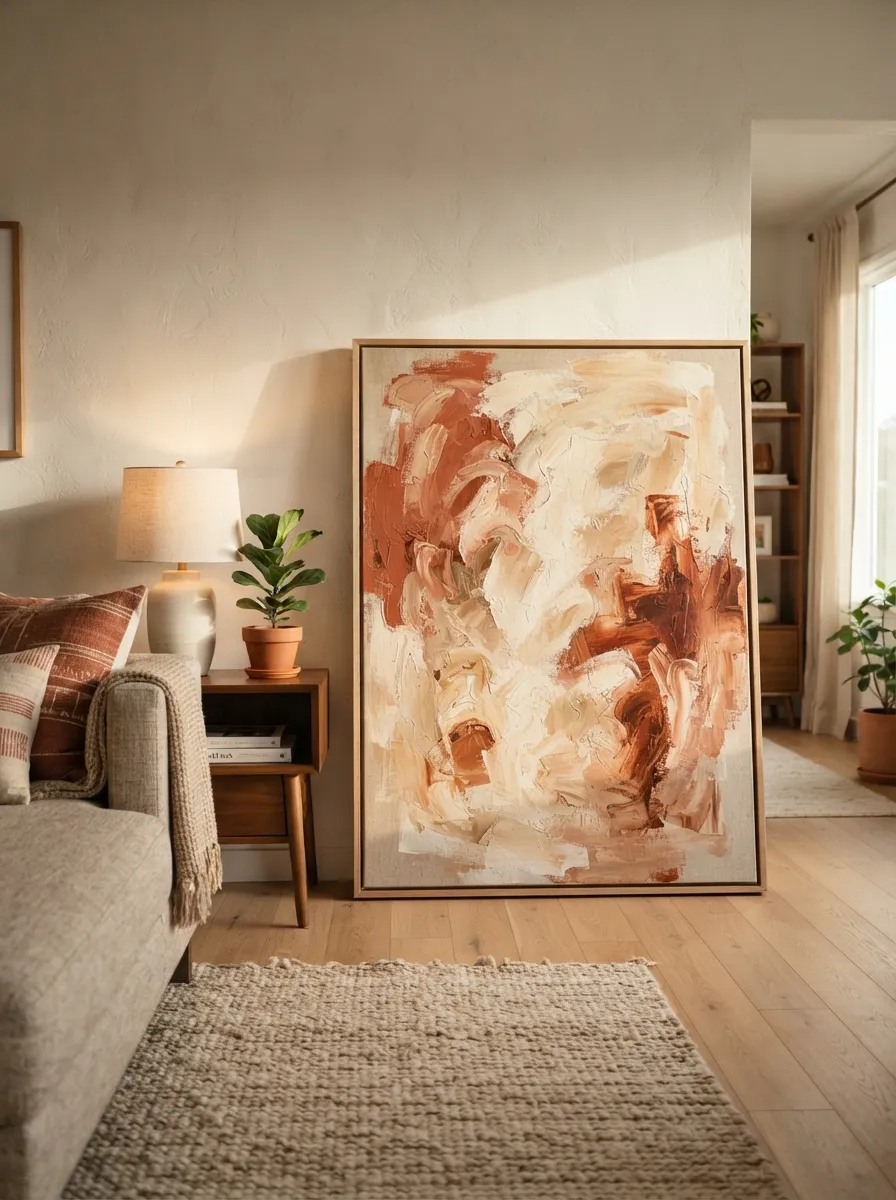
You don’t need formal training to make wall-worthy art. Grab a blank canvas, a few tubes of acrylic paint, and a wide brush. Pick two or three colors that match your room. Mix them loosely on the canvas using broad, confident strokes. Abstract art forgives mistakes because there’s no “wrong” shape. A budget tip: dollar stores and craft chains often sell small canvases for under five dollars, so buy a few and experiment before committing to a large piece. Try a palette knife for texture, or a sponge for a softer, cloud-like effect. Let each layer dry before adding the next so colors don’t muddy together. Once finished, seal with a matte varnish spray to protect the surface. This project works for any skill level and any wall size, since you control the canvas dimensions. A handmade abstract piece adds a personal, gallery-style feel that store-bought prints rarely match.
5. Pressed Flower Frames
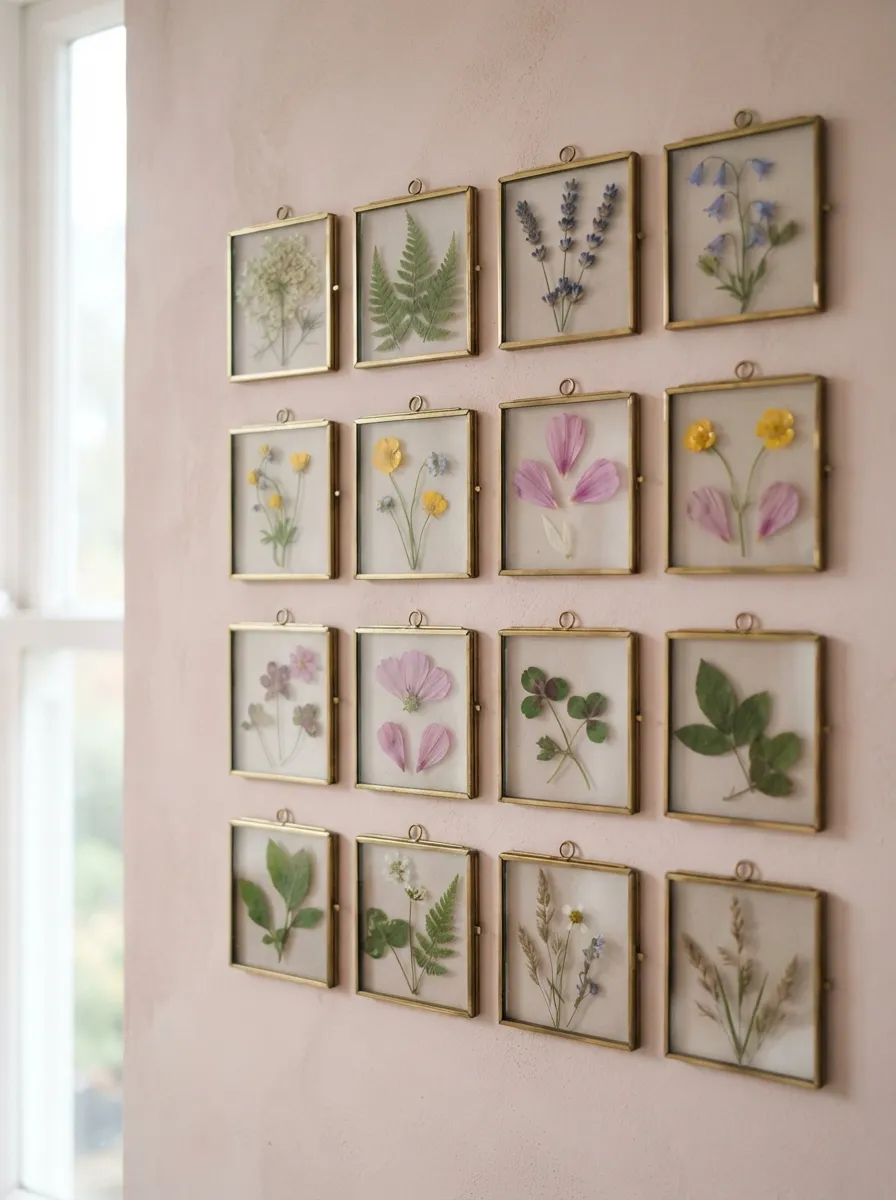
Pressed flowers turn a simple walk outside into lasting wall art. Collect flowers, leaves, or ferns and press them between heavy books for one to two weeks. Once flat and dry, arrange them inside small glass frames. Symmetrical layouts look tidy, while scattered arrangements feel more natural and relaxed. A budget tip: use flowers from your own yard or a nearby park instead of buying a bouquet, and reuse old picture frames you already own. Group three to five small frames together for a cohesive cluster on the wall. This project costs almost nothing beyond frame glass and a little patience. It’s a calming, seasonal activity that connects your decor to the world outside your window. Rotate the flowers each season for a display that changes throughout the year. Pressed flower art suits bedrooms, bathrooms, and reading corners where a soft, delicate touch feels right.
6. Reclaimed Wood Shelf Display
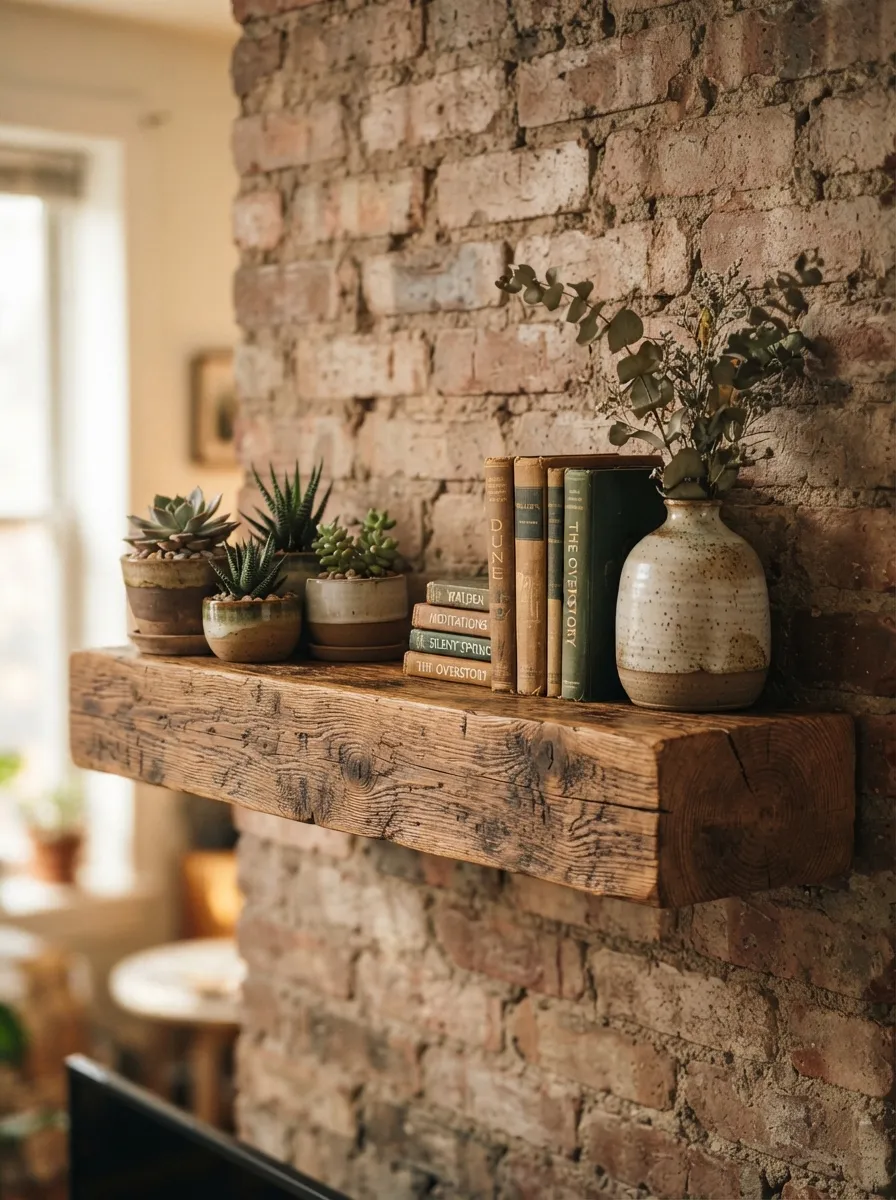
Floating shelves made from reclaimed wood add both storage and style. Look for old pallets, fence boards, or scrap lumber at a local hardware store or salvage yard. Sand the wood down, then treat it with oil or a light stain to bring out the grain. Mount the shelf using simple L-brackets hidden underneath for a clean, floating look. A budget tip: many hardware stores give away pallet wood for free if you ask, so this project can cost almost nothing but your time. Style the shelf with a few small plants, a stack of favorite books, or a single piece of pottery. Keep the arrangement light and avoid overcrowding so the wood texture stays visible. This project adds functional decor to kitchens, bathrooms, and living rooms alike. The natural imperfections in reclaimed wood give the piece character that new, factory-cut shelving can’t match.
7. Fabric Wrapped Wall Panels
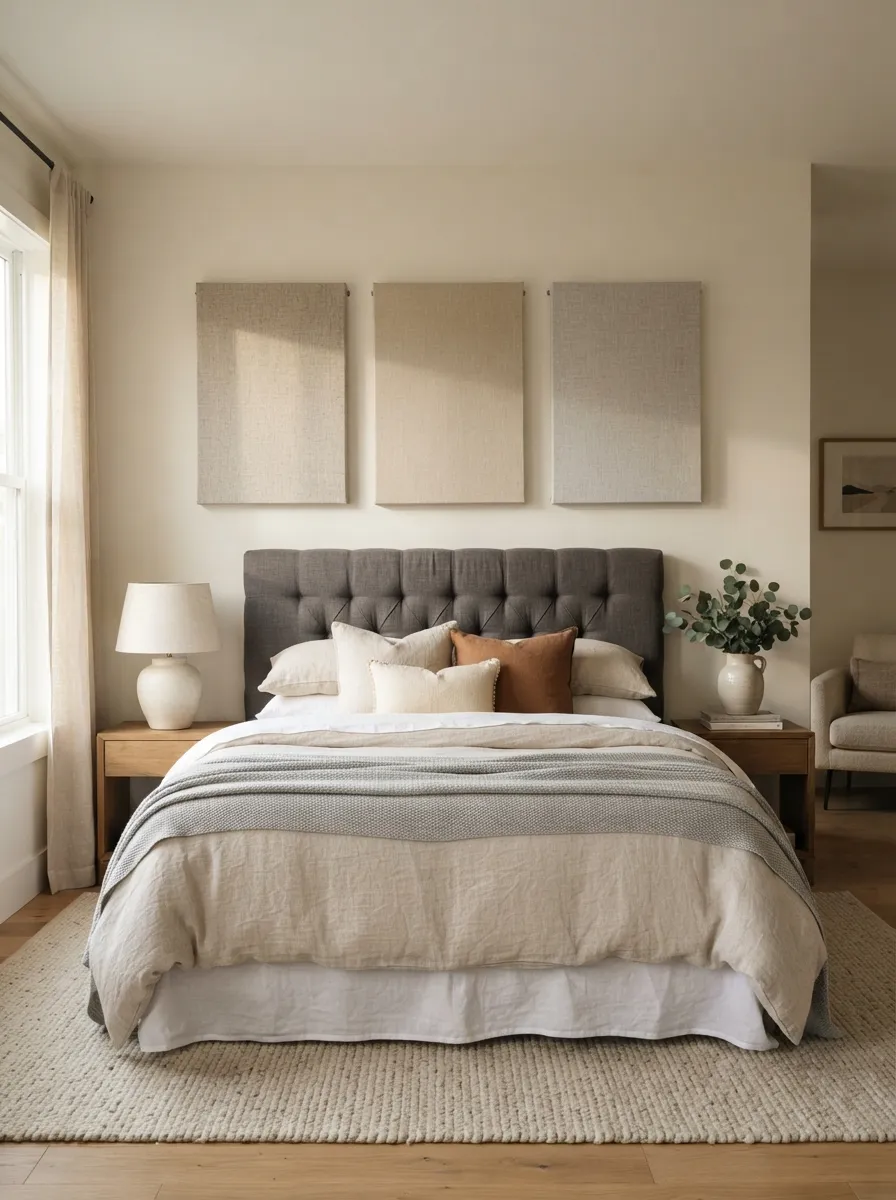
Fabric panels soften a room instantly. Cut plywood or foam board into rectangles, then wrap them tightly in fabric like linen, canvas, or an old bedsheet. Staple the fabric to the back of each panel until it’s smooth and taut. Mount the finished panels directly to the wall using strong adhesive strips or small screws. A budget tip: repurpose an old duvet cover or curtain instead of buying new fabric by the yard. Choose a pattern or solid color that matches your existing bedding or furniture. Group two or three panels in a row above a headboard or sofa for a boutique hotel feel. This project adds texture and a hint of soundproofing, which makes it a smart pick for bedrooms. Because the fabric is removable, you can update the look seasonally without buying new panels. It’s an easy weekend project that feels far more expensive than it actually is.
8. Vintage Plate Wall Display
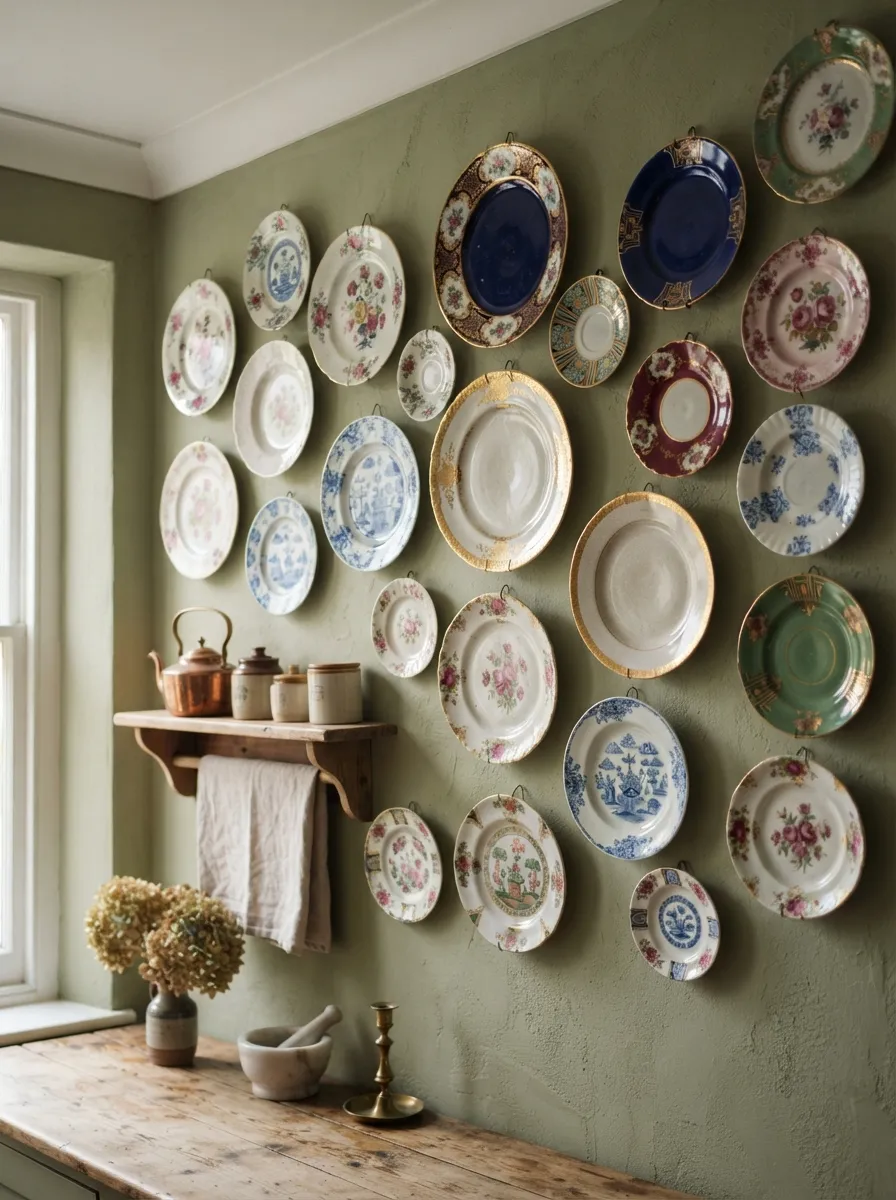
Plate walls bring old-world charm into a modern kitchen or dining room. Thrift stores and estate sales are goldmines for mismatched vintage plates. Look for pieces with interesting patterns, colors, or gold trim. Use plate hangers, which are cheap spring-loaded wire frames that grip the plate’s edge without any glue. A budget tip: buy chipped or slightly imperfect plates since flaws won’t show once mounted on the wall. Arrange the plates on the floor first, mixing sizes and patterns until the layout feels balanced. Start with your largest plate as the anchor, then build outward. This project adds instant character to a dining nook or kitchen wall without needing any painting or drilling beyond a few small nails. Plate walls also make a great conversation piece, since guests often ask where each one came from. Rotate pieces in and out as you find new favorites at your next thrift trip.
9. String Art Design
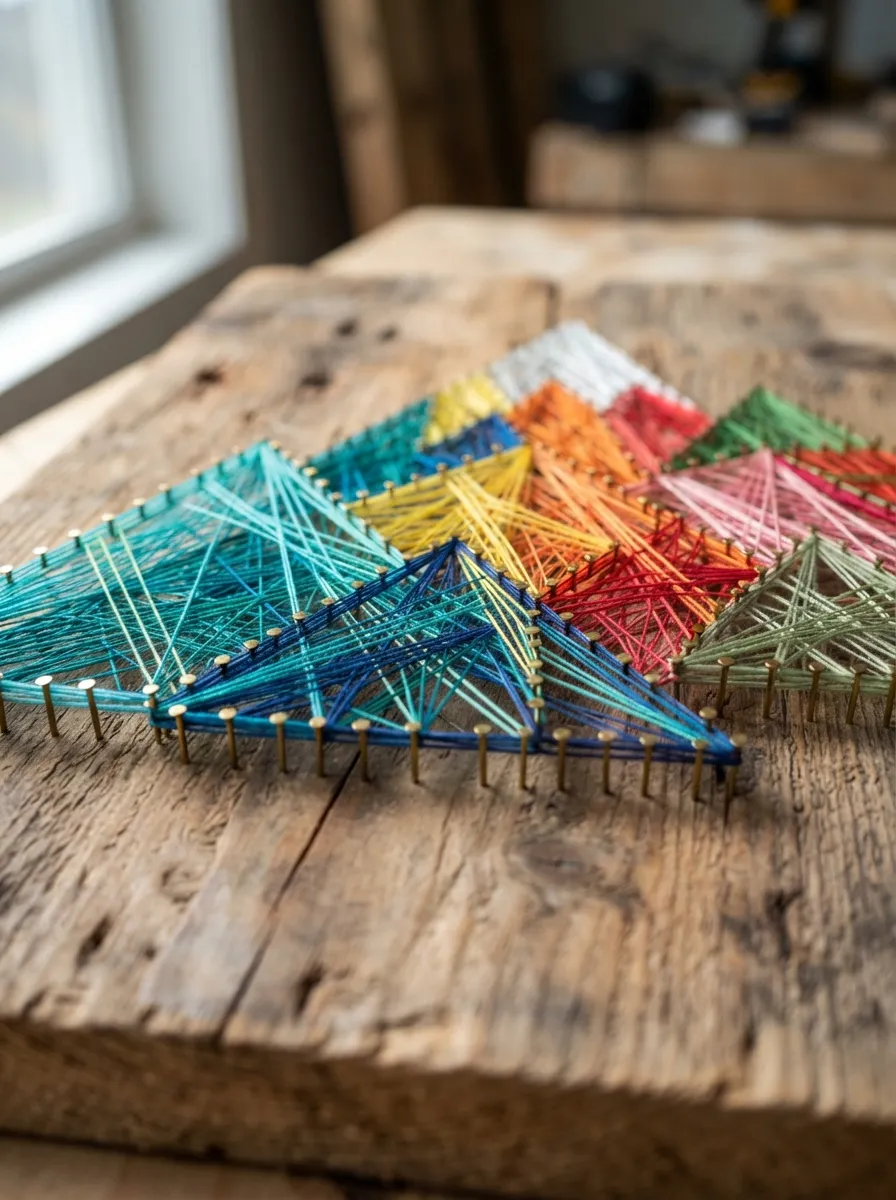
String art turns nails and thread into surprisingly striking wall pieces. Start with a wooden board, a hammer, small nails, and a few spools of embroidery thread. Sketch your design lightly in pencil, then hammer nails along the outline, spacing them about half an inch apart. Wrap the thread around the nails in overlapping patterns to fill in the shape. A budget tip: embroidery thread costs only a dollar or two per spool, and one board can be redesigned multiple times if you remove the nails. Simple shapes like mountains, hearts, or initials work best for beginners. More advanced makers can try detailed animal silhouettes or word art. This project is satisfying because the design builds gradually with each wrap of thread. It suits kids’ rooms, home offices, or any wall that could use a playful pop of color. String art also makes a meaningful handmade gift for birthdays or housewarmings.
10. Corkboard Photo Collage
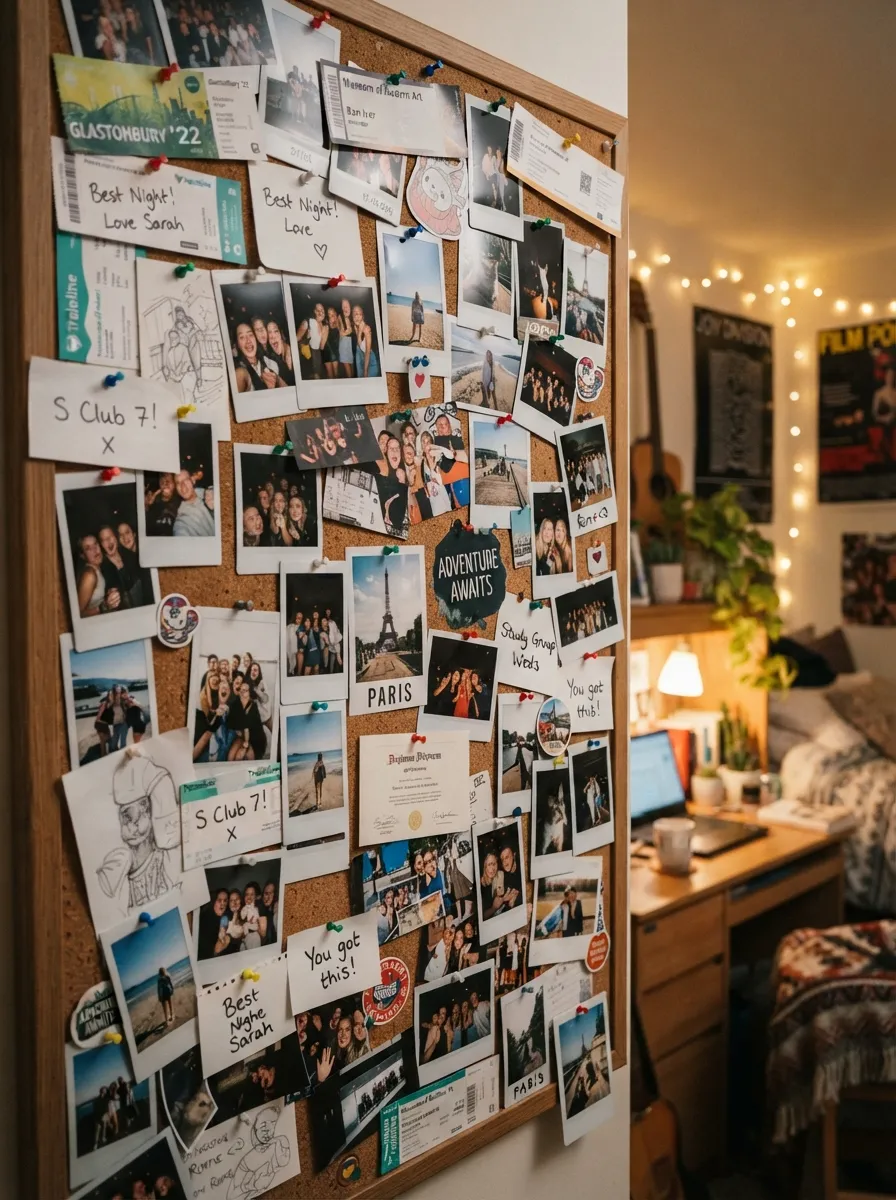
A corkboard collage is one of the most flexible wall projects around. Buy large cork tiles or a full cork sheet and mount it directly to the wall using strong adhesive. Once it’s up, pin photos, ticket stubs, postcards, and handwritten notes in overlapping layers. A budget tip: cork tiles are often sold in multipacks for under fifteen dollars, making this one of the cheapest large-scale wall projects available. Because everything is pinned rather than glued, you can rearrange or swap items anytime without damage. This makes it ideal for dorm rooms, home offices, or creative workspaces where inspiration changes often. Add small string lights around the edges for extra warmth at night. Layer items loosely rather than in a strict grid for a more relaxed, lived-in feel. A corkboard wall becomes a living scrapbook, growing and changing along with your memories and interests.
11. Hanging Plant Wall Garden
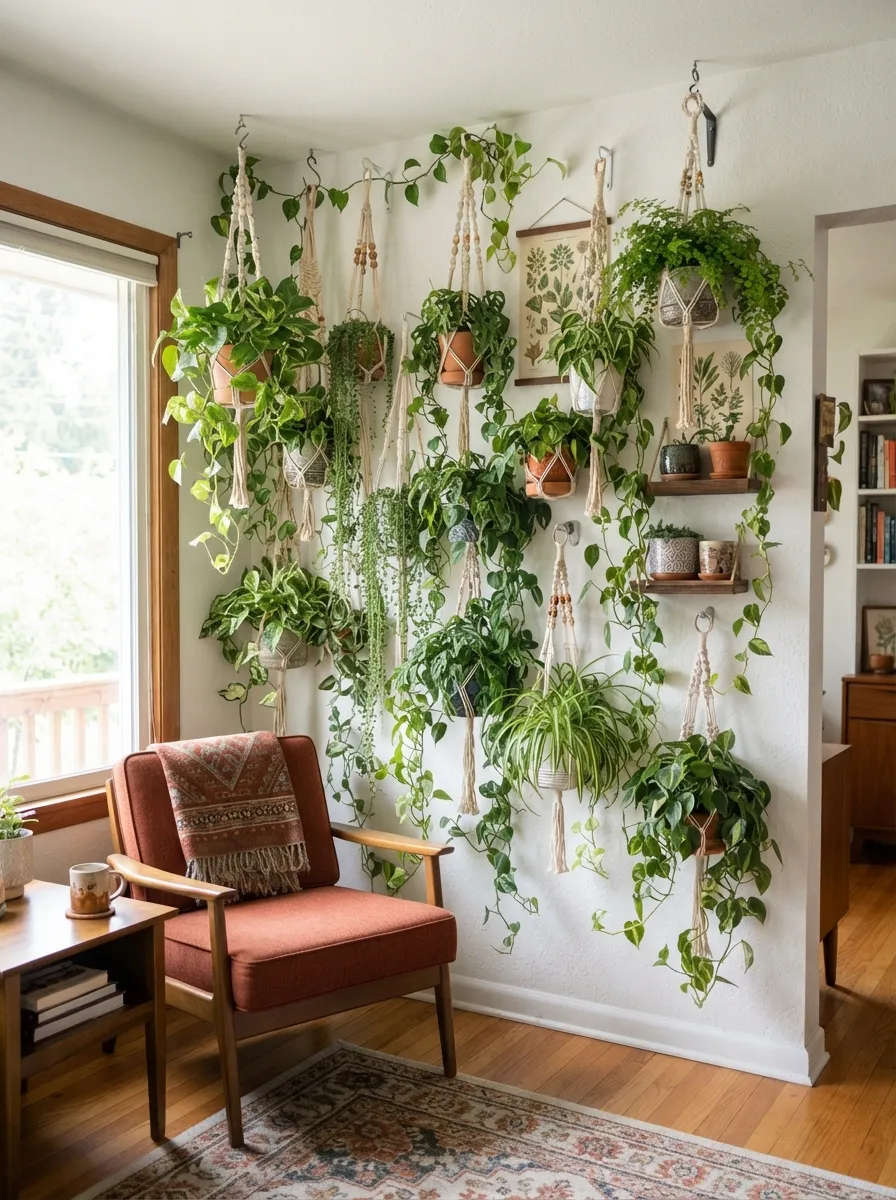
A plant wall brings life and color into any room without paint or frames. Start with a few hardy trailing plants like pothos or spider plants, which forgive occasional neglect. Hang them at varying heights using simple hooks or macrame holders. A budget tip: propagate cuttings from a friend’s plant instead of buying new ones, since most trailing plants root easily in a glass of water. Mix pot styles and plant sizes for visual interest, but keep the color palette of your containers simple so the greenery stands out. Group plants in odd numbers, like three or five, for a more natural-looking cluster. This project works well near windows where plants can get indirect light. Beyond decor, a plant wall improves air quality and adds a calming, natural texture to a room. As your plants grow and trail down the wall, the display keeps evolving without any extra work from you.
12. Mirror Cluster Wall
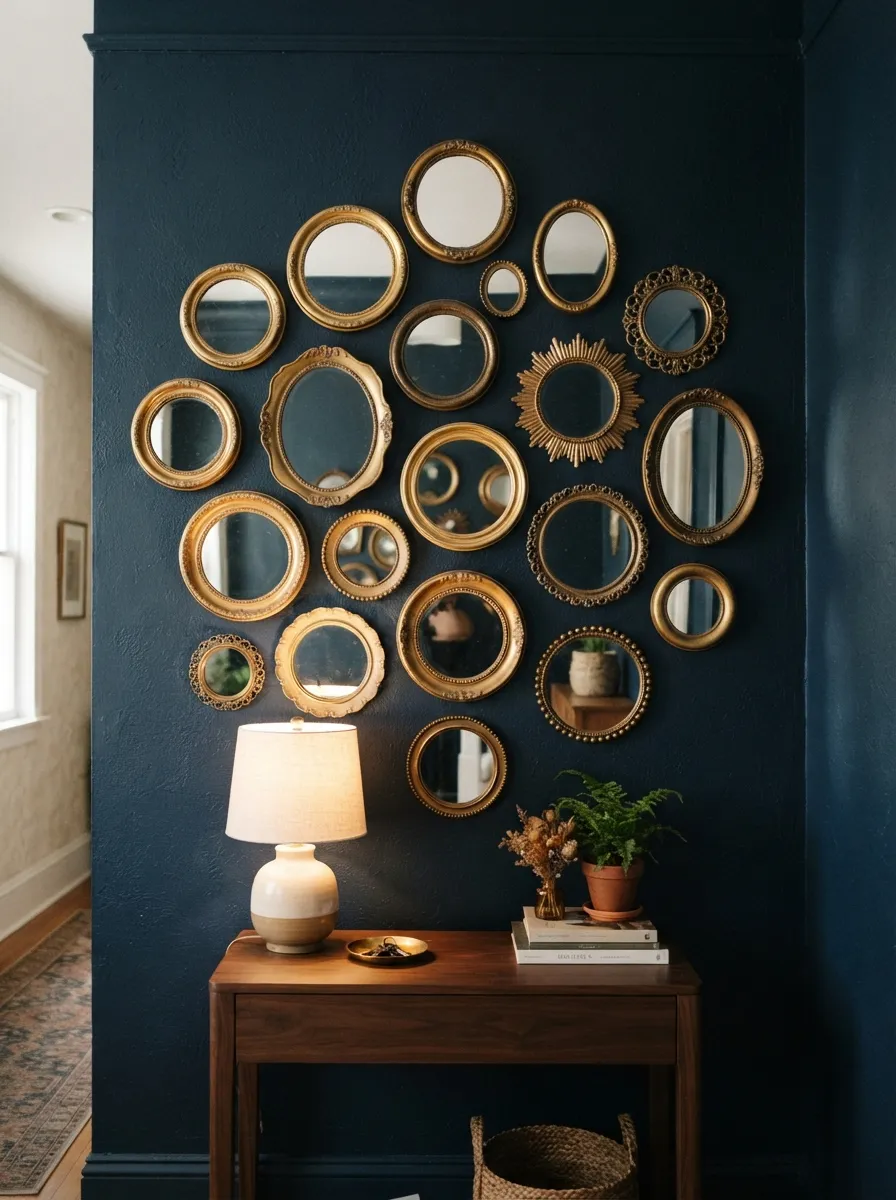
Mirrors do double duty. They decorate a wall and make a room feel bigger by bouncing light around. Collect small mirrors in different shapes from thrift stores or discount home shops. Round, oval, and sunburst styles mix well together. A budget tip: spray paint mismatched mirror frames the same metallic color for a cohesive, higher-end look without buying anything new. Arrange the mirrors on the floor first, balancing sizes and shapes before committing to hanging them. Use adhesive hooks for lighter mirrors to avoid drilling multiple holes. This project works especially well in entryways, hallways, and small bathrooms where extra light and reflection make the biggest difference. A mirror cluster also gives you a quick spot to check your outfit before heading out the door. Keep spacing tight between mirrors for a dense, gallery-style cluster, or spread them out for a lighter, airier feel.
13. Rope Wall Art
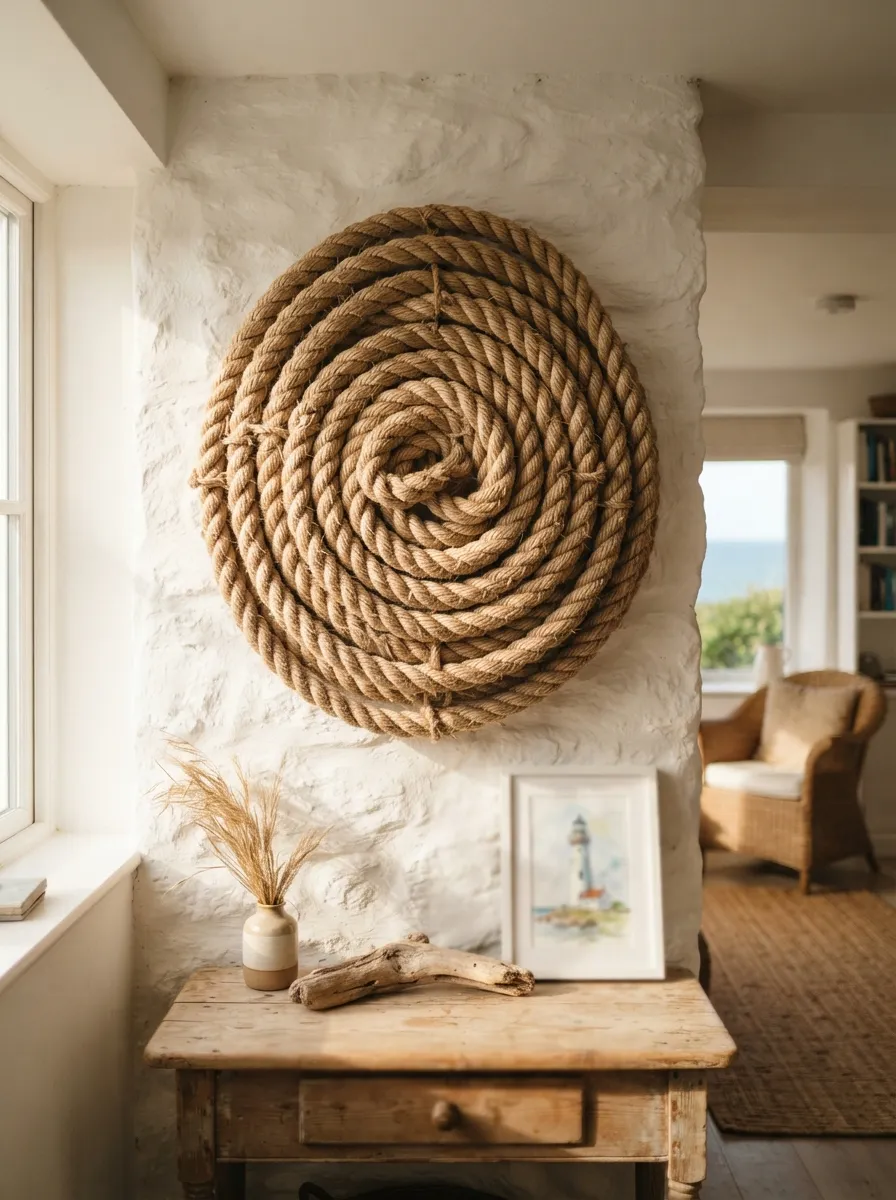
Rope art brings a coastal, textured feel to any wall. Buy thick cotton or jute rope from a hardware store and coil it into a spiral, wave, or geometric shape. Secure the coils with hot glue as you go, working section by section. A budget tip: hardware store rope is often cheaper per foot than craft store versions, so compare prices before buying. Mount the finished piece on a round wooden backing board using a hanging hook on the back. This project pairs well with beach house, farmhouse, or minimalist decor styles. The natural fiber texture adds warmth without adding color, which makes it easy to match with almost any existing palette. Try layering two rope thicknesses for added depth. Rope art is sturdy and low maintenance, making it a good choice for entryways or covered porches where other materials might not hold up as well over time.
14. Paint Swatch Rainbow Wall
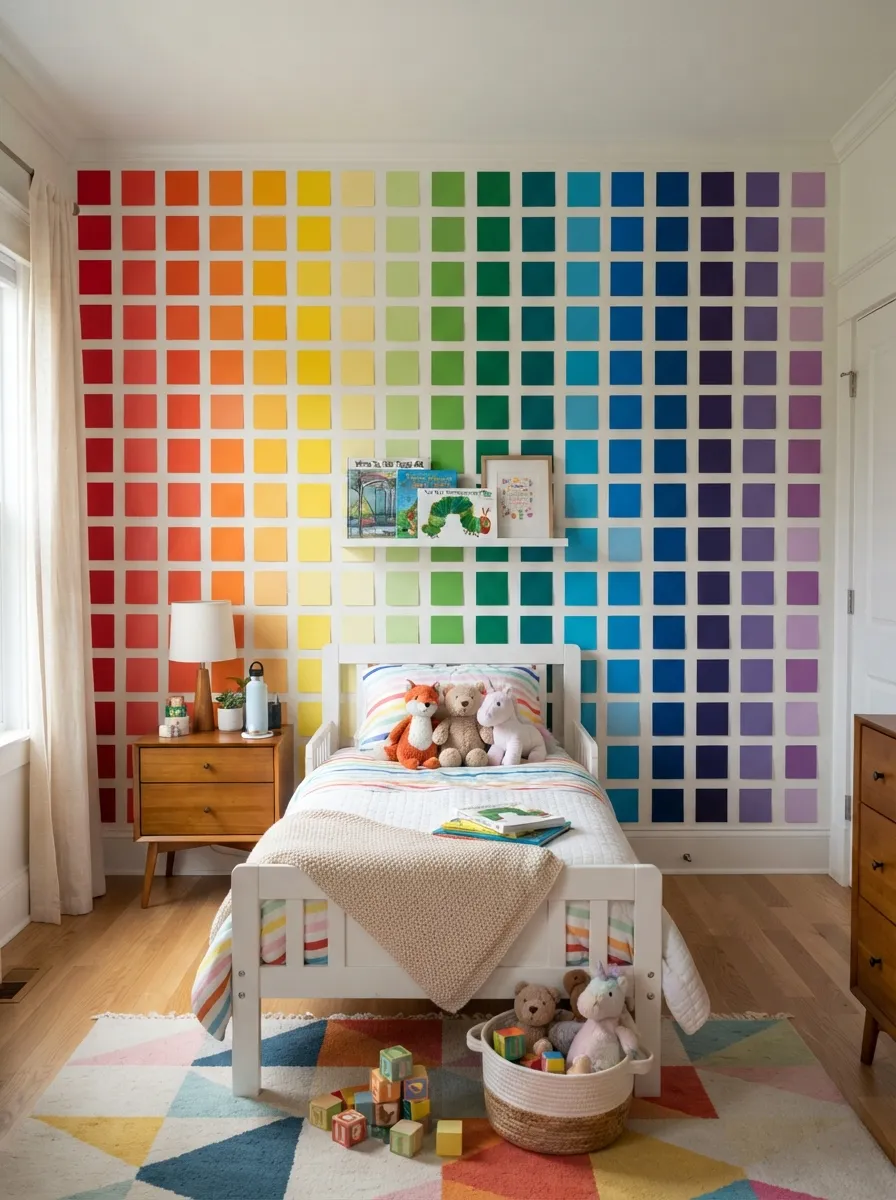
Paint swatches from the hardware store are free and full of color options. Grab a stack in every shade you like, then cut or trim them into uniform squares. Arrange the squares on your wall in a rainbow gradient, moving from one color family into the next. A budget tip: most hardware stores hand out paint chips at no cost, making this one of the least expensive projects on this list. Use a small dot of removable adhesive on the back of each swatch so you can adjust the layout without damaging the wall. This project works great in kids’ rooms, playrooms, or craft spaces where a burst of color feels appropriate. Try arranging the squares into a heart, arrow, or wave shape instead of a straight grid for a more creative twist. Because the swatches are removable, the whole design can change in an afternoon whenever you want something new.
15. Map Wall Art
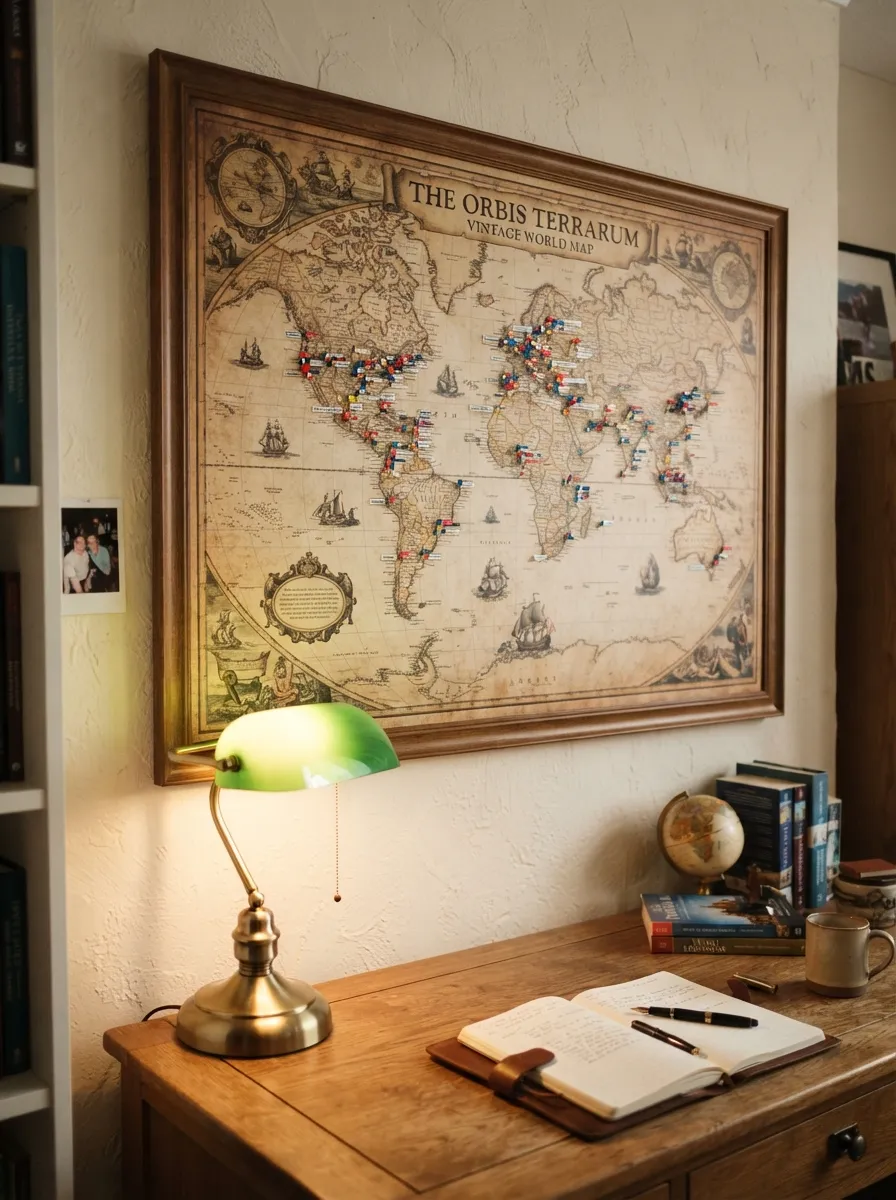
A map turns wall space into a personal travel journal. Buy a large printed map, or use an old atlas page enlarged at a print shop. Mount it flat using a simple wood or metal frame, or attach it directly with removable adhesive strips. A budget tip: thrift stores and used bookstores often sell old maps and atlases for just a few dollars. Add small pins or stickers to mark places you’ve visited or hope to visit someday. This project works well in home offices, hallways, or above a desk where you’ll see it often. Choose a map style that matches your decor, whether that’s a muted vintage look or a bold modern color scheme. A map wall sparks conversation and doubles as a visual bucket list. Over time, watching the pins accumulate becomes its own kind of reward, turning a simple decoration into a record of where you’ve been.
16. Record Album Cover Display
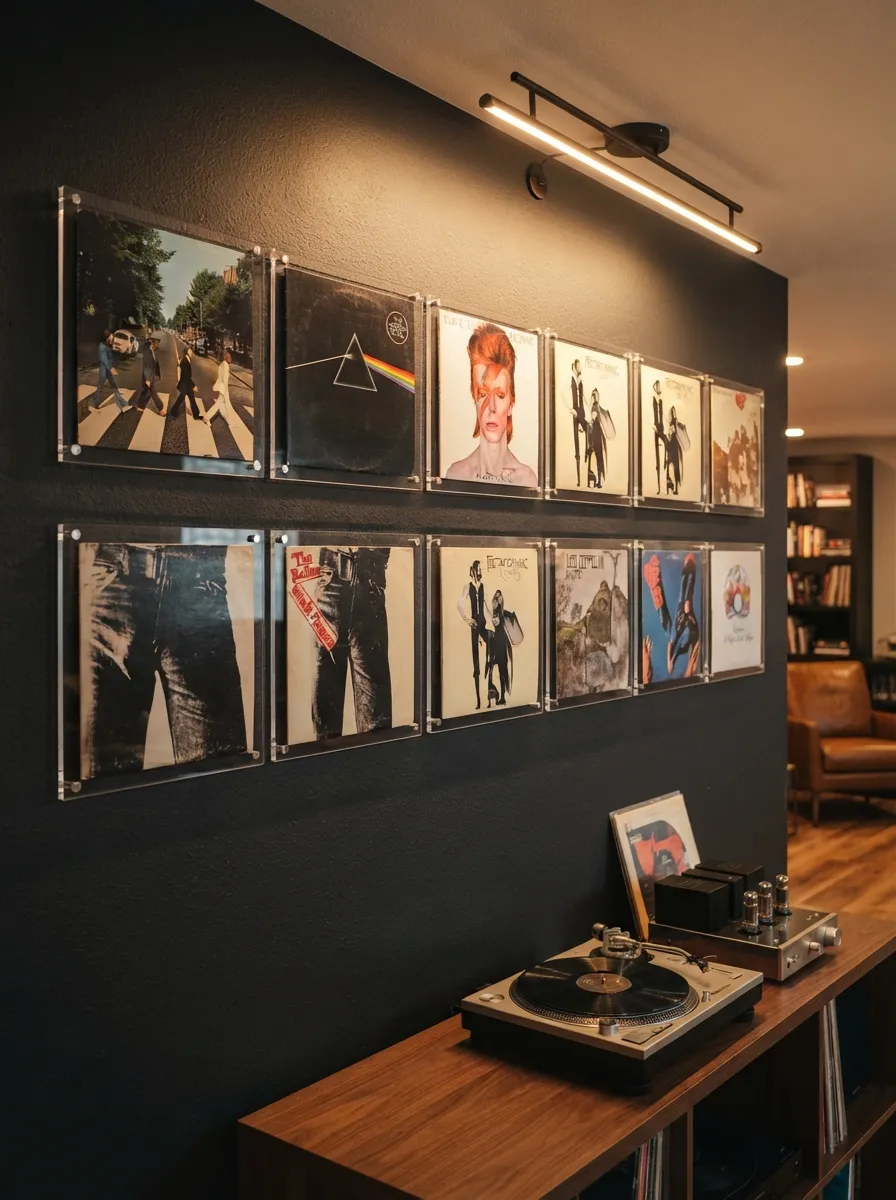
Old vinyl records make bold, colorful wall art. Look for albums with striking cover art at thrift stores or garage sales, even if the vinyl inside is scratched. Mount each cover using a clear acrylic record frame, which lets you swap covers anytime you find a new favorite. A budget tip: damaged records with intact covers are often sold for a dollar or less, since sellers assume no one wants a broken record. Arrange three to five covers in a row or grid for a gallery feel. This project suits music rooms, living rooms, or home bars where a little personality goes a long way. Mixing genres and eras adds visual variety, from bold psychedelic art to minimalist jazz covers. Because the frames are reusable, your display can rotate with the seasons or your current favorite artists, keeping the wall fresh without any extra cost beyond your next thrift store visit.
17. Postcard Collection Wall
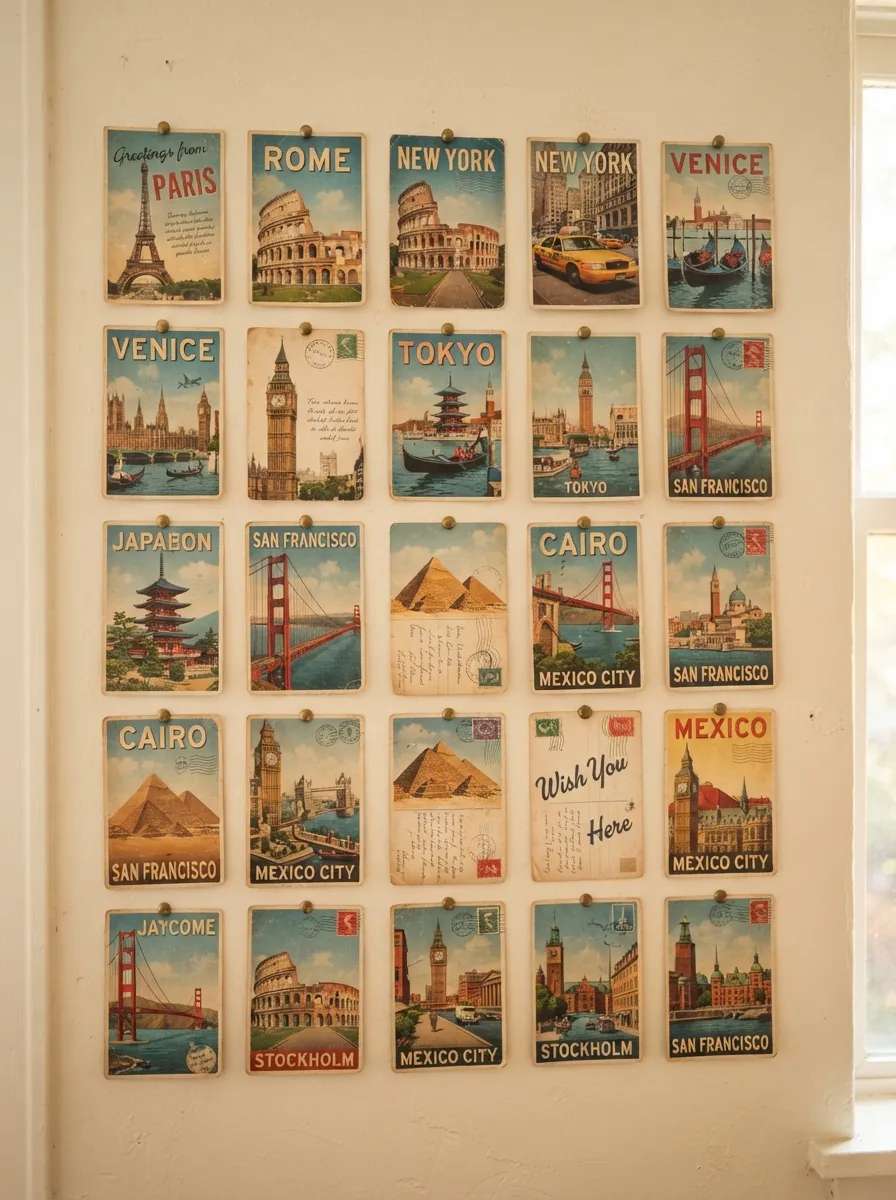
Postcards are small, affordable, and full of character. Collect them from trips, flea markets, or online sellers who specialize in vintage ephemera. Arrange them in a tight grid for a clean, organized look, or scatter them loosely for a more relaxed feel. A budget tip: vintage postcards often cost less than a dollar each when bought in bulk lots online. Use small pins or a light adhesive to mount each card directly to the wall without frames. This keeps the project affordable and easy to update as your collection grows. A postcard wall works well in hallways, offices, or reading nooks where guests can stop and look closely. Group postcards by theme, like travel destinations or vintage illustrations, for a more cohesive story. Because each card is small, this project is forgiving for renters worried about wall damage, since a few small pin holes are barely noticeable.
18. Yarn Wrapped Letters
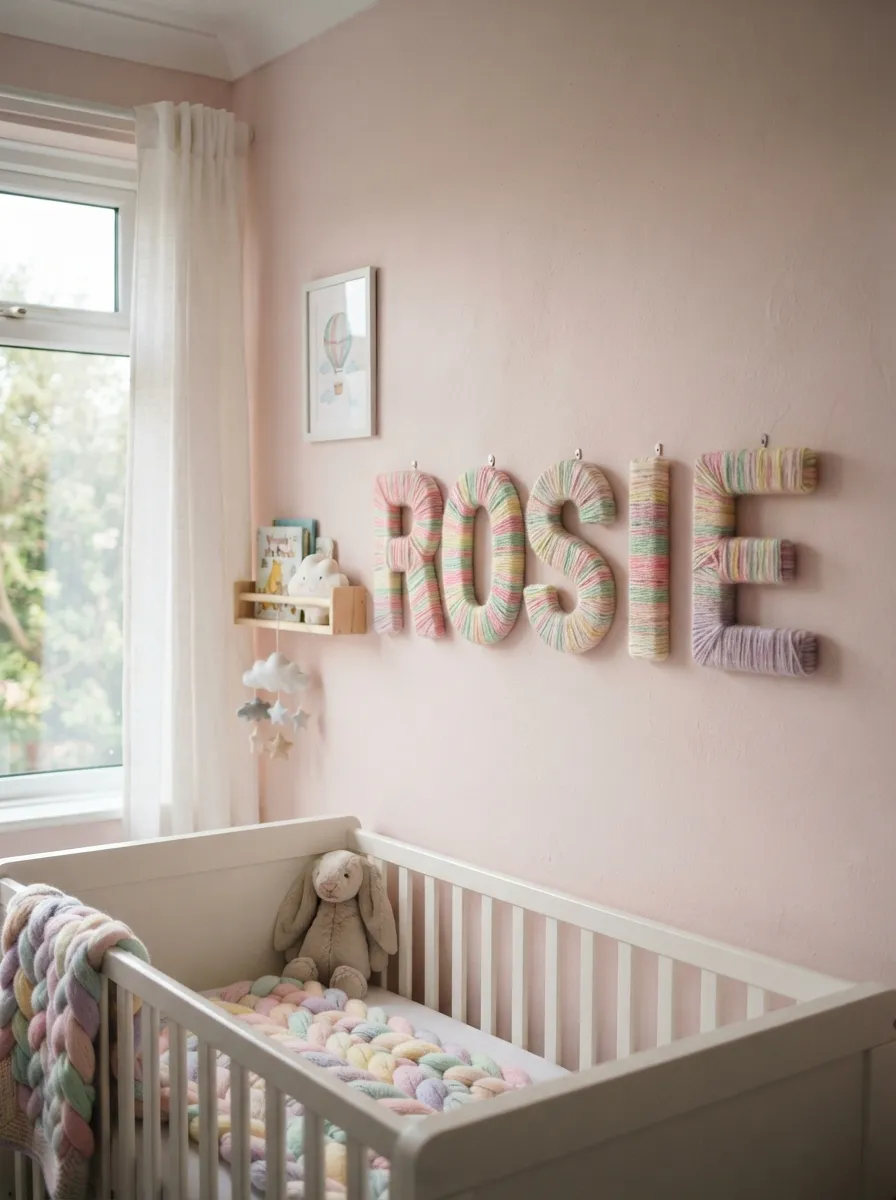
Yarn-wrapped letters spell out names, initials, or short words with texture and color. Buy plain wooden or cardboard letters from a craft store, then wrap yarn tightly around each one until the surface is fully covered. Secure the ends with hot glue. A budget tip: cardboard letters cost less than wooden ones and work just as well once wrapped, so skip the pricier option if you’re on a tight budget. Mix yarn colors for a playful look, or stick to one shade for something more subtle. This project suits nurseries, kids’ rooms, or craft spaces where a soft, tactile element adds warmth. Hang the letters using small adhesive hooks along the top edge. Because the letters are lightweight, they won’t need heavy-duty mounting hardware. This is also a great beginner project for kids to help with, since wrapping yarn requires no special skill beyond patience and a steady hand.
19. Peel and Stick Wallpaper Accent
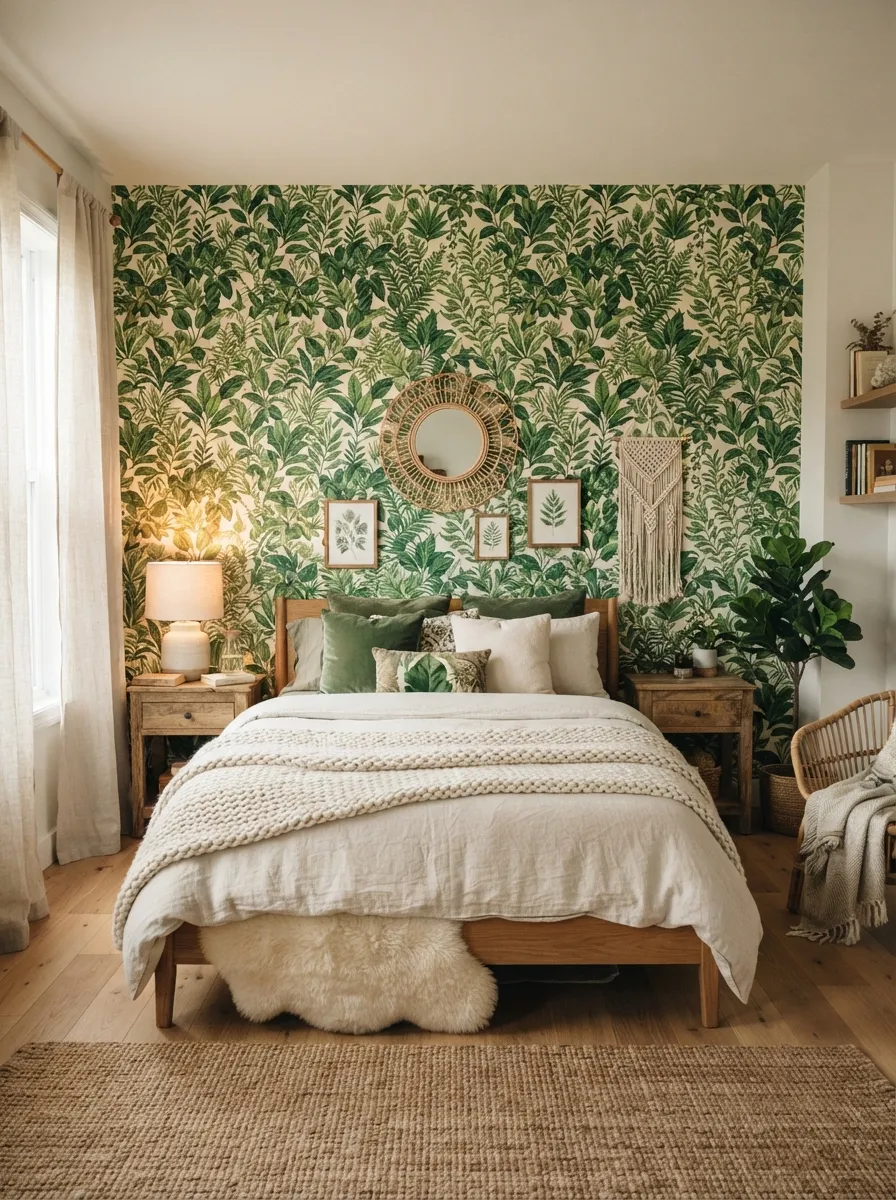
Peel and stick wallpaper gives you a bold pattern without the commitment of paint or traditional wallpaper paste. Measure your wall, then order enough panels to cover it with a little extra for trimming errors. Clean the wall surface first so the adhesive sticks evenly. A budget tip: apply wallpaper to just one accent wall instead of an entire room to cut material costs significantly while still making a strong visual impact. Work from top to bottom, smoothing out bubbles with a credit card or plastic scraper as you go. This project works especially well behind a bed, on a small accent nook, or in a powder room. Because it peels off cleanly, it’s a safe option for renters who want a bold look without breaking their lease agreement. Choose a pattern that contrasts with your furniture for the most impact, whether that’s a bright floral, a geometric print, or a subtle textured design.
20. Handprint or Kids Art Display
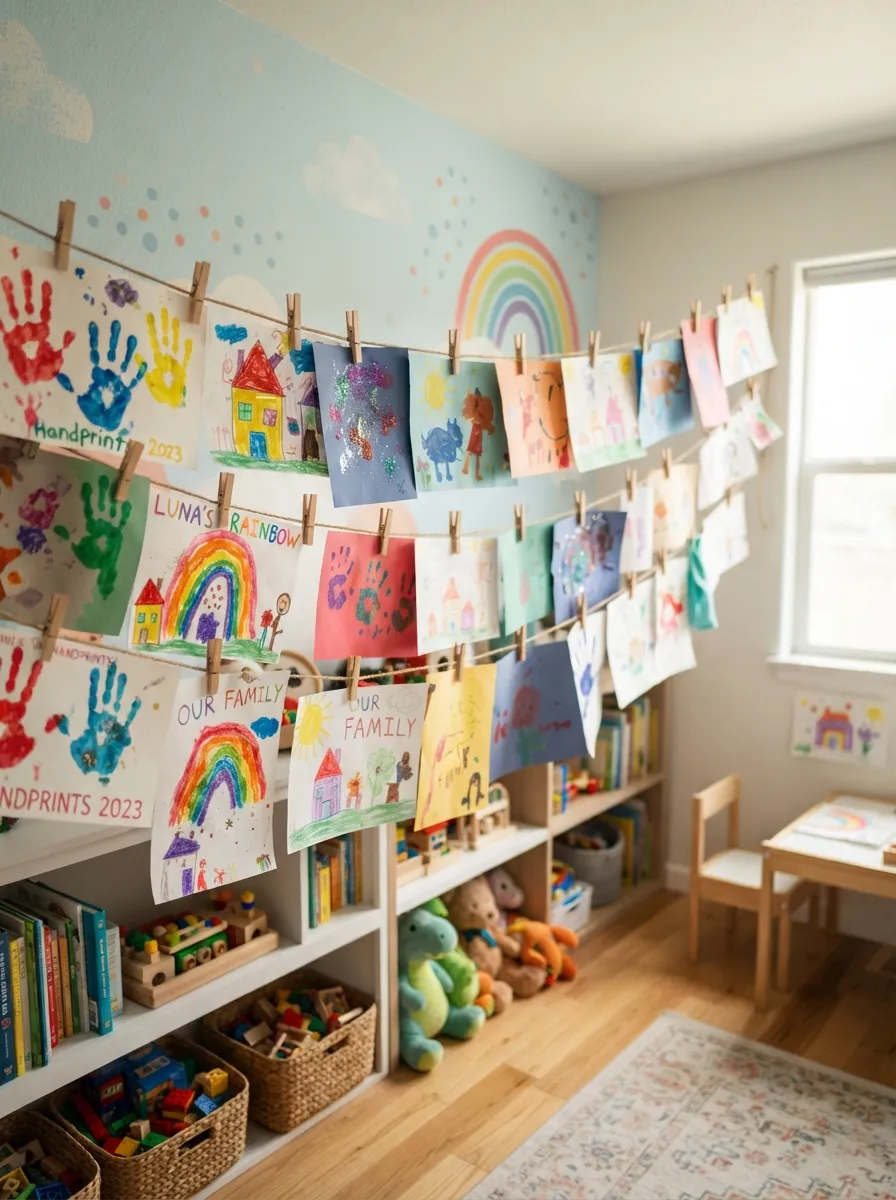
Kids’ art deserves better than a pile in a drawer. String a length of twine across a wall and use small wooden clothespins to clip up drawings, paintings, and handprints. A budget tip: twine and mini clothespins cost only a few dollars for enough supplies to cover an entire wall, and both are reusable as new art comes in. Rotate the pieces every few weeks so the display always feels current. This project works well in playrooms, hallways, or a child’s bedroom, giving their work a proud place instead of a forgotten folder. Let kids help choose which pieces go up, which builds their sense of ownership over the space. For extra durability, laminate favorite pieces before clipping them so they survive little hands touching them repeatedly. This display also makes it easy to swap in seasonal art projects, holiday crafts, or school assignments as they come home throughout the year.
21. Feather Wall Hanging
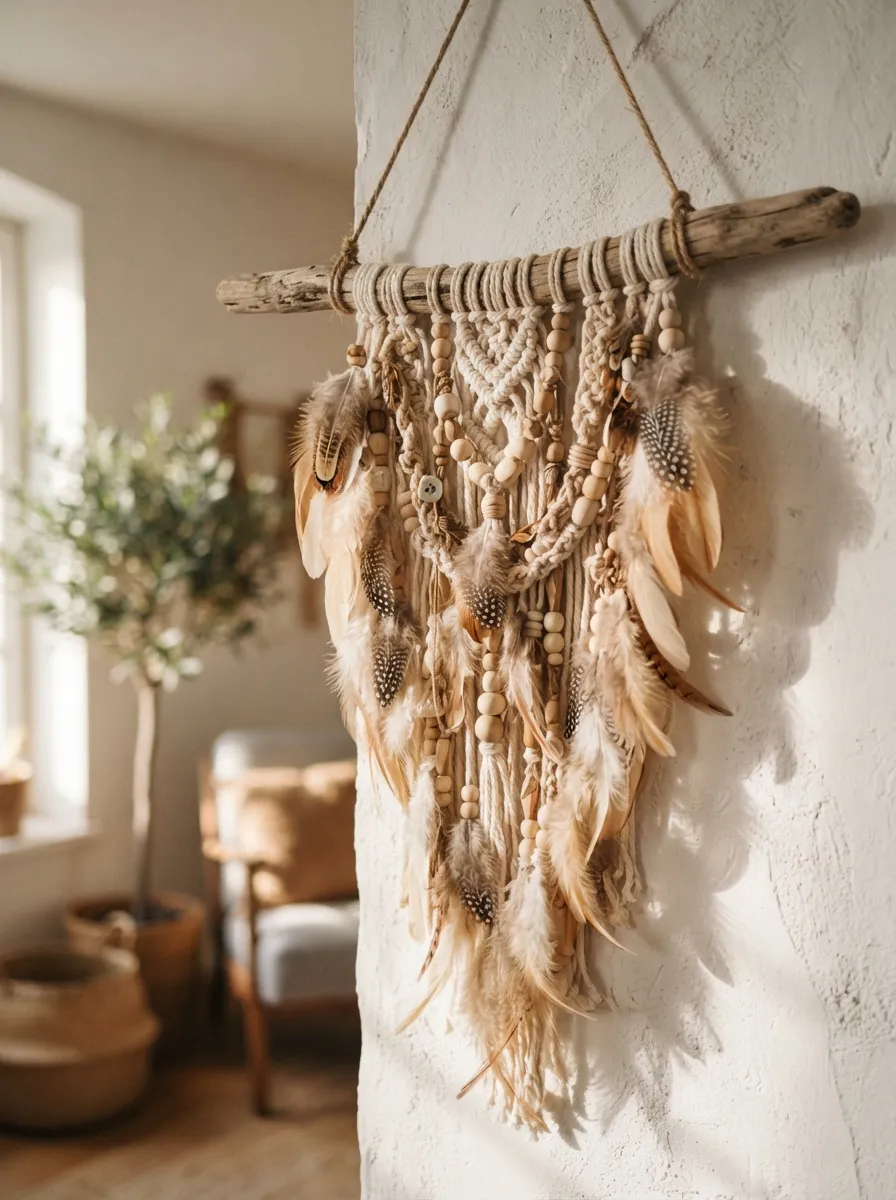
Feather hangings add a light, boho touch to any wall. Find a sturdy branch or dowel to use as the base, then attach feathers using thread or thin wire. Mix feather sizes and colors for a layered, natural look. A budget tip: craft stores sell bags of assorted feathers for just a few dollars, enough for several hangings. Add small wooden beads along the thread for extra texture and visual interest. Hang the finished piece from a single nail or hook, letting the feathers move slightly with any passing breeze. This project suits bedrooms, reading corners, or any space that could use a soft, organic accent. Because it’s lightweight, it works well on walls where you don’t want to risk heavier hardware. Try dyeing plain white feathers with fabric dye for a custom color palette that matches the rest of your room without needing to buy pre-colored feathers at a higher price.
22. Basket Wall Grouping
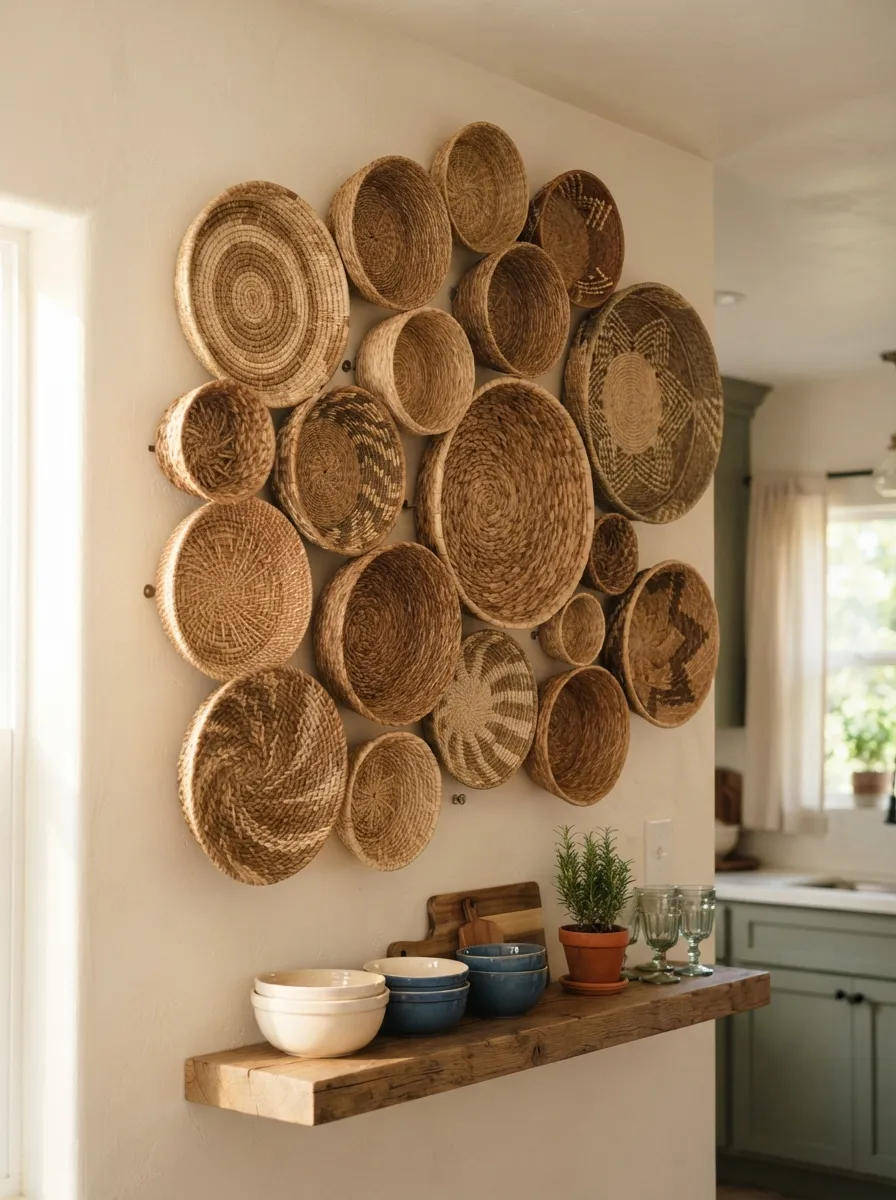
Woven baskets aren’t just for storage. Mounted flat on a wall, they create texture and depth without adding any real weight or cost. Collect baskets in different shapes and sizes from thrift stores or discount shops. A budget tip: mismatched baskets found secondhand often cost less than a single new basket from a home goods store, and the variety actually improves the final look. Arrange them on the floor first, mixing round and oval shapes until the grouping feels balanced. Mount each basket flat against the wall using a few small nails through the rim, which is usually sturdy enough to hold the shape without bending. This project suits kitchens, dining rooms, and entryways where a warm, natural material adds contrast to painted walls or tile. Basket walls also pair well with plants, woven textiles, or wood accents for a cohesive, earthy room design that feels collected over time rather than bought all at once.
Conclusion
A blank wall is really just an invitation. Every idea on this list can be done over a weekend, with supplies that cost little and skills that require no special training. Start small if a full gallery feels like a lot. Pick one project, gather a few materials, and give it a try. Once you see how much personality a handmade piece adds to a room, chances are you’ll want to fill every wall in your home the same way. Your space deserves decor that reflects who you are, not just what’s on sale at a big box store, and every project here proves that meaningful decor doesn’t have to cost much at all.