Your garage decor ideas do not have to be a dumping ground for broken bikes and forgotten boxes. With the right decor choices, it becomes one of the most useful and good-looking rooms in your home. More homeowners are turning their garages into workshops, gyms, hangout spots, and showrooms for their cars. The ideas in this list are practical, affordable, and totally doable on a weekend. You do not need a contractor or a big budget to make a real difference. Pick a few ideas that fit your space and your style, and start there. If you’re also exploring TV wall decor ideas, combining clean shelving, hidden cable management, and balanced decorative accents can help create a living room setup that feels modern, organized, and visually polished.
Epoxy Floor Coating for a Clean Polished Look
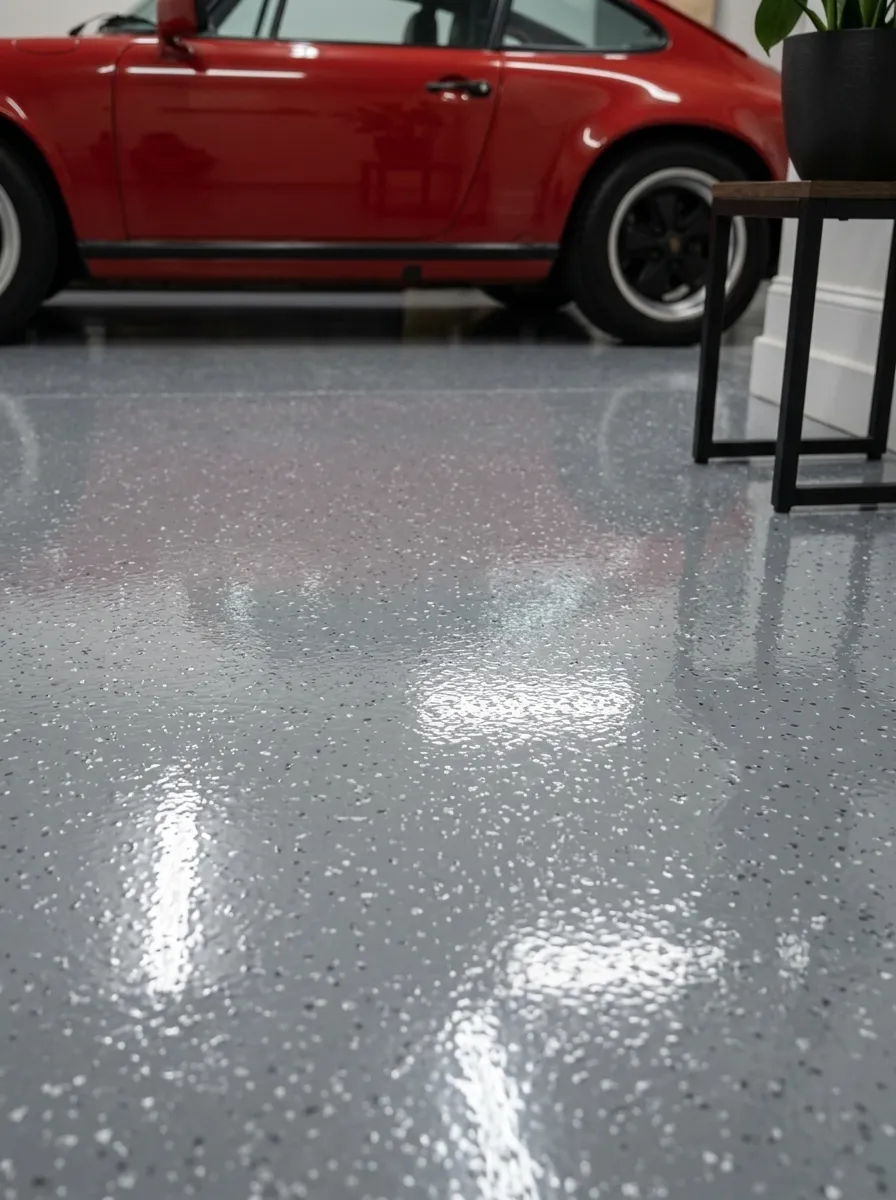
The floor is the first thing anyone sees when your garage door goes up. A bare concrete slab looks unfinished and feels cold. An epoxy coating changes everything about how the space feels.
Epoxy floor kits are available at most hardware stores for around fifty to one hundred dollars. The process takes a weekend but the result lasts for years. You get a smooth, glossy surface that is easy to sweep and wipe clean.
Go with a solid grey or charcoal tone for a clean modern look. Add paint flakes for a speckled texture that hides minor scuffs. A darker base with silver or white flakes is a popular combination right now.
Prep work matters most here. Clean the concrete thoroughly, fill any cracks, and let it dry fully before applying the epoxy. Skipping the prep leads to peeling later.
Once your floor is coated, the whole garage looks sharper instantly. Tools look more organized. Your car looks better sitting on it. Even cardboard boxes somehow look less chaotic against a polished floor.
This is the single highest-impact upgrade you can make to a garage space without hiring anyone.
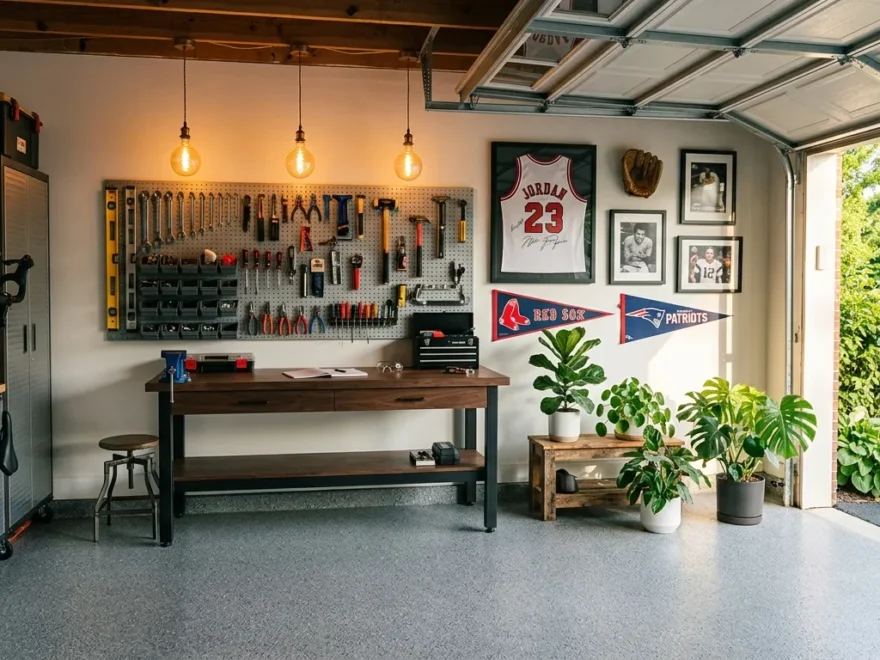
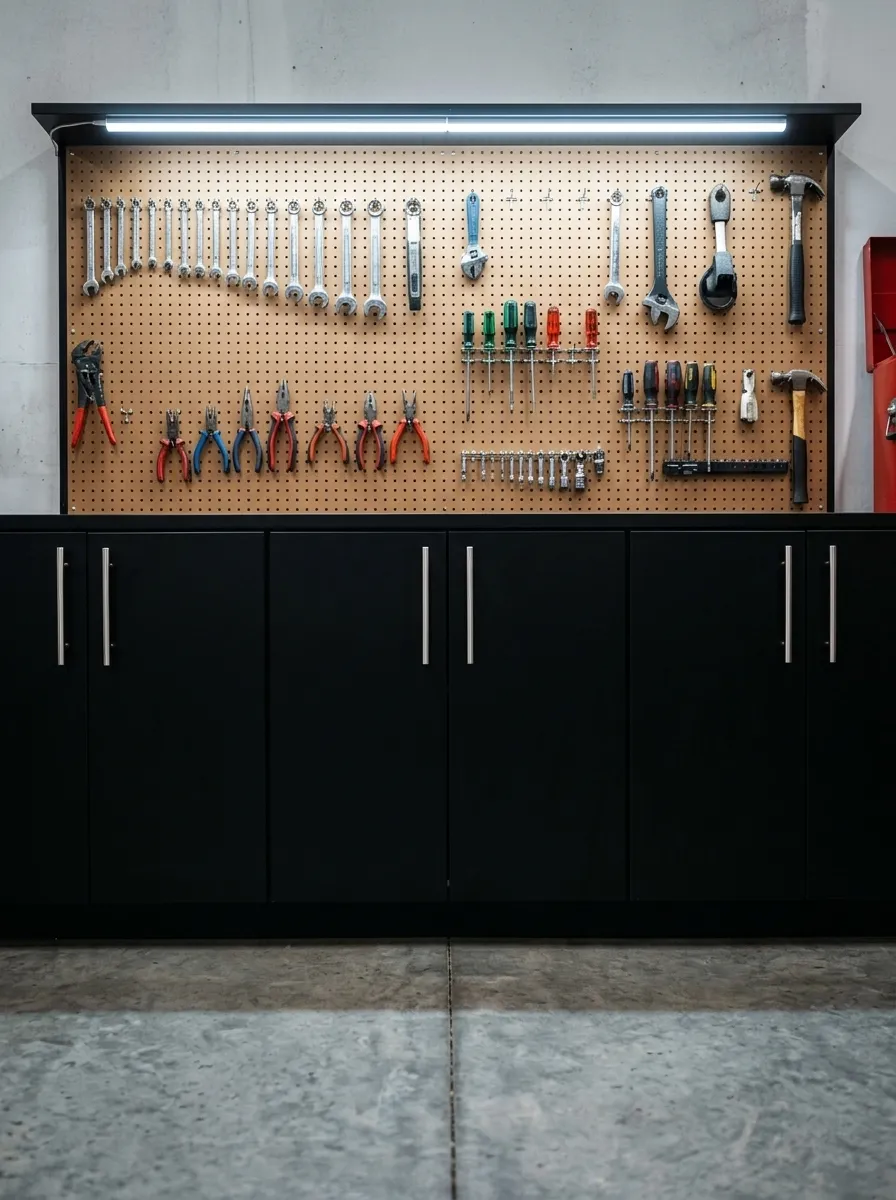
Pegboard Tool Wall for Organized Display
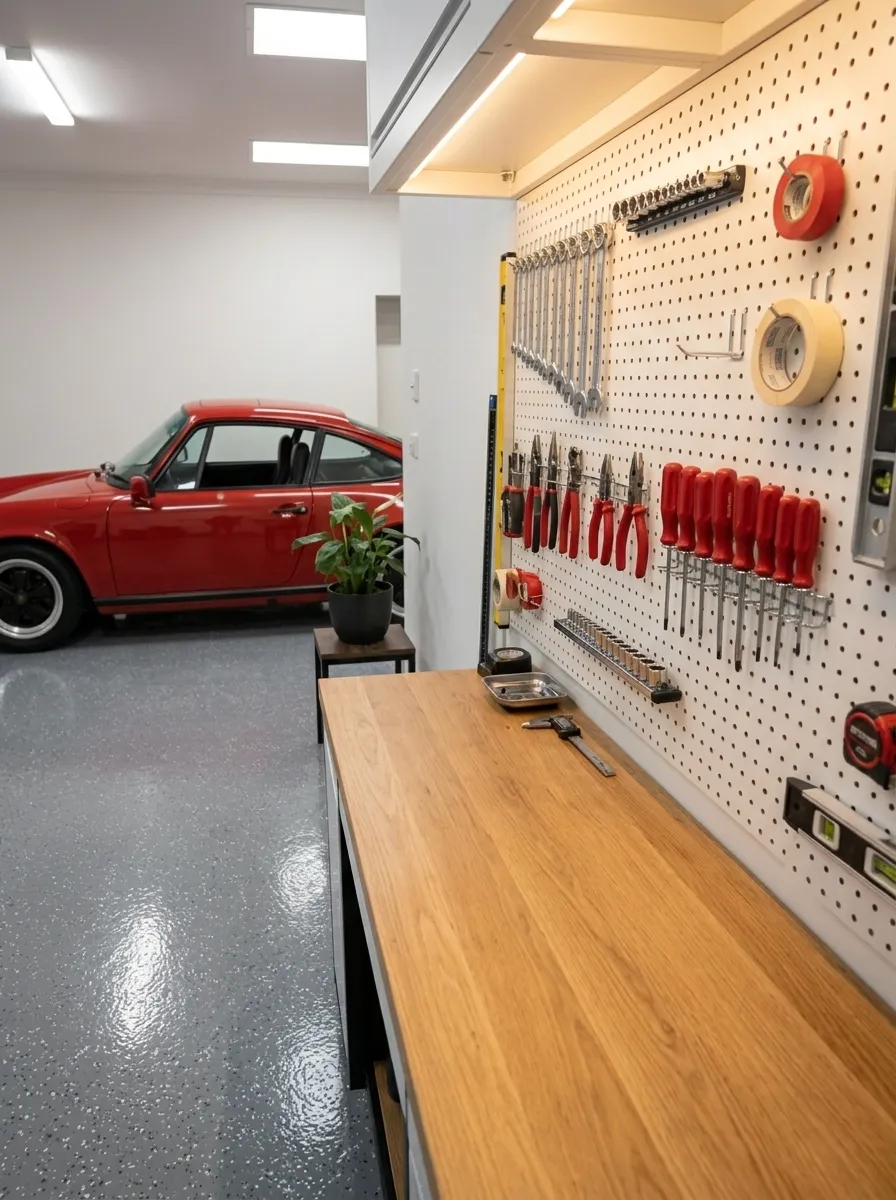
A pegboard wall turns your tool collection into wall art. Every hammer, wrench, and pair of pliers gets a dedicated spot. Nothing gets lost. Nothing piles up on the workbench.
A standard four-by-eight-foot pegboard sheet costs around twenty dollars at a hardware store. Paint it before mounting for a cleaner look. White and black are both popular. A dark charcoal pegboard with chrome hooks looks especially sharp.
Mount the board with furring strips between the pegboard and the wall so hooks have room to hang properly. This is a one-hour project with basic tools.
Once it is up, arrange your tools by category. Hang everything you use weekly at eye level. Less-used items go higher or lower.
Outline each tool with a black marker or paint so you always know where things belong. This military-style shadow board technique is what professional shops use and it works perfectly at home.
Add a strip of LED lights above the pegboard to illuminate the whole display. When the garage door opens and that lit-up tool wall is visible, the whole space looks intentional and professional.
Budget-friendly hook sets are available online in packs of fifty for under ten dollars.
Floating Wall Shelves for Vertical Storage
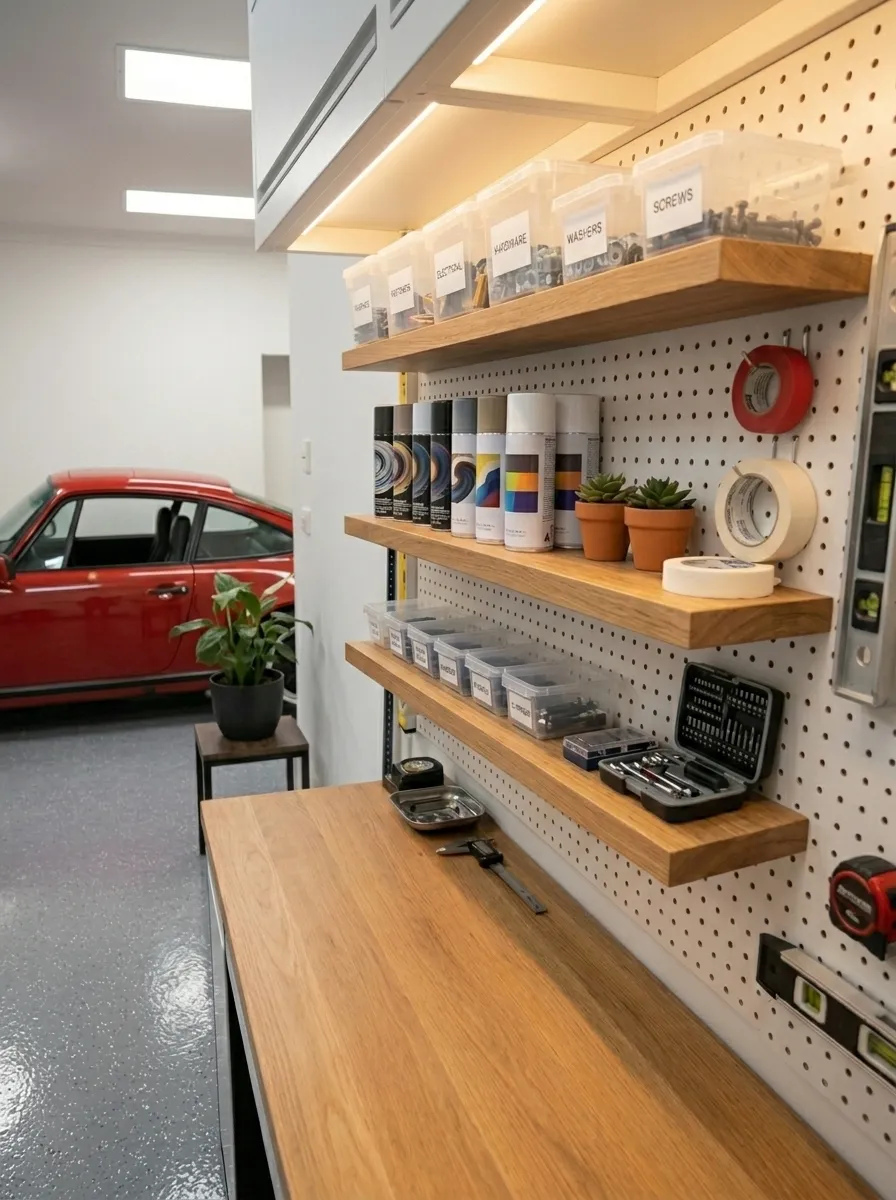
Floor space in a garage is precious. The moment you move storage off the floor and onto the walls, your whole garage feels twice as large.
Floating shelves do not require any special carpentry skills. Buy pre-made shelf brackets and boards from any hardware store. A basic four-foot shelf with two brackets costs around fifteen to twenty dollars.
Mount them at consistent heights along one or two walls. Space them twelve to fourteen inches apart vertically so standard bins and boxes fit easily.
Use matching plastic storage bins on every shelf. Label each one clearly. The uniformity makes even a crowded shelf look clean and put together.
Heavier items like car fluids, paint cans, and tool boxes go on the lowest shelf. Lighter seasonal items go up top. Keep things you use regularly at arm’s reach.
If your walls are drywall, use studs or wall anchors for secure mounting. Concrete walls need masonry anchors and a hammer drill.
Adding a floating shelf row above your workbench creates a dedicated supply zone right where you work. No more hunting for the right drill bit or extension cord. Everything sits at eye level exactly where you need it.
Edison Bulb String Lights for Warm Ambiance
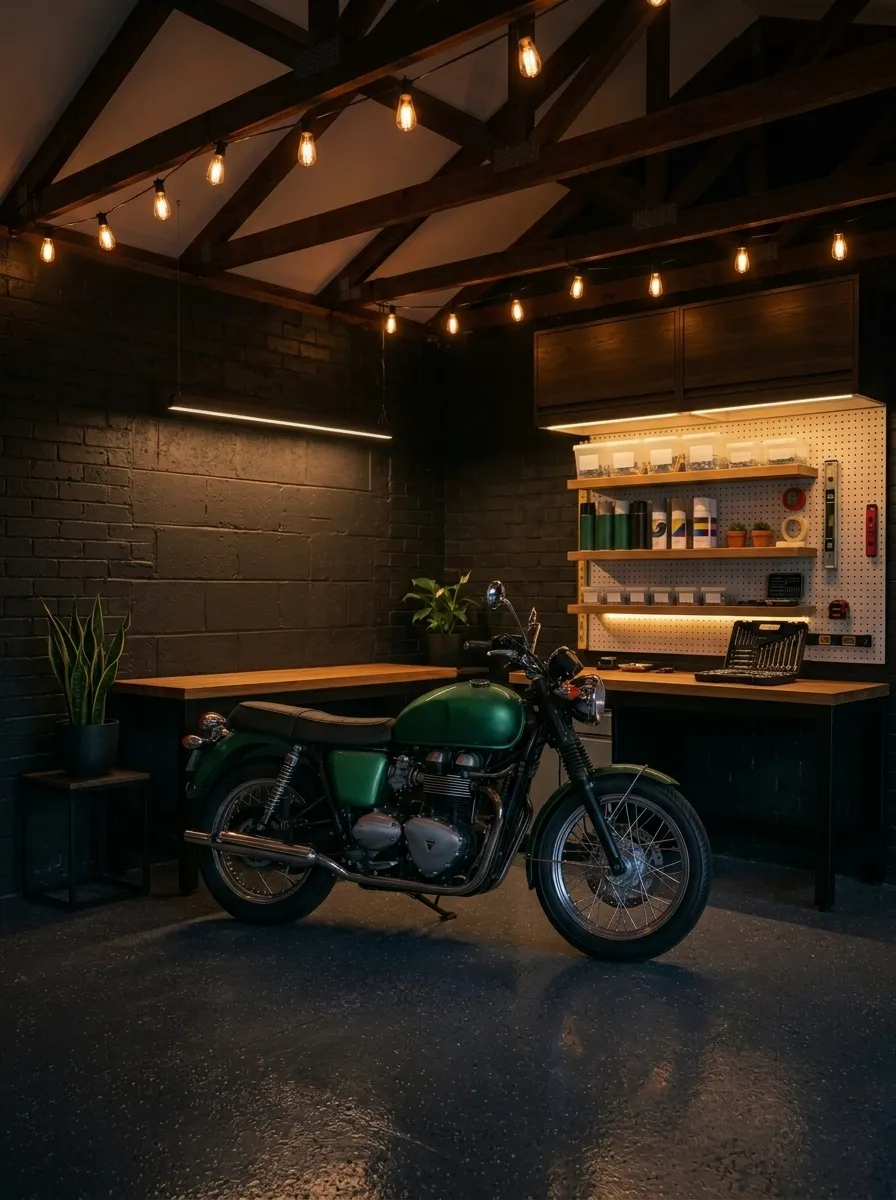
Most garage lighting is harsh and unflattering. A single fluorescent tube makes the space feel like a storage unit. String lights with Edison-style bulbs completely change the atmosphere.
Drape them along ceiling beams, run them along wall edges, or zigzag them overhead. The warm amber tone softens the entire room and makes time spent in the garage much more enjoyable.
A twenty-foot strand of outdoor-rated Edison string lights costs around fifteen to twenty-five dollars online. These are weather-resistant and safe for garages with fluctuating temperatures.
Pair string lights with your main overhead lighting rather than replacing it. Keep your bright ceiling lights for when you are actually working. Switch on the string lights when you are hanging out, watching a game, or just spending time in the space.
If your garage has exposed wooden rafters, clip the lights along each beam with small hooks or cable staples. On smooth ceilings, adhesive hooks hold the strands in place without any drilling.
This is one of the cheapest and fastest changes you can make. Thirty minutes of work, twenty dollars of supplies, and your garage feels like a completely different room.
Framed Sports Memorabilia Wall

If you follow a team, your garage is the perfect place to build a dedicated display. Sports memorabilia goes from clutter in a closet to a real statement wall when it is properly framed.
Start with matching frames. You do not need expensive frames. A pack of five black frames from a dollar store or discount retailer costs under ten dollars. Consistency in frame color ties the whole wall together.
Mix different display elements. A framed jersey as the centerpiece. Signed photos on either side. Team pennants above and below. A printed schedule from a championship season. Old ticket stubs arranged in a shadow box.
Plan your layout on the floor before you start putting nails in the wall. Photograph the arrangement, then use it as a guide when hanging.
Hang everything at eye level. The center of each frame should sit at about sixty to sixty-five inches from the floor.
Add a shelf below the main display to hold a team bobblehead, a commemorative ball, or a small figurine. This breaks up the flat wall arrangement and adds depth.
This wall turns your garage from a parking spot into a room with a personality. Guests who share your team loyalty will love it every single time.
Chalkboard Paint Panel for a Functional Feature Wall
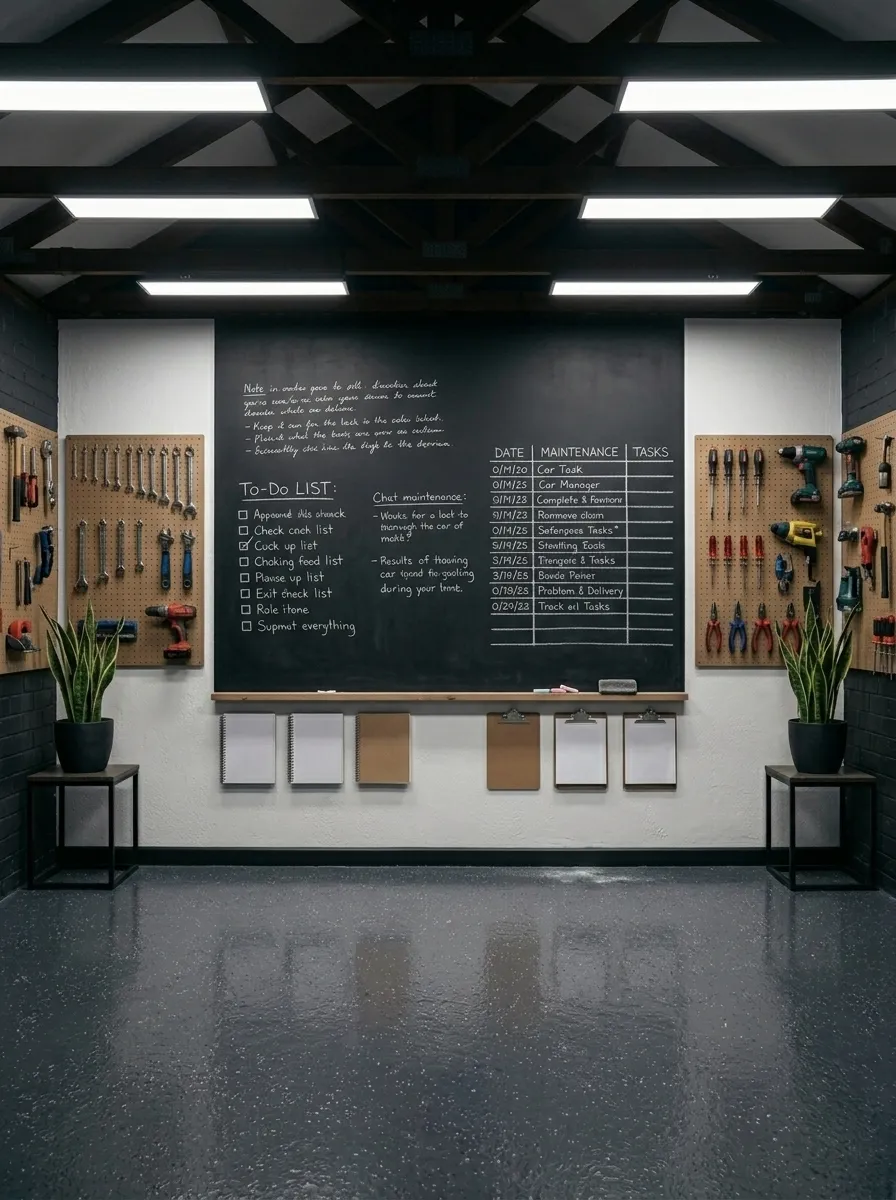
A chalkboard wall in a garage is more useful than it sounds. Use it to track project to-do lists, car maintenance schedules, parts you need to order, or measurements for ongoing builds.
Chalkboard paint comes in a can and costs around fifteen dollars. Apply it to any smooth wall surface in two coats. Let it cure for a full day before writing on it.
You do not need to paint an entire wall. A four by four foot section is plenty. Use painter’s tape to create a clean border around your chalkboard panel so it looks like a framed feature rather than an accident.
Mount two small wooden ledge shelves below the chalkboard to hold chalk and erasers. This keeps everything tidy and makes the panel feel like a complete built-in feature.
Write the date you last changed your oil on it. Track what tools you have lent out. Sketch rough plans for your next project. Leave a shopping list so you know what to grab on your next hardware store run.
A chalkboard wall is interactive, practical, and genuinely useful in a way that most decor is not. And repainting it is as simple as rolling on another coat.
Industrial Pipe Shelving for a Raw Modern Look
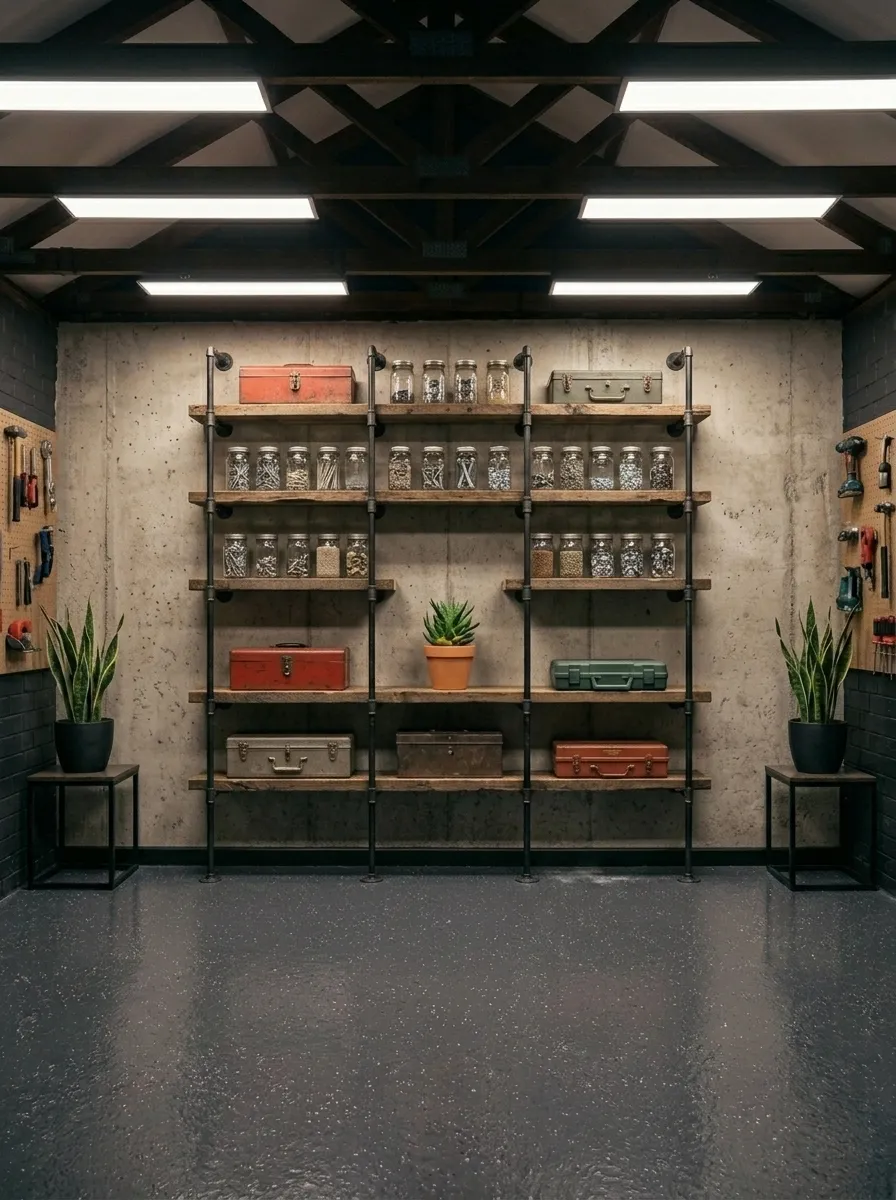
Industrial pipe shelving uses black iron pipe fittings and wooden boards to create open shelves that look like they belong in a high-end workshop. The raw, unfinished aesthetic is popular in garages because it matches the environment naturally.
Pipe flange fittings, nipple connectors, and floor flanges are all available at hardware stores. A basic three-shelf unit using two-inch diameter pipes costs around sixty to eighty dollars in parts.
Cut your shelf boards to length at the hardware store if you do not have a saw. Sand the edges smooth and finish with a dark walnut stain for a professional result.
Mount the floor flanges directly to the wall studs for solid support. These shelves can hold significant weight once properly secured.
The open design means everything on the shelves is visible. Keep only items that look decent on display. Glass jars full of screws and hardware look great. Labeled metal bins look sharp. Random plastic bags do not.
This shelving style works especially well on exposed brick or painted concrete walls. The contrast between the raw materials and the structured pipe framework gives the space a character that standard box shelves never achieve.
Accent Wall with Bold Paint Color
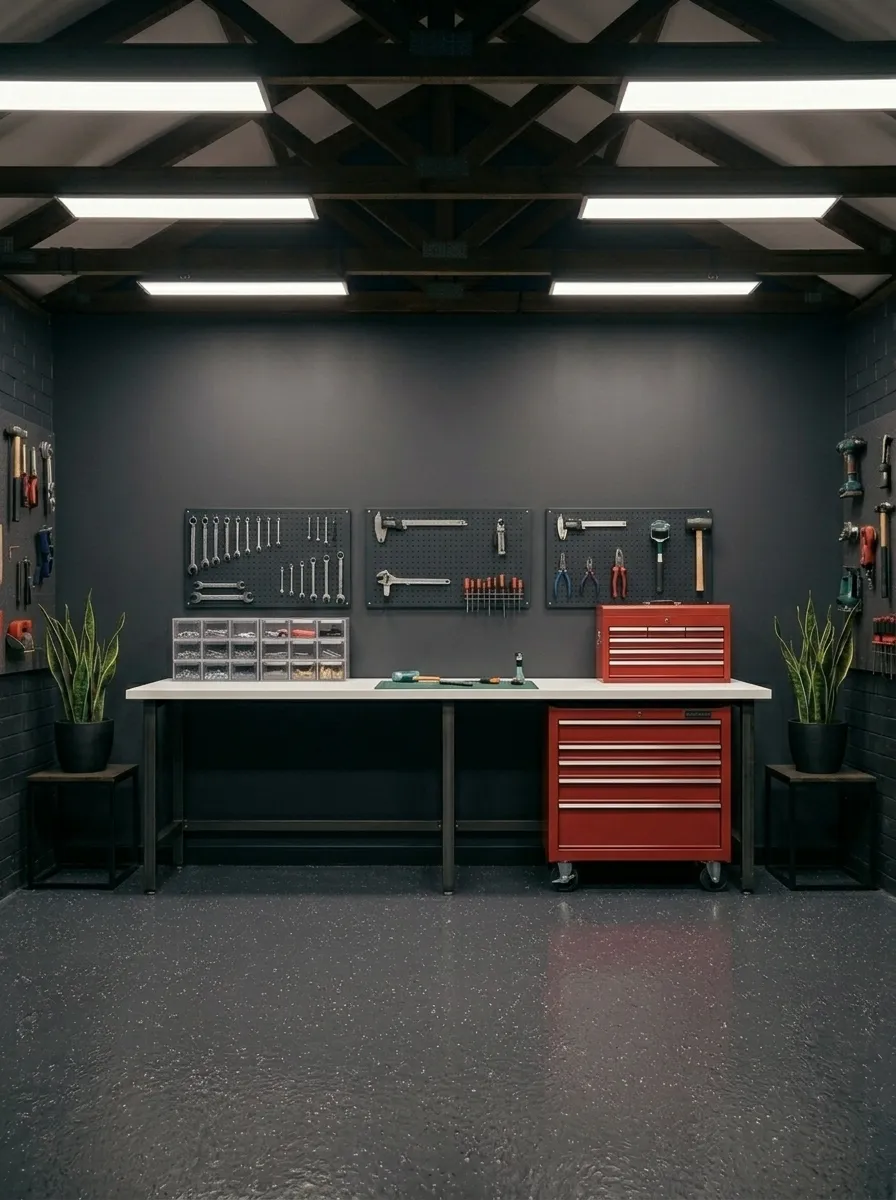
Painting one wall a bold color does more for a garage than almost any furniture change can. It creates a focal point, defines zones, and gives the space a finished look almost immediately.
Deep charcoal, navy blue, forest green, and brick red all work well in garage settings. These colors feel intentional and pair naturally with the industrial materials that most garages already contain.
You do not need to paint all four walls. Picking just one accent wall keeps the project small and the cost low. A single gallon of paint covers one wall for around thirty dollars.
Place your workbench or main tool storage against the accent wall to anchor the design. This connects the color to a functional purpose rather than just being decoration.
Use a semi-gloss or satin finish. Garages collect grease, dust, and fingerprints. A wipeable sheen makes cleanup simple.
If you want to go further, paint the floor-to-ceiling columns or door frames in the same accent color. Repeating the shade in small doses throughout the space ties the whole room together without additional cost.
This is one weekend project that delivers immediate visual results you will notice every single time you pull in or walk through.
Magnetic Tool Strip for Metal Tools
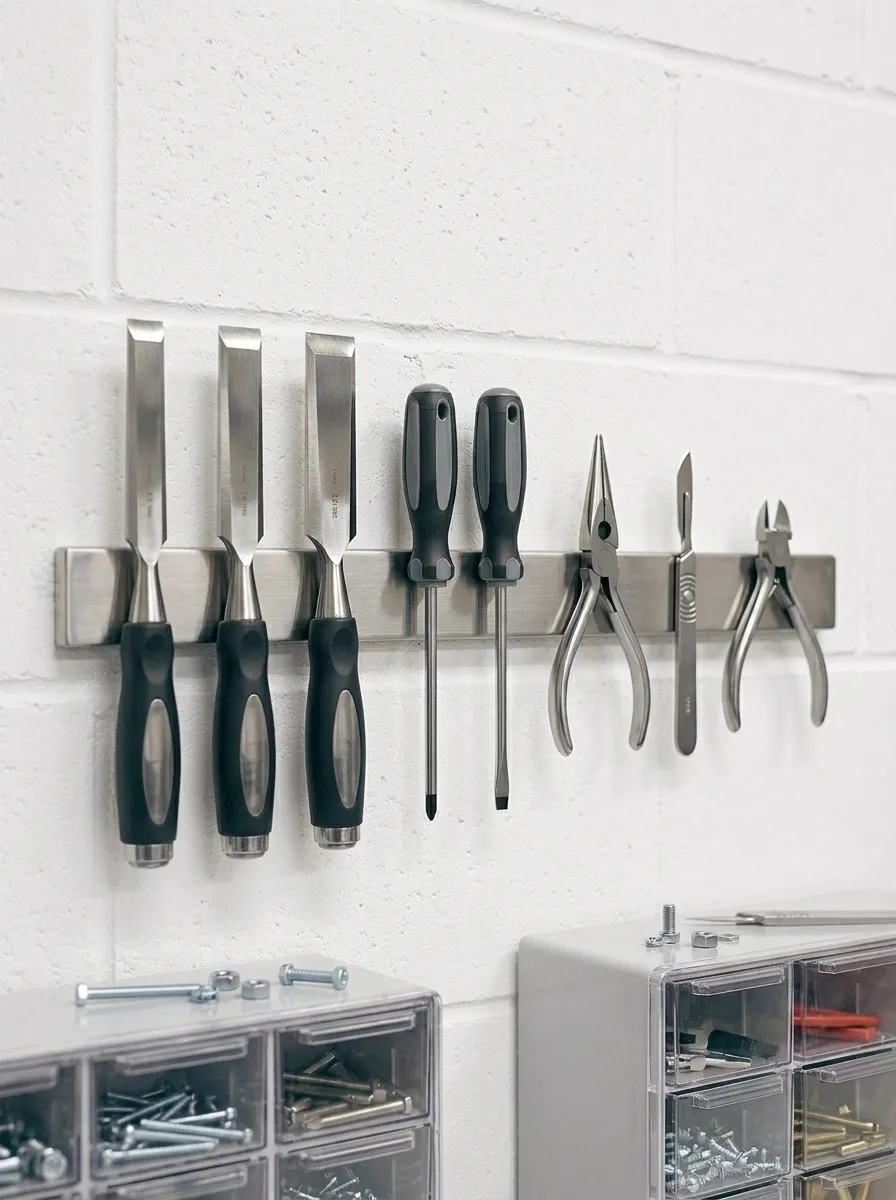
A magnetic strip is one of the cleanest ways to store metal tools. Every knife, chisel, wrench, and screwdriver snaps right to the bar. No hooks. No brackets. No rummaging through drawers.
Magnetic tool strips come in stainless steel or wooden versions. Stainless steel looks best in modern garages. Wooden ones feel warmer and suit workshop or craft-focused spaces better.
A twenty-four inch magnetic bar costs between fifteen and thirty dollars online. Mount two or three bars side by side for a dramatic display of an entire tool collection.
These strips work for more than just tools. They hold metal rulers, paint scrapers, box cutters, and any other ferrous metal objects you reach for regularly.
Mount the bar at a comfortable reach height. Slightly above the workbench surface is ideal. This keeps your most-used tools within arm’s reach without taking up any counter space.
Clean the bar occasionally with a damp cloth since metal dust and shavings will collect on the magnet over time.
This upgrade takes about fifteen minutes to install and immediately makes your workbench area look like a serious workspace. It is also one of the most practical investments you can make in a tool-heavy garage.
Wall-Mounted Bike Hooks for Vertical Bike Storage
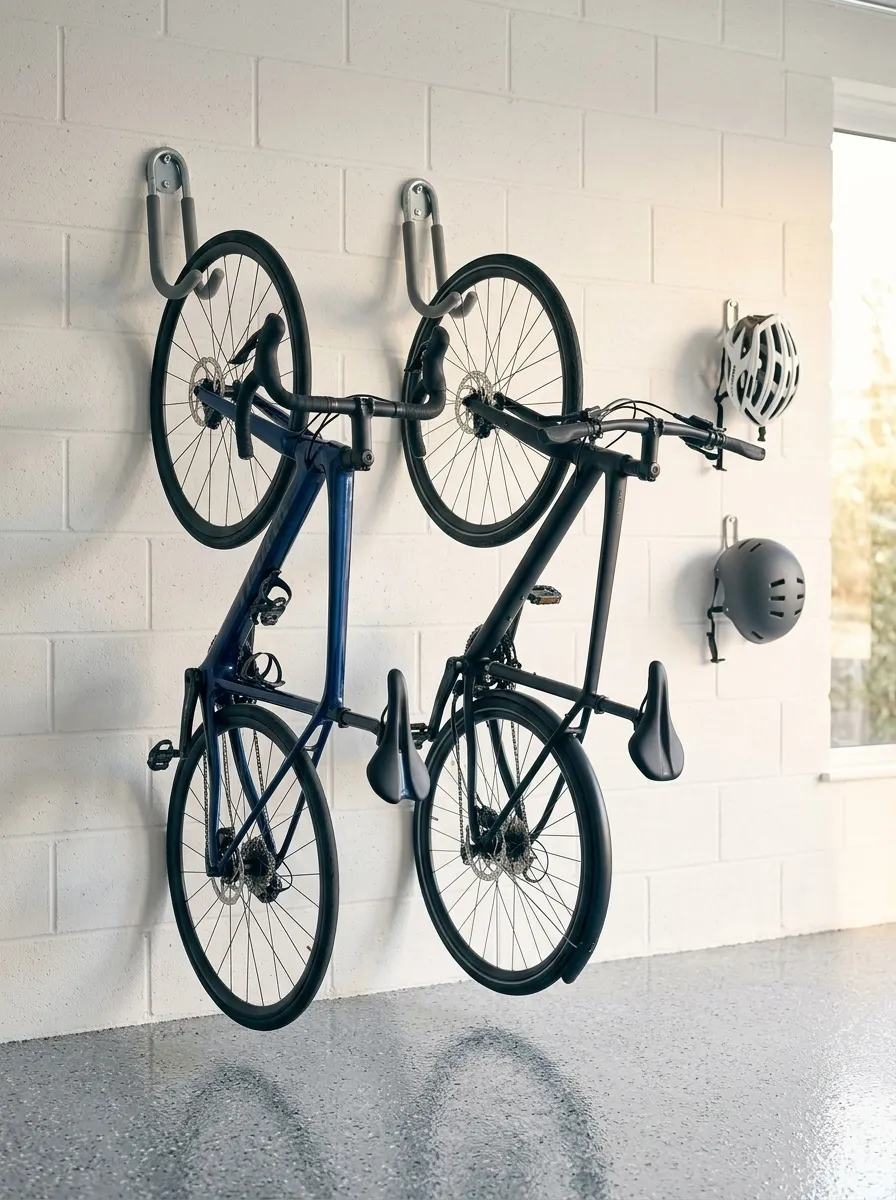
Bikes on the garage floor eat up a huge amount of space and always seem to be in the way. Wall-mounted hooks lift them off the ground and turn storage into a feature.
A single heavy-duty bike wall hook costs around ten to fifteen dollars. Install two of them per bike, one at the front wheel and one at the rear, to hold the bike flat against the wall.
If you prefer vertical storage, a single overhead hook lets the bike hang nose-down from the ceiling. This uses almost zero floor space and works perfectly in garages with high ceilings.
Group your bikes together on one dedicated wall. Paint that section a contrasting color or add a simple geometric pattern behind the bikes to turn the whole thing into a display feature.
Hang helmets and gloves on small hooks directly beside each bike. This creates a complete gear station in one organized zone.
For households with multiple bikes, horizontal wall-mounted arms that fold down when in use are a great option. The arms swing out to place the bike, then fold flat against the wall when not needed.
Bikes displayed intentionally on a wall look sporty and organized. The same bikes scattered on the floor just look like mess.
Neon Sign for Personality and Lighting
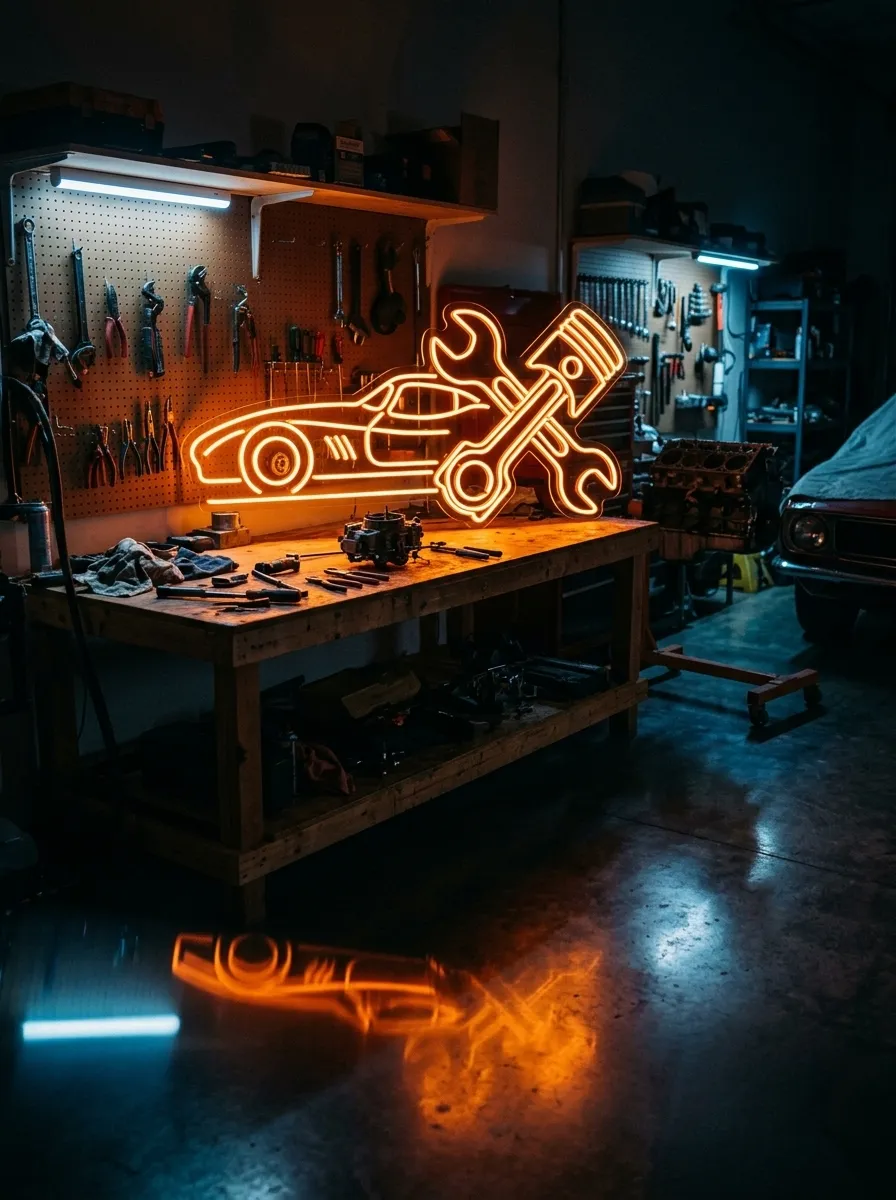
A neon sign in a garage sounds like overkill until you actually see one. Then it becomes the obvious choice for making a space feel like it belongs to someone specific.
LED neon signs mimic the look of real neon but cost a fraction of the price and use minimal electricity. Custom signs start at around forty to sixty dollars online. Pre-made signs with popular garage phrases or car logos are even cheaper.
Pick a phrase that matches your personality. Car enthusiasts often go with quotes from favorite films or brand logos. Sports fans choose team slogans. Workshop owners like simple phrases about building or creating.
Mount the sign above your workbench, above the garage door interior frame, or on the accent wall as a centerpiece.
The warm colored glow from a neon sign changes the mood of the entire room when you switch it on. Pair it with the Edison string lights mentioned earlier and your garage feels like a destination rather than a utility room.
These signs also photograph extremely well, which matters if you ever want to show the space off or use it for content creation.
This is one of the more personality-driven purchases in this list and it pays off every single time you walk in.
Pegboard Cabinet Combo for Concealed Storage
Open pegboards are great for tools you use daily. But not everything needs to be on display. A pegboard and cabinet combination gives you the best of both worlds.
Mount your pegboard in the upper section of the wall for active tools. Install simple flat cabinet doors in the lower section to conceal items you do not want visible. Paint cabinet doors in a matte black or dark tone to match the hooks and hardware above.
Pre-built cabinet units from hardware stores can be wall-mounted for around fifty to one hundred dollars per unit. These often come with adjustable shelves inside.
Keep chemical products, spray paints, and hazardous materials behind closed cabinet doors. This is also safer for households with children.
The visual contrast between the organized upper pegboard display and the clean closed cabinet faces below creates a professional workshop look that looks like it was designed and installed intentionally.
Add matching metal bin handles to plain cabinet doors for an upgrade that costs under ten dollars but looks like you paid a designer.
This combination approach maximizes storage while keeping the space looking clean. Every item has a home. Nothing sits on the floor.
Rubber Mat Flooring Tiles for Comfort and Safety
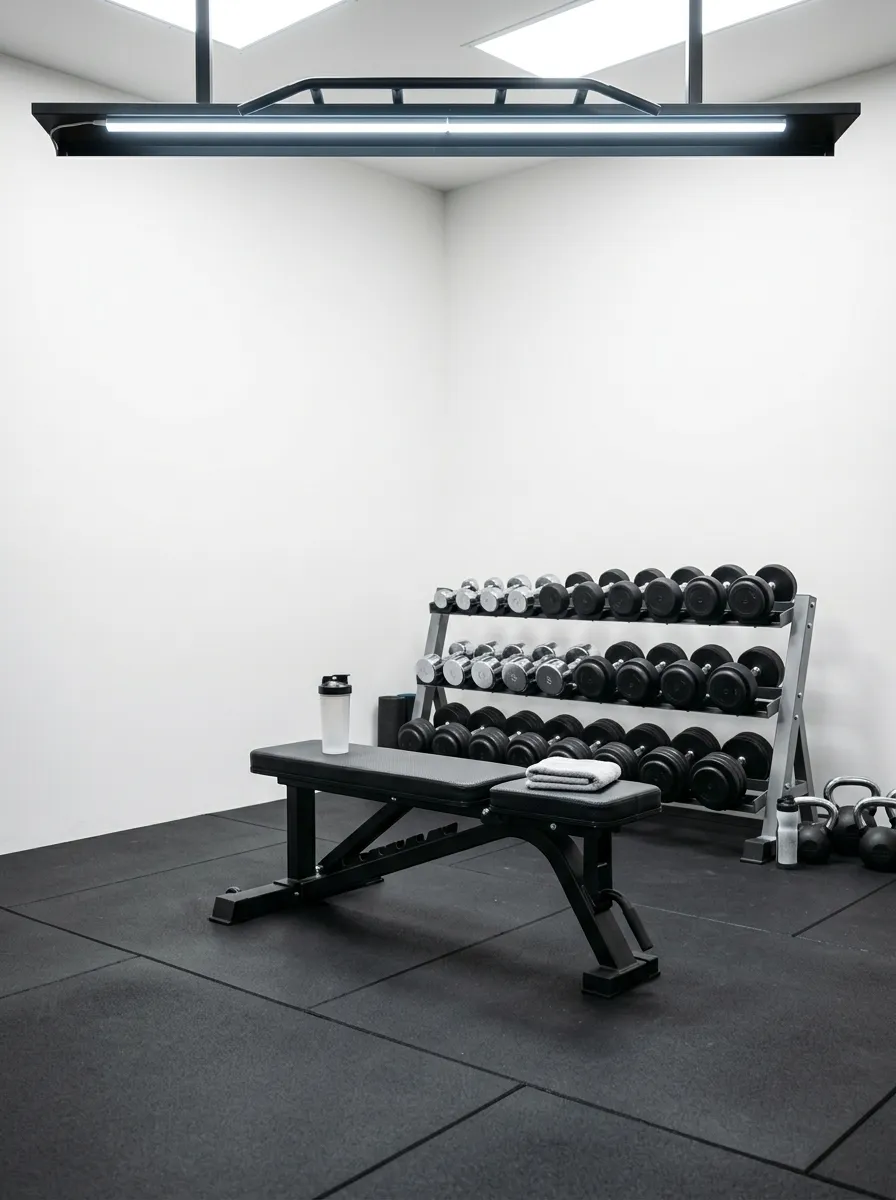
If your garage doubles as a gym or workspace, rubber interlocking floor tiles are a practical and low-cost flooring option that protects both your floor and your body.
These tiles interlock like puzzle pieces and require zero adhesive. Lay them over concrete in any pattern or coverage area you choose. They can be lifted and rearranged or removed entirely.
A pack of tiles covering fifty square feet costs around forty to sixty dollars online. For a dedicated gym zone in one corner of the garage, you may only need one or two packs.
Rubber tiles absorb impact from dropped weights, reduce noise transmission, and provide a non-slip surface for all exercise activities.
In workshop areas, rubber mats reduce fatigue from standing on concrete for long periods. If you spend hours at a workbench, this single change makes a meaningful physical difference.
Choose tiles in a uniform dark color for a clean look. Black, dark grey, and charcoal all work well. Avoid bright colors unless you are specifically going for a bold gym aesthetic.
These tiles add a layer of professionalism to any garage zone. They signal that the space was set up thoughtfully and used for a purpose.
Reclaimed Wood Feature Wall Behind the Workbench
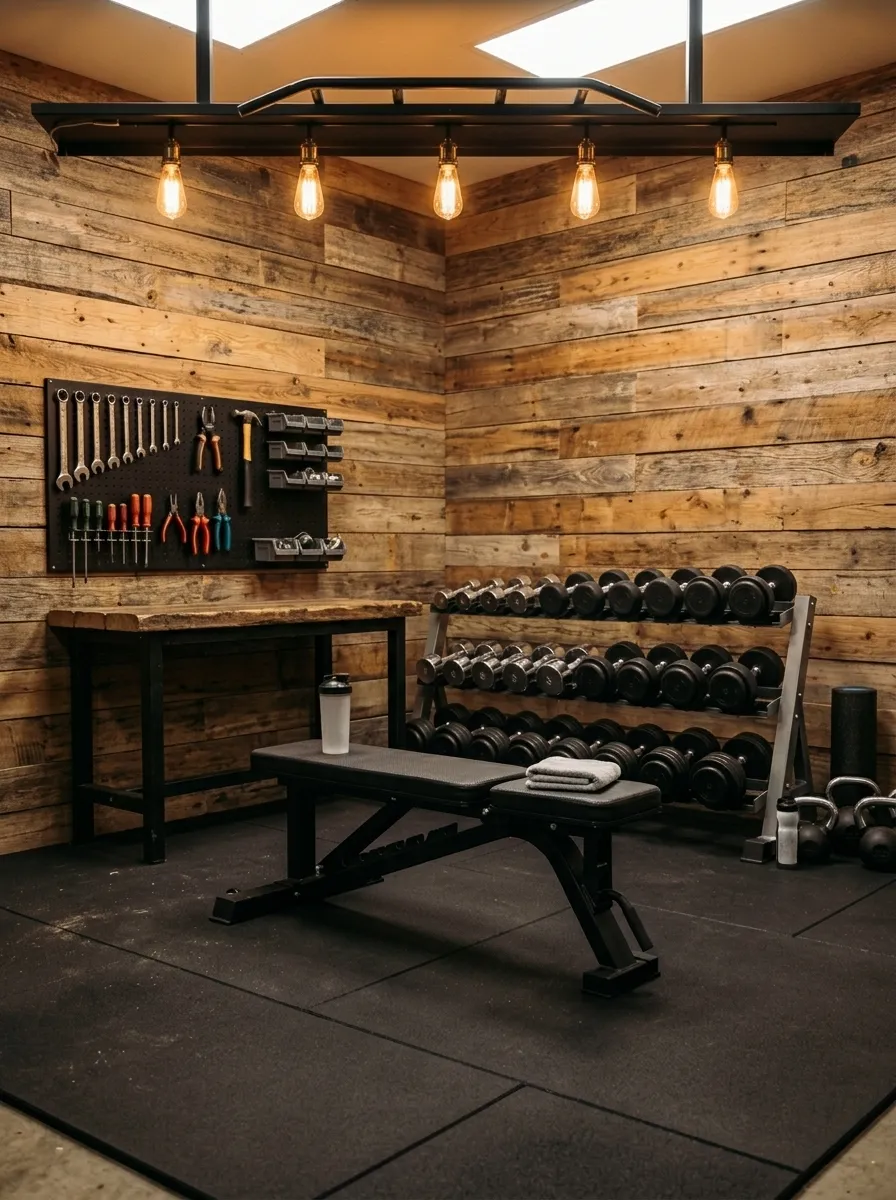
A reclaimed wood accent wall behind your workbench adds warmth and texture to what is usually the coldest looking part of a garage. The contrast between raw wood and raw concrete is one of the best design combinations you can create in this space.
Source reclaimed wood from salvage yards, old pallets, or discount wood outlets. Rough, uneven planks look better here than perfectly finished boards. The character in the wood grain is the whole point.
Sand each plank lightly and seal with a clear matte finish to prevent splinters and dust without covering the natural texture. Let the original grain and nail holes remain visible.
Attach the planks horizontally using construction adhesive or finish nails directly into wall studs. Alternate plank widths and lengths for a more authentic reclaimed look.
Mount your pegboard or tool hooks directly into the wood wall rather than the bare concrete. The wood provides easier anchor points and looks far more intentional.
This wall becomes the clear focal point of the garage the moment it is finished. Everything else in the room feels more considered and purposeful in contrast to it.
Reclaimed pallet wood can often be sourced for free from local businesses or online marketplaces. This can make the entire project nearly cost-free beyond the sealant.
Overhead Ceiling Storage for Seasonal Items
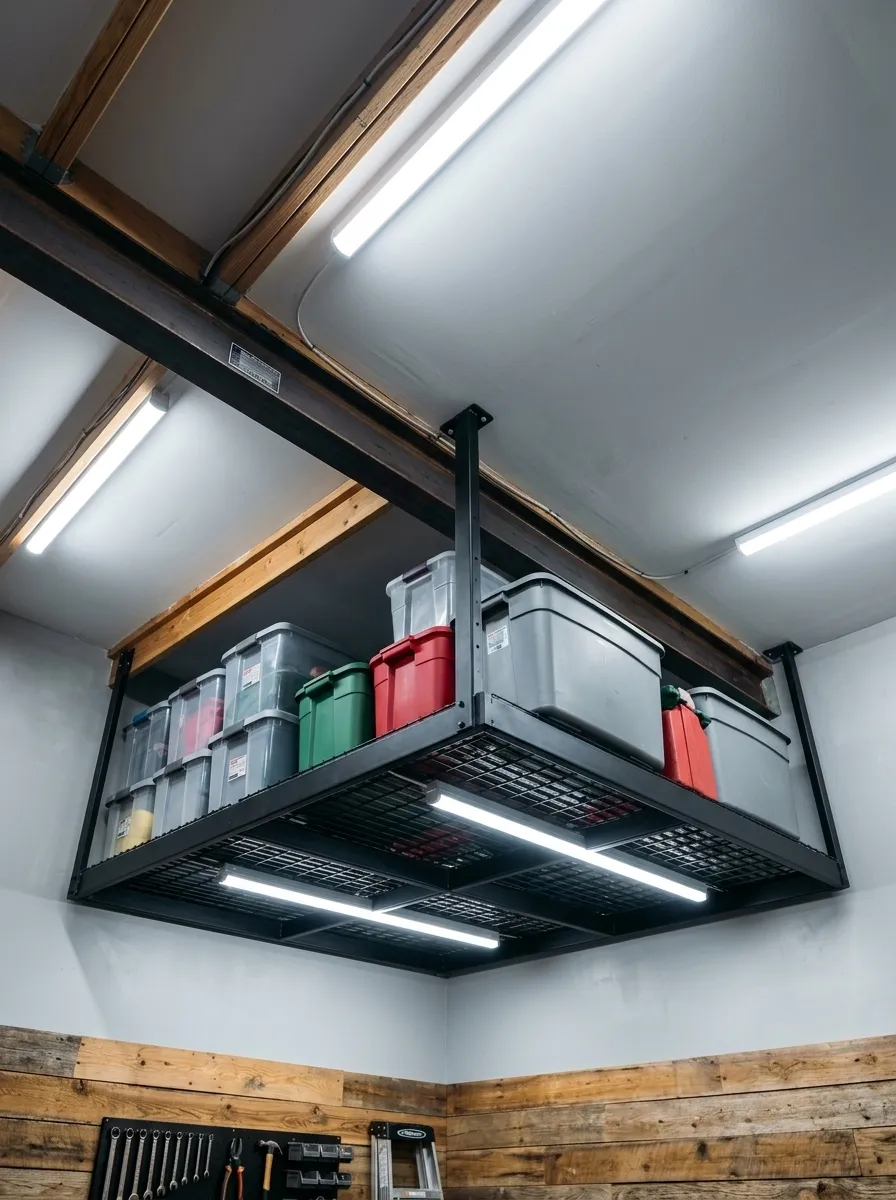
The ceiling in your garage is an entirely unused storage zone. Overhead ceiling storage platforms use that space to hold seasonal items without taking up a single square foot of floor space.
Pre-made overhead storage kits hang from ceiling joists and hold up to six hundred pounds. These kits cost between sixty and one hundred and fifty dollars and take about two hours to install.
Use this space for things you only access a few times per year. Holiday decorations, camping gear, luggage, and seasonal sports equipment all work perfectly up here.
Place items in matching stackable plastic bins before loading them onto the platform. Label each bin clearly on the side and front so you can identify contents without pulling everything down.
Measure your garage door opening height before installing any overhead storage. You need enough clearance to open the door fully without the storage platform blocking the path.
Once installed, the ceiling storage disappears into the background. Guests rarely look up. You gain an enormous amount of effective storage without altering the visual feel of the garage floor level at all.
Combine overhead storage with wall shelving and you can completely clear the garage floor of non-vehicle items. An open floor makes the whole space feel larger and easier to keep clean.
Workbench with Built-in Power Strip
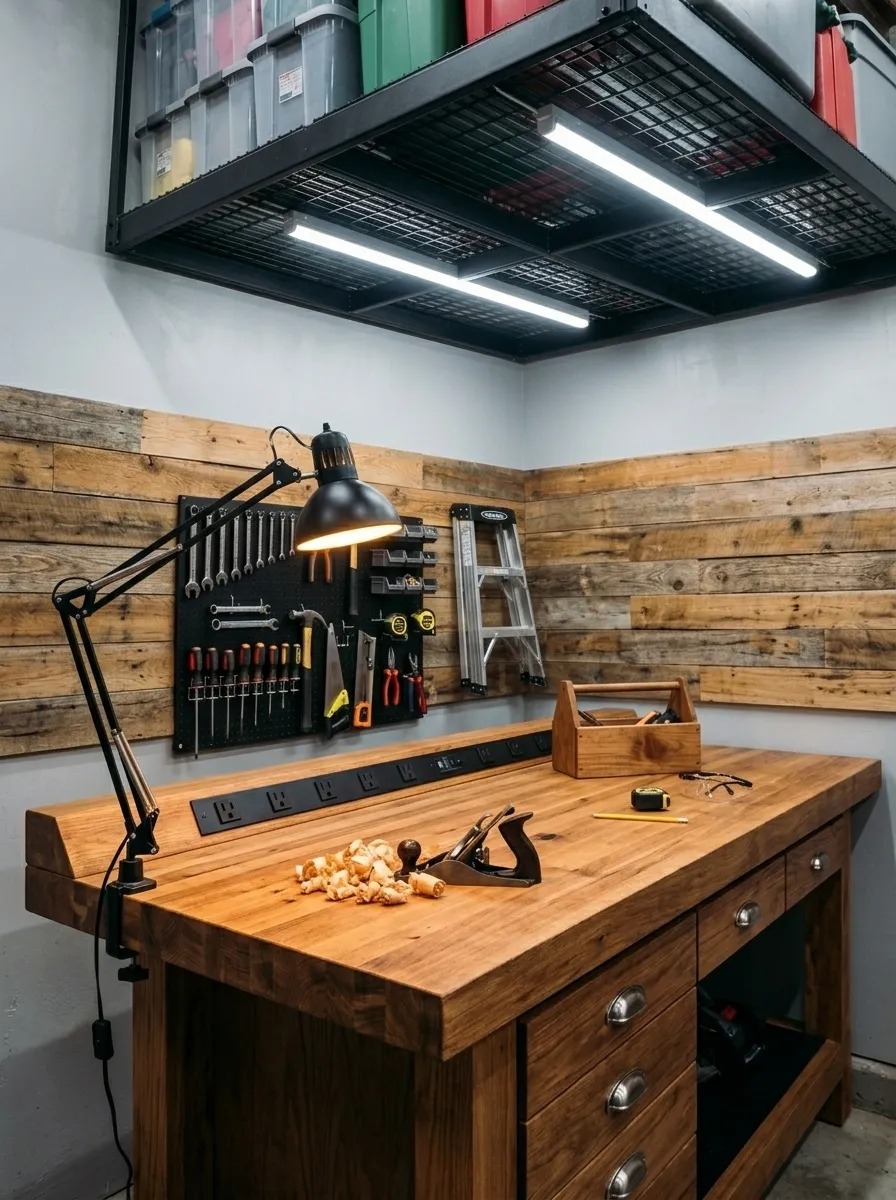
A workbench with direct power access changes how you use your garage entirely. No more extension cords running across the floor. No more unplugging one tool to use another.
Build a simple workbench using two by four lumber and a plywood top. Basic materials cost around sixty to eighty dollars for a full-sized bench. Online plans are available for free.
Mount a surge-protected power strip along the back edge of the bench at surface level. Screw it to the bench frame rather than leaving it loose. Run the cord down through a neat cable channel to the nearest outlet.
Add a mounted task light on one corner. A simple LED swing arm lamp screwed to the bench frame provides focused light exactly where you need it without taking up counter space.
A drawer unit beneath the bench adds storage for frequently used small tools. Two-drawer plastic rolling units from hardware stores cost about thirty dollars and slide under any bench.
The result is a complete work station that handles every task you bring to it. Power right there. Light right there. Tools in the drawer below. Supply storage on the wall above.
This is the kind of setup that makes you actually want to spend time working in your garage instead of avoiding it.
Custom Wall Lettering or Quote Display

A single bold quote or phrase painted or applied to your garage wall gives the entire space a clear identity. It tells anyone who walks in exactly what kind of space this is and what kind of person uses it.
Vinyl letter decals are the easiest option. Search for your phrase on Etsy or Amazon, order the decal in your chosen size and color, and apply it to a flat clean wall. Cost runs from ten to thirty dollars depending on size.
For a more custom look, print the text in the size you want, tape it to the wall, trace the outline with a pencil, and fill it in with paint using a small brush.
Pick a wall that serves as the main backdrop of the space. Above the workbench, above the garage door, or centered on the accent wall all work well.
Keep the phrase short and direct. Long quotes lose their impact on a wall. Three to seven words read at a glance and stick in memory.
The lettering becomes an anchor for the whole room design. It gives your eye somewhere to land when you walk in and reinforces the identity of the space every single time.
Mini Fridge and Snack Station Setup
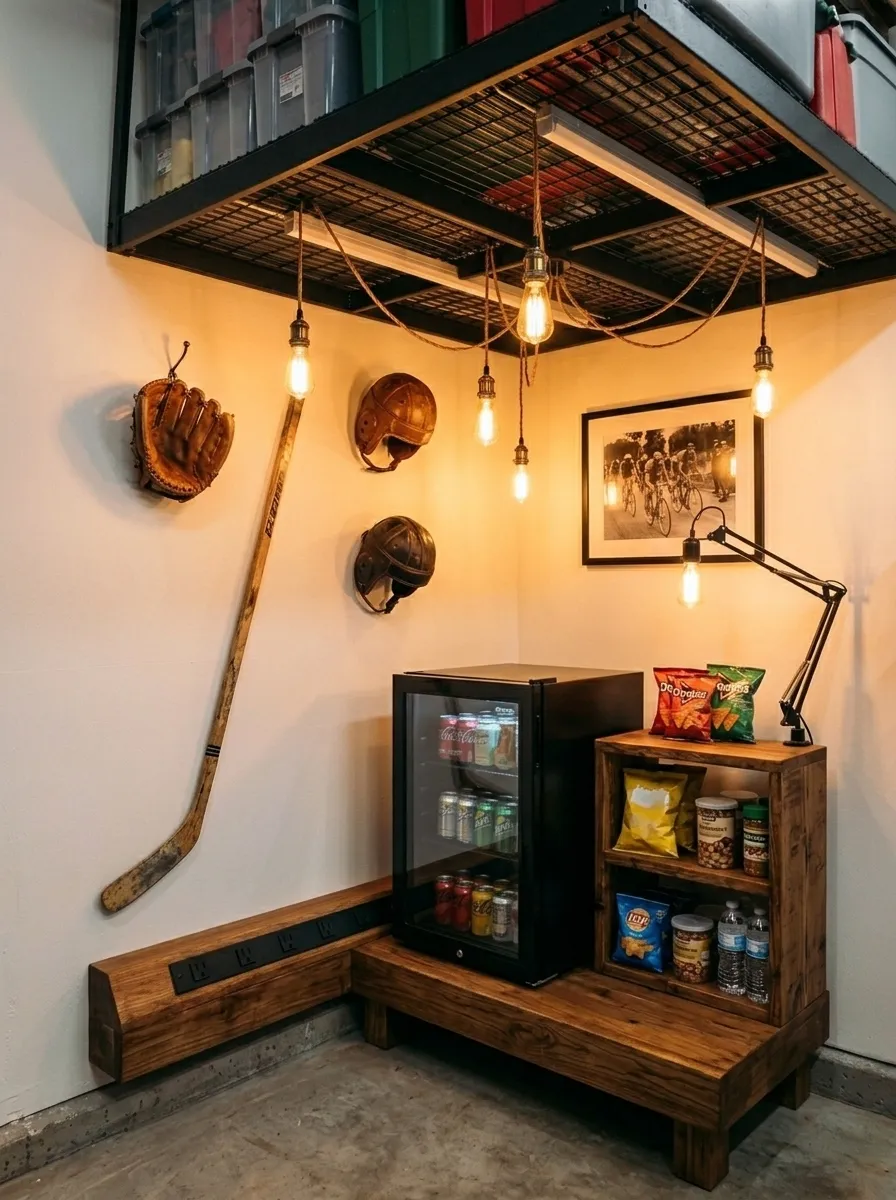
A garage with a cold drink waiting for you is a garage you actually want to spend time in. A mini fridge turns your space from a work area into a real hangout spot.
Mini fridges run between fifty and one hundred and fifty dollars depending on size. A two to three cubic foot unit is large enough to hold drinks and snacks without taking up much floor space.
Place the fridge on a low wooden platform or dedicated shelf rather than directly on the floor. This keeps it at an easy reach height and protects the floor finish underneath.
Add a small shelving unit beside the fridge for snacks, paper towels, and any other supplies that should live in the garage. Paint the shelf to match the wall or workbench for a cohesive look.
Mount a few bottle cap openers on the wall nearby. These are purely functional but become small decor details that add personality to the corner.
If your garage has a TV or sound system, position the fridge near the seating area to create a complete entertainment zone.
This setup is especially popular in sports-fan garages and man caves. Once it is in place, your garage becomes the go-to gathering spot for watching games, working on projects, or just relaxing.
Slat Wall Panels for Flexible Storage Display
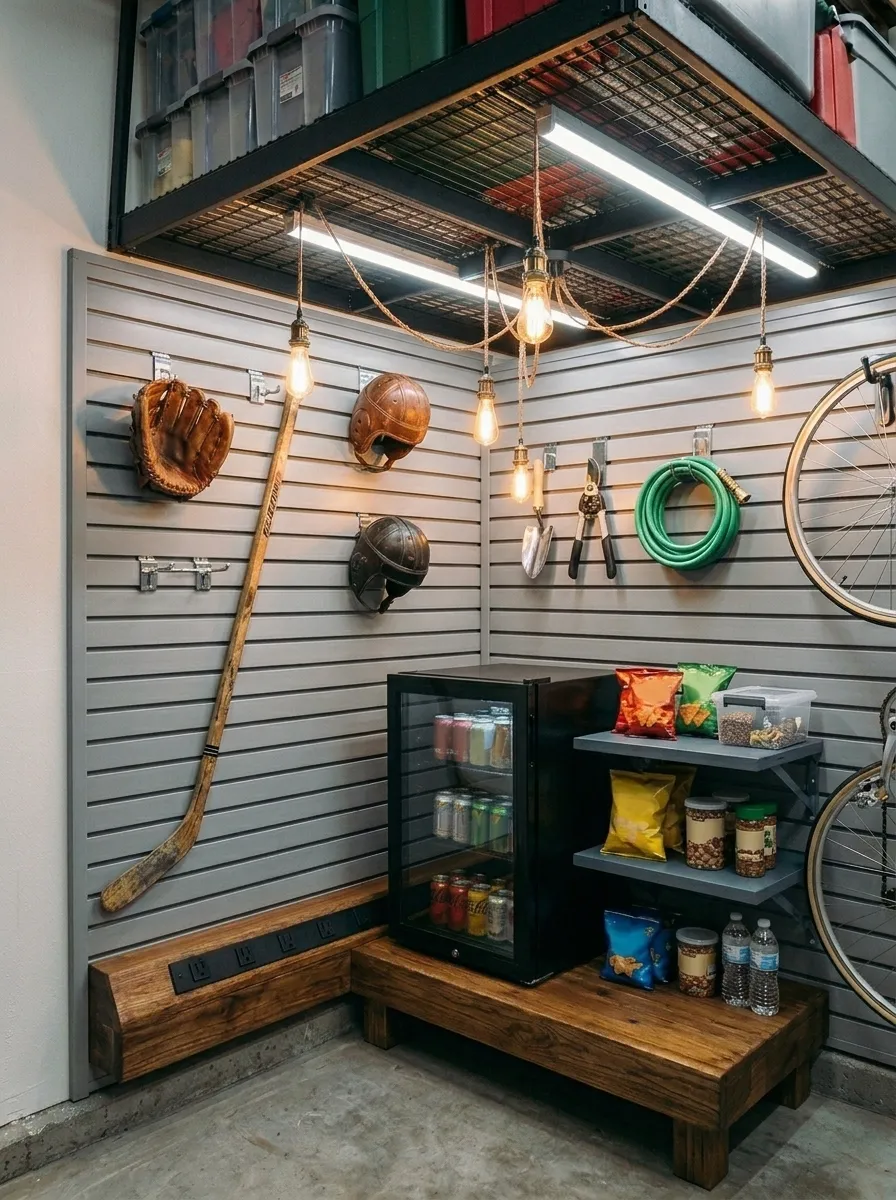
Slat wall panels are one of the most flexible wall storage systems available. The horizontal slats accept any compatible hook, bracket, bin, or shelf in any position. You can rearrange everything without drilling new holes.
Standard slat wall panels come in four by eight foot sections and cost around thirty to sixty dollars each at hardware or home improvement stores. They mount directly to wall studs.
The system accepts dozens of different accessory types. Hooks for tools. Bin rails for small parts storage. Shelf brackets for larger items. Even fold-down work surfaces and bike holders work with most slat wall systems.
Start with a basic hook set and one or two bin rails. Add accessories over time as you identify exactly how you use the space. The system adapts to your habits instead of forcing you to adapt to it.
Slat walls look especially clean in garages with a simple color scheme. White or grey panels against a white wall disappear into the background and let the stored items become the visual feature.
This is the storage system used by professional garages, auto shops, and hardware stores because it balances high capacity with fast access. Bring that same efficiency into your home garage and you will wonder why you waited so long.
Outdoor Rug for a Defined Lounge Zone
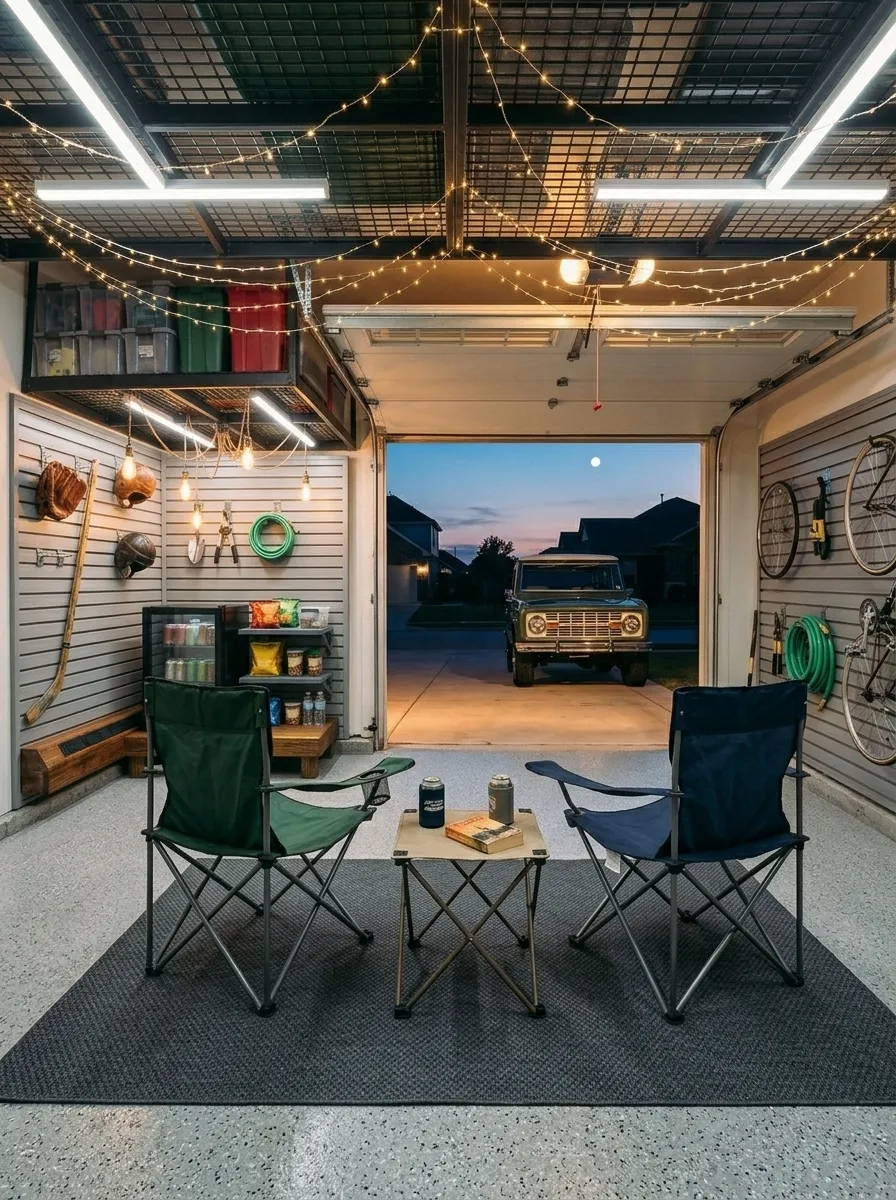
An outdoor rug placed inside a garage signals to every brain that this is a space for sitting, talking, and relaxing. That psychological shift happens the moment people step onto the rug.
Outdoor rugs are built for hard use. They resist moisture, handle dirt, and clean up with a hose. Cost runs from twenty to sixty dollars for a mid-sized rug at most home goods stores.
Choose a dark color. Charcoal, navy, and dark green all hold up to garage conditions without showing stains or grime over time. Avoid light colors in any workspace.
Place the rug in your designated lounge corner. Add two or three folding camp chairs or a small outdoor settee on top. Position them facing the open garage door or a TV wall.
The rug defines the boundary of the social zone clearly. Everything inside the rug is for sitting and relaxing. Everything outside it is for working and storage.
Even without chairs, a rug near the workbench gives you a comfortable place to stand while doing detailed work. Your feet and back will notice the difference after an hour.
This is one of the cheapest ways to give your garage a room-like quality. A floor covering is what separates a garage from a living space, and this does exactly that.
Conclusion
Transforming your garage does not require tearing anything out or spending thousands of dollars. It starts with one decision, one wall, one weekend. Pick the idea that makes the most immediate sense for how you actually use your space. If you park your car in there every day, start with the floor coating. If you spend hours at a workbench, start with the pegboard and task lighting. If the garage is your social spot, start with the string lights and mini fridge. Each improvement builds on the last. A few months from now your garage can be the most purposeful, best-looking room in your entire home, and you will have gotten there one affordable idea at a time.